Browsing Category

Spring

Autumn/ Courses/ Desserts & Savouries/ Spring/ Summer/ Winter

A QUICK LEMON TART FROM ITALY

Quick Lemon Tart

One of my favourite books in the last few years has been Helena Attlee’s The Land Where Lemons Grow. It is a happy mix of food, history, art and Italy thus covering many of my interests; it is also beautifully written and so withstands many readings without becoming tedious. 

The book traces the development of the growing of citrus fruits throughout the Italian peninsular and specifically the lemons for which Italy is justifiably famous. In the UK, the vast majority of our lemons are imported from Spain and whilst they are reliable workhorses in the kitchen (or in the gin), for me they lack the added dimension of fragrance and flavour that some with Italian lemons, specifically those from the area around Sorrento or from Sicily. 

Unfortunately for we cooks, Spanish lemons tend to be at a more economical price point and I use them for the majority of food where lemon is a supporting act, rather than the star of the show. Where a dish has lemon as the main act, I do try to find and use Sorrentine or Sicilian lemons, especially if I am using the zest. This part of the lemon is where I feel the main advantage lies in Italian lemons; there is something deeply aromatic and almost woody in the zest that out-performs the Spanish cousins. A further advantage is that tend to be somewhat larger so do go further.

I have a vast repertoire of lemon dishes (although I cannot abide lemon meringue pie!) and have been in pursuit of the perfect lemon tart for many years. Mercifully, the wonderful Felicity Cloake has now written up the perfect tarte au citron in her fab book Perfect Two. It is however, not a recipe to be hurried or done in a spare half hour, as the author herself says, so much I love this recipe and commend it wholeheartedly, I have also been searching for a quicker, more “do-able” tart and this is it. It is a variation on a torta al limone as found in the iconic Italian cookery book, The Silver Spoon. Now I love this book, despite it being roughly the size and weight of two house bricks, but it does have shortcomings. It makes no concessions to one’s experience (or lack of) and thus assumes you know how to undertake certain cooking processes and can tell when something is done. The prime example of this assumption is that it never specifies what size cake, tart or flan to to use. In other words, you will have learned all the basics from your mother and/or grandmother and this is just to provide you with ingredients and (approximate) cooking times!

I have to admit that I got this recipe wrong a couple of times but I’d like to think that I’ve ironed out all the wrinkles and have also added additional information that might be helpful. It has a simplicity that showcases Sorrentine or Sicilian lemons to perfection and I like to serve it with creme frâiche or home made (or very high quality bought) vanilla ice cream.

If you don’t feel like making pastry but quite fancy making the tart, do feel free to use an all-butter bought pastry but in this case, I would blind bake it first (see recipe)

A Quick Lemon Tart

Print Recipe
Serves: 6 Cooking Time: 30 minutes cooking

Ingredients

  • Pastry (as per my Rhubarb Almond Tart)
  • 250g plain flour or Italian Tipo 00
  • 125g unsalted butter, very cold from the fridge and cut into small cubes
  • 1 medium free range egg, lightly beaten
  • 100g icing sugar
  • tiny pinch of sea salt
  • Filling
  • 3 medium free range eggs
  • 140g caster sugar
  • finely grated zest of two unwaxed Sorrentine or Sicilian lemons
  • juice of one Italian lemon
  • 150g softened unsalted butter, plus extra for greasing
  • A well buttered 21cm loose bottomed flan tin. I have neither the inclination nor space to collect flan tins in every possible size, so I use a loose bottomed sandwich tin for this; no fluted edge but I can live with that. Happily, both are about 3cms deep.

Instructions

1

Pre-heat the oven to 160C fan

2

To make the pastry, place the flour and butter in a food processor and whizz until fine breadcrumb stage

3

Add the sugar, mix briefly and add the egg and salt

4

Whizz until a soft dough is achieved; tip out of the processor and form into a flattened ball, wrap in clingfilm and put in the fridge for at least 30 minutes

5

When time is up, roll out to fit the flan tin and press the dough gently into the tin

6

Unusually for flans, this recipe doesn’t require baking blind first but somehow (miraculously!) avoids a soggy bottom, at least in a fan oven

7

If you are using bought pastry, increase the oven to 170C, prick the base of the pastry lightly with a fork, line with baking parchment and baking beans; put in the oven for 20 minutes, remove the paper and beans and return to the oven for another 5 minutes

8

After removing the case from the oven, reduce the heat to 160C

9

Beat the eggs with the caster sugar in a large bowl until the mixture becomes creamy with a small amount of foam on top

10

Stir in the lemon zest and juice and then stir in the butter, mixing well

11

Pay attention at this point as if you over mix, the mixture can curdle, which doesn’t affect the flavour but will affect the texture; it’s probably safer to mix by hand at this point rather than use a mechanical mixer

12

Pour the mixture into the pastry case and bake for about 30 minutes until golden and firm to the touch

13

Cool in the tin then dust with icing sugar, remove from the tin and serve with creme frâiche or ice cream

Notes

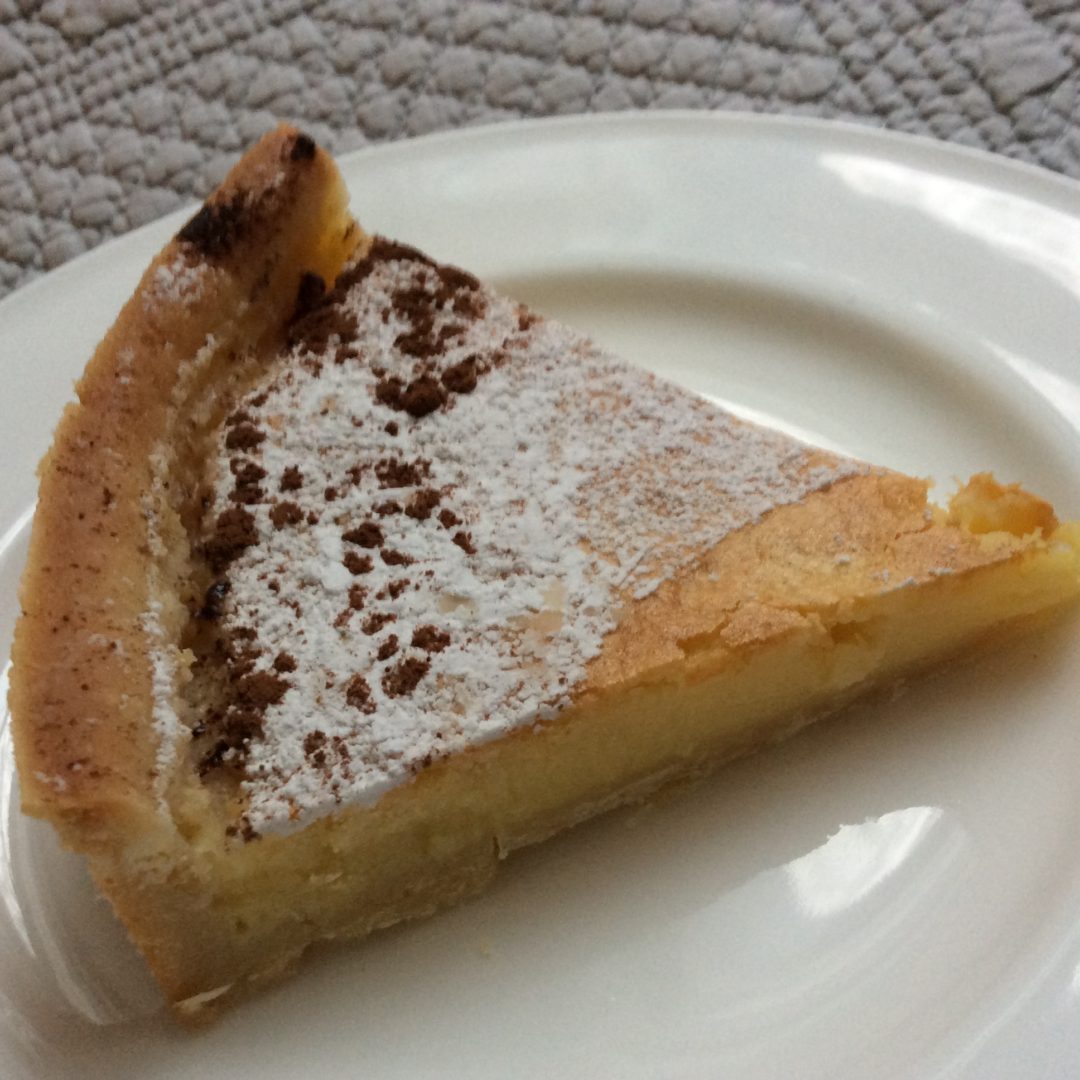
This looks very pretty topped with raspberries or halved strawberries, too. I have also tried this as a blood orange tart with some success (but I do love lemon!) in which case I like to sprinkle with cocoa powder, as indeed I did for the lemon tart in the photo

 

Autumn/ Courses/ Lunches & Light Suppers/ Spring/ Suppers, Dinners & Main Courses/ Winter

A SPRING RECIPE FOR PORK

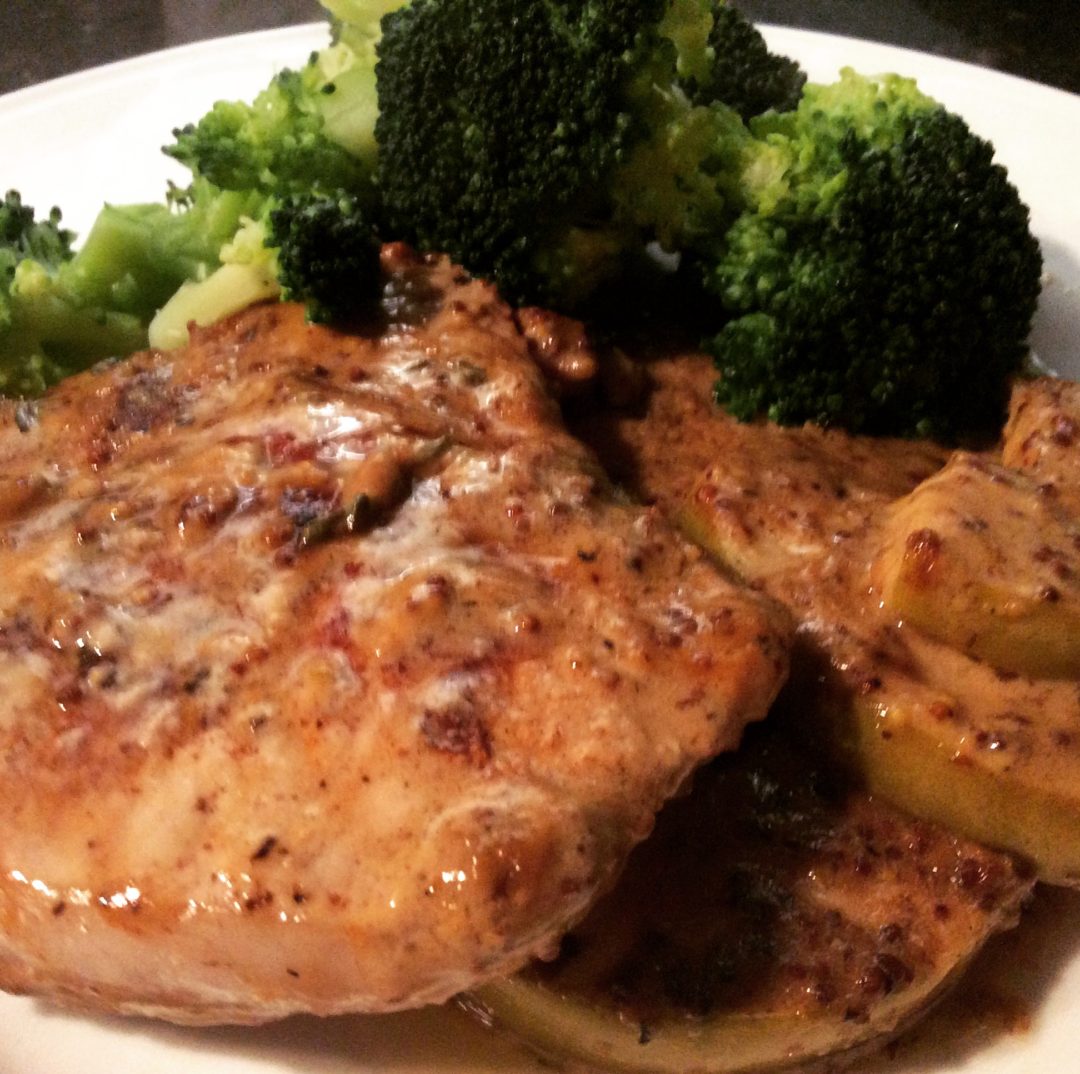
Pork chops with apple and creme frâiche

As you know I am someone who tries to eat seasonally and reasonably locally, although I am not going to apologise for buying avocados or olive oil. Traditionally, pork has not been much of a spring meat, which I think is a shame as while the weather remains unpredictable during March and April, I think free range organic pork is a splendid choice.

Our local butcher recently had beautiful pork chops, with a fair layer of flavour – adding fat so I snaffled a couple. Once home, however, I then had the “what do I do with them” problem. Pork chops have flavour at the more delicate end of the range and frankly, can also be dry, if not cooked carefully. For that reason, I am not a fan of the plain grilled pork chop, so I consulted better cooks than I to decide how to get the best from them.

I have a quite a fair size cookery book collection which is something of a double edged sword when it comes to consulting them, as it can take so long to look through them. There is also the serious risk of becoming completely engrossed in a book I haven’t opened for a while and losing sight of my original need to look in the book in the first place! Anyway, my fingers hovered around Richard Olney’s three books that I have in the collection and I realised that I really haven’t paid him as much attention recently as I should have done.

For those of you who don’t know him, please may I take a moment to commend his writing to you, especially if you are partial to good wine, or at least reading about it. He was an American who, like many before him, fell in love with France and its attitude to food and wine. He lived in Paris during the 50s and 60s and writes evocatively about the arts scene of the time. He eventually settled permanently in Provence where he wrote most of his books. My favourite is “Reflexions” in which he is deliciously gossipy about many food names from the second half of the twentieth century. I no longer feel quite the same about Julia Childs but did have my view of Elizabeth David positively reinforced.

I found the inspiration I was looking for in Mr Olney’s “Simple French Food” and whilst I didn’t follow the recipe to the letter, I did like the method and most of all, the outcome. This is my take on the Olney recipe and I am very grateful for everything I have learned from reading his books.

PORK CHOPS WITH APPLE AND MUSTARD CREAM

Print Recipe
Serves: 2 Cooking Time: 45 inc prep

Ingredients

  • 500g eating apples, preferably with a bit of tartness to them and a crisp texture
  • 1 tbsp unsalted butter, plus more for greasing
  • 2 free range organic pork chops, skin removed if present
  • sea salt
  • 150ml dry white wine (I used a Gavi of which I doubt Mr Olney would approve as he didn’t seem to be a fan of Italian wine)
  • 4tbsp creme frâiche
  • 4tbsp Dijon mustard
  • black pepper
  • A well buttered gratin dish or other shallow oven proof dish, into which the chops will fit without overcrowding or distortion

Instructions

1

Take the chops out of the fridge about half an hour before you start cooking

2

Pre heat the oven to 180C fan

3

Peel, core and quarter the apples, slicing the resulting pieces into thin slices and lay them in the dish, turning them over so they acquire some of the butter clinging to the dish

4

Place the dish in the oven and bake for 15 minutes

5

While that’s going on, over a medium heat melt the tablespoon of butter in a sauté pan and brown the chops, about 7 - 8 minutes per side

6

Remove the apple from the oven (leave the oven on) and put the chops on top, leaving the sauté pan on a low heat

7

Add the wine to the pan, scraping any meaty scraps from the base and sides of the pan

8

Turn up the heat a little so that the wine bubbles enthusiastically and reduce it by about half

9

Turn down the heat to low and add the creme frâiche, stirring it all in

10

Add the mustard, tasting you go to your satisfaction; you may like more or less than the amount I’ve suggested

11

Season with salt and pepper and pour the sauce over the chops and apples

12

Give the dish a good shake to ensure the sauce penetrates down to the apple

13

Return the dish to the oven and leave it there, unmolested for 15 minutes; if you have particularly thick chops, you may need a few minutes more

Notes

It’s very easy to multiply this up to feed more than two people and is equally good with wholegrain mustard. I have also tried adding a small amount of chopped sage or thyme, but decided I preferred the simplicity of the basic recipe. I like to serve this with brown rice and a green vegetable, or good bread and a green salad. Drink the wine you’ve got left from making this dish!

Courses/ Desserts & Savouries/ Spring/ Summer/ Uncategorized

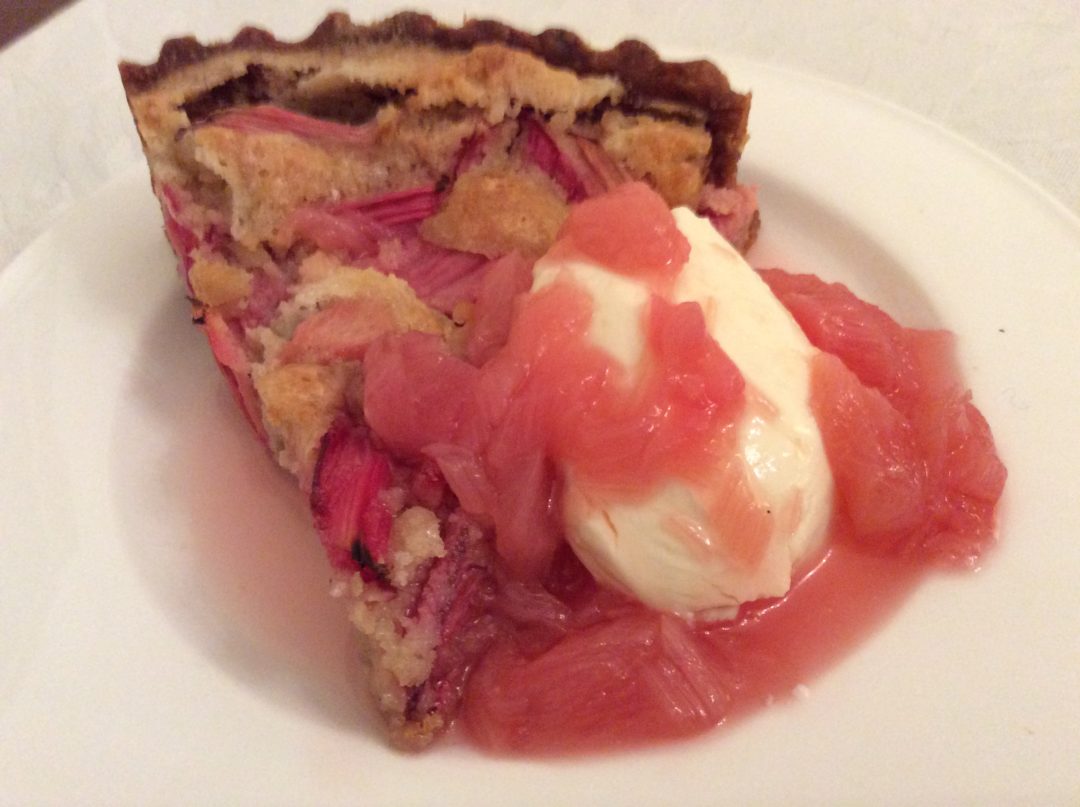
RHUBARB AND ALMOND TART – WITH ADDED GIN!

Rhubarb and Almond tart with Rhubarb and Gin Sauce

The end of winter is marked for me by the appearance of two fruits – rhubarb and blood oranges. Recently, winter seems not to have taken the hint and has been hanging around beyond the forced rhubarb season. This tart however, is delicious whatever the weather. And yes, I know that rhubarb is botanically not a fruit, but I would hope you agree that in the kitchen, it tends to be used as if it were. When the first forced rhubarb appears, delicate and elusively fragrant, I like to do as little as possible to it. I poach it gently with the juice of a blood orange and a tablespoon of honey. It is my absolutely favourite breakfast with a good yogurt, the zest of the orange and walnuts. And in a Moka full of Illy coffee and I can face whatever the day decides to lob at me.

Once the forced rhubarb is over and we have the sturdy maincrop stalks, I do like to experiment rather more. Although I have to say that for me, baked mackerel with rhubarb sauce was an experiment too far. More perhaps, I have to say, because I really can’t cope with mackerel and should not have tried (yet again) to get past my dislike. In my defence, at least I do regularly revisit my few dislikes to see if I’ve changed my mind. Still hate sweetcorn, though, in any and all of its manifestations.

A much more successful experiment was when I pottered about with almonds, which I think complement so many fruits, and arrived at this tart. It is an absolute breeze to make and works warm or cold as a dessert and has been consumed here with yogurt for breakfast. No, I am not saying who did that…

Don’t feel you have to make the pastry yourself here; there are excellent ready made, all-butter pastries on the market and resist those people who think using ready made is the eighth sin. I do not, regrettably have my late mother’s gift as a pastry cook and if it weren’t for my Magimix, I would never willingly make pastry. For sweet dishes I now use exclusively the Italian method of Pasta Frotta and so far, it hasn’t let me down; however, feel free to use your favourite sweet pastry recipe here. Should pastry making not be your thing, and if you have access to the French brand “Marie” (available on Ocado) then use that without a second thought.

RHUBARB AND ALMOND TART WITH GIN POACHED RHUBARB SAUCE

Print Recipe
Serves: 6 Cooking Time: 1.5 hours

Ingredients

  • Pastry
  • 250g plain flour or Italian Tipo 00
  • 125g unsalted butter, very cold from the fridge and cut into small cubes
  • 1 medium free range egg, lightly beaten
  • 100g icing sugar
  • finely grated zest of half an unwaxed lemon
  • tiny pinch of sea salt
  • Filling
  • 125g softened unsalted butter, plus extra to grease the tin
  • 125g golden caster sugar plus 2 tbsp
  • 1 medium free range egg
  • 125g ground almonds
  • 1 tsp ground ginger (optional)
  • 250g rhubarb, cut into 3cm chunks
  • Poached Rhubarb
  • 150g rhubarb, cut into 1cm chunks
  • 2 tbsp caster sugar (or more if you prefer)
  • 2 tbsp gin
  • A buttered 23cm loose bottom flan tin
  • Baking parchment
  • Baking beans

Instructions

1

Set the oven to 170C fan

2

To make the pastry, place the flour and butter in a food processor and whizz until fine breadcrumb stage

3

Add the sugar, mix briefly and add the egg, salt and lemon zest

4

Whizz until a soft dough is achieved; tip out of the processor and form into a flattened ball, wrap in clingfilm and put in the fridge for at least 30 minutes

5

When time is up, roll out to fit the flan tin and press the dough gently into the tin

6

Prick the base with a fork, line with baking parchment then tip the baking beans on top

7

Put in the oven for 20 minutes, after which remove the paper and cook for another 5 minutes until the tart shell is crisp and golden

8

It’s really important to get the shell crisp as otherwise the moist almond mixture will result in the dreaded “soggy bottom”

9

While the shell is baking, prepare the almond filling

10

Beat the softened butter and golden caster sugar until light and fluffy, then beat in the egg

11

Fold in the ground almonds and ginger

12

When the shell is ready, spread the almond mixture and press the rhubarb pieces into the mixture in a cartwheel pattern, or whatever pleases you

13

Sprinkle over the 2 tbsp of sugar

14

Put the tart in the oven and bake for 35 - 40 minutes until the tart is golden and puffy

15

Now make the poached rhubarb:

16

Put the second lot of rhubarb in a saucepan with a good heat conducting base, add the sugar and the gin

17

Heat until bubbling and then simmer gently until the rhubarb disintegrates - this doesn’t take long so don’t wander off and start the ironing

18

Bubble more fiercely until reduced by about one third

19

Remove from the heat and allow to cool slightly

20

If you want the final dish to be more refined, you can at this point, press the mixture through a sieve; I was a bit up against the clock when I made the tart pictured so this sauce isn’t sieved

21

Serve slices with either ice cream or creme frâiche and then drizzle over the gin sauce

Notes

You can change this round a bit too, by putting orange zest in the pastry and orange juice in the sauce - or Grand Marnier, perhaps. The tart can be re-heated and also freezes well for up to about a month.


Books & Blogs/ Courses/ Lunches & Light Suppers/ Spring/ Summer/ Suppers, Dinners & Main Courses/ Tips & Techniques

A HANDY TART FOR THE SUMMER…WHAT SUMMER?

Onion and Thyme tart

In this less than summery weather we are having, I always think things like quiches and tarts are useful to have in your repertoire. If it’s cold and grey (as per London as I write this) they can be eaten with new potatoes and a vegetable and if (by some miracle), we have sun and warmth, you can make them early in the day while it’s cool and eat them at room temperature with salad. I was extolling their virtues amongst a group of friends recently and I was a bit taken aback when one said, somewhat accusingly, “well I suppose you’re bl**** WonderWoman and always make your own pastry”. Ha, if only….no, I don’t.

It isn’t my favourite kitchen activity and if I didn’t have a Magimix, I am not sure I would ever make pastry. I nearly always have some ready made pastry tucked away in the freezer and my favourite is the French brand Marie La Pâte Feuilletée Ready Rolled Puff Pastry (no, I am not being paid to mention this). Rather conveniently the ready rolled round perfectly fits a 24cm flan tin so given that I nearly always have the other ingredients to hand for a tart or quiche, this cuts out the (for me) tedious part of the recipe. I’ll be honest and say that I used this by mistake the first time – I overlooked the fact that it was puff pastry but now I actually prefer it for this recipe.

This recipe owes its genesis to Sybil Kapoor’s Onion Tart in her book ‘Simply Veg” published by Pavilion (and I urge you to buy it – fabulous recipes that always work). As is my habit, however, I have tweaked and experimented – not least by using puff pastry – to make something that fits our personal tastes and sometimes, just uses what I have. This version is, however, the one we prefer and appears regularly, warm or cold. It puffs up massively while cooking and then when cold, sinks back to something that almost looks slightly disappointing. Do ignore this little failing, as the flavour is deeply savoury and rewarding; it also travels well for picnics or packed lunches.

I like to use a well flavoured olive oil for this as it is reflected in the final flavour and I have been getting good results recently with the Greek brand Charisma which even Edoardo admits is a very good oil. If the budget runs to it, the French Roscoff pink onions are superb in this recipe – their subtle flavour really shines through but use what you have or can source well.

If you want to use shortcrust pastry, please do – and if you want to make your own, well that’s good too!

ONION AND THYME TART

Print Recipe
Serves: 6 Cooking Time: 45 minutes

Ingredients

  • 1 packet Marie La Pâte Feuilletée Ready Rolled Puff Pastry or 170g shortcrust or puff pastry
  • 60ml extra virgin olive oil
  • 2 large or 3 medium onions, peeled and thinly sliced
  • 2 cloves garlic, crushed to a paste with sea salt salt under the blade of a knife
  • 2 tbsp thyme leaves, stripped from the branches (yes, I know it’s a pain but it’s worth it)
  • salt and freshly ground black pepper
  • 2 medium eggs, well beaten
  • 200 ml creme frâiche or soured cream
  • 60g finely grated Parmesan cheese

Instructions

1

Preheat the oven to 180 degrees C fan and set a baking tray to heat

2

Line a 23/24cm flan tin with your chosen pastry

3

Prick the base and then line with baking parchment or greaseproof paper

4

Fill with baking beans and put on the heated baking tray to bake blind for 15 minutes

5

Remove the beans and paper and return to the oven for a further 5 - 7 minutes until the pastry is golden brown

6

While all this is going on in the oven, heat the oil in a non-stick frying pan over a low to medium heat

7

Add the onions and garlic and fry gently for about 20 minutes; some colour is fine but we’re not looking for a high degree of browning here which would impair the fresh flavour

8

Add the thyme leaves and stir around to distribute evenly amongst the onions and garlic

9

Remove from the heat and seasonTransfer to the pastry case, spreading them evenly

10

Add the creme frâiche or soured cream to the beaten eggs, season well with freshly ground black pepper and add to the onions in the pastry case

11

I don’t add salt here as the Parmesan gives enough for our tastes

12

Gently mix it into the onion mixture being careful not to pierce the pastry which your not - so -Watchful Cook has done on one occasion

13

Sprinkle with the cheese and return to the oven, on the baking tray, for 25 minutes until puffed up and golden brown

Notes

Eat this warm (but not hot) or cold with salt or vegetables, depending on the weather!

Spring/ Summer/ Suppers, Dinners & Main Courses

TREASURE FROM TURIN

Glorious Vitello Tonnato

I’ll be honest and say that when I first heard about this dish, I wasn’t at all sure that it would be to my taste. Veal and tuna together? Hmm, didn’t sound my kind of combination. If I had not tried it, however, I would have missed out on one of Piedmont’s true glories. I am also very glad that I waited until I was actually in Piedmont to try it. Turin, to be precise and frankly if you can’t find a superb, authentic vitello tonnato there, then something has gone badly wrong with the world. Fortunately, I did find one at the terrific www.leviteletonne.com which pointed me in the right direction when it came to finding an authentic recipe and tweaking it to our taste, and on advice from our Piedmontese friends.

It is true to say that there is still some reluctance to eat veal in the UK. Whilst I absolutely would not eat crate reared veal, free range rose veal is one of life’s true delights. And to be brutally frank, if you eat dairy, you are contributing to the creation of bull calves as a by-product. Sorry to be obvious but to lactate, a cow must be pregnant and deliver a calf. A heifer calf will become a dairy cow but a poor little bull calf, in industrial dairy production, faces a brutally short existence. We are talking hours. So to square with my conscience, all our dairy produce – milk, cream, yogurt, cheese – comes from high welfare farms (usually organic) that then rear the bull calves compassionately for rose veal. If you eat cheese, you should eat veal.

A good vitello tonnato also requires good tuna. It doesn’t have to be fresh and in fact I have never seen an Italian recipe that calls for it. I use Brindisa Ortiz Bonito Tuna Fillets which is line caught in the Bay of Biscay and comes in good size chunks which are also fabulous in other recipes. The flavour is superb and although it can be a bit tricky to track down, Ocado stock it and I’ve seen it in independent food stores too. Please don’t use that tinned tuna that strongly resembles cat food in looks, texture and smell. You know the stuff I’m talking about.

Another major component that I am going to be a tad militant about is the mayonnaise. It must be homemade with a mild olive oil and good eggs. That calf and that fish did not die for you to insult it with industrially made “mayonnaise”; the UK’s best selling brand is made with – amongst other things – rapeseed oil, calcium disodium and paprika extract. I don’t want to eat that in an egg mayonnaise sandwich, let alone vitello tonnato.

You will also need a butcher, one who knows his onions and can supply humanely reared rose veal and who knows how to cut and tie it. I will be astonished if you can find a supermarket that can do this, so do your best to either find a local butcher or use an on-line supplier. If you can’t do either of these things, make something else.

This dish, done properly, is a significant financial commitment so do it right, even if you only make it once a year! My version owes a huge debt to the late, great Marcella Hazan and I‘ve tweaked it on advice from Piedmont friends.

Vitello Tonnato

Print Recipe
Serves: 6 - 8 Cooking Time: Including all prep time, 3 hours

Ingredients

  • For me, this is two day recipe. Day One I make the mayo and cook the veal. You don’t need me to tell you how to make mayo but can I please, however, make a plea that you use olive oil and ONLY olive oil. I occasionally make mayonnaise with sunflower oil but never for this recipe. Day Two I make the tuna sauce and put the dish together
  • Day One
  • Your favourite home made mayonnaise recipe made with 2 egg yolks, 300ml olive oil and two tablespoons or so of fresh lemon juice
  • The mayo needs to be a tad on the sharp side to cope with the other flavours that will mingle with it, so don’t be afraid to use a little more than you might otherwise
  • And for the veal 900g - 1.25kg lean boneless veal tied firmly into a roll
  • 2 medium carrots
  • 2 sticks of celery, minus leaves
  • 1 medium onion
  • 4 sprigs parsley, including the stalks where so much of the flavour resides
  • 2 bayleaves
  • Day Two
  • The mayo you made yesterday
  • The veal joint you cooked yesterday
  • 200g tinned Italian or Spanish mediterranean tuna
  • 5 flat anchovy fillets, preferably in olive oil and patted dry (if they are salted, rinse them throughly in cold water)
  • 300ml mild olive oil
  • 3 - 4 tbsp lemon juice
  • 4 tbsp capers, rinsed

Instructions

1

Day One

2

Choose a flameproof pot just big enough to contain the veal; I use an ancient oval Le Creuset pot

3

Put in the veal, carrots, celery, onion, parsley and bayleaves and just cover with cold water

4

Now take out the veal and put it to one side (no, I’m serious)

5

Bring the water to the boil and add the meat again

6

Bring the contents of the pot to just under the boil, cover the pot and reduce to a barely perceptible simmer

7

At the point, I have found that none of the burners on my hob allow the low simmer I need for this so I do use a reducer plate which I now don’t know how I lived without

8

Simmer for about two hours, using your judgement if it needs a bit more or less - don’t wander off and have a nap while this is cooking. It does need you to keep an eye on it and it is way too high an investment to allow to simmer dry.

9

When the meat is cooked - you should be able to easily slide a skewer into it - remove the pot from the heat and allow everything to cool at its own pace

10

Day Two

11

Drain the tuna and put in a blender or food processor with the anchovies, olive oil, lemon juice and capers and run at a high speed until a creamy consistency is achieved

12

Now fold it carefully into the mayonnaise (not the other way around!) and test for salt; I find it is rarely required because of the anchovies and capers

13

Having drained the meat (don’t discard the stock - it makes fabulous soup or risotto) and ensured it is patted dry, slice it into thin slices

14

Arrange artfully on a serving dish and cover completely with the tuna sauce; if you need to layer the meat, ensure each layer is covered with some sauce and and cover the final layer completely

15

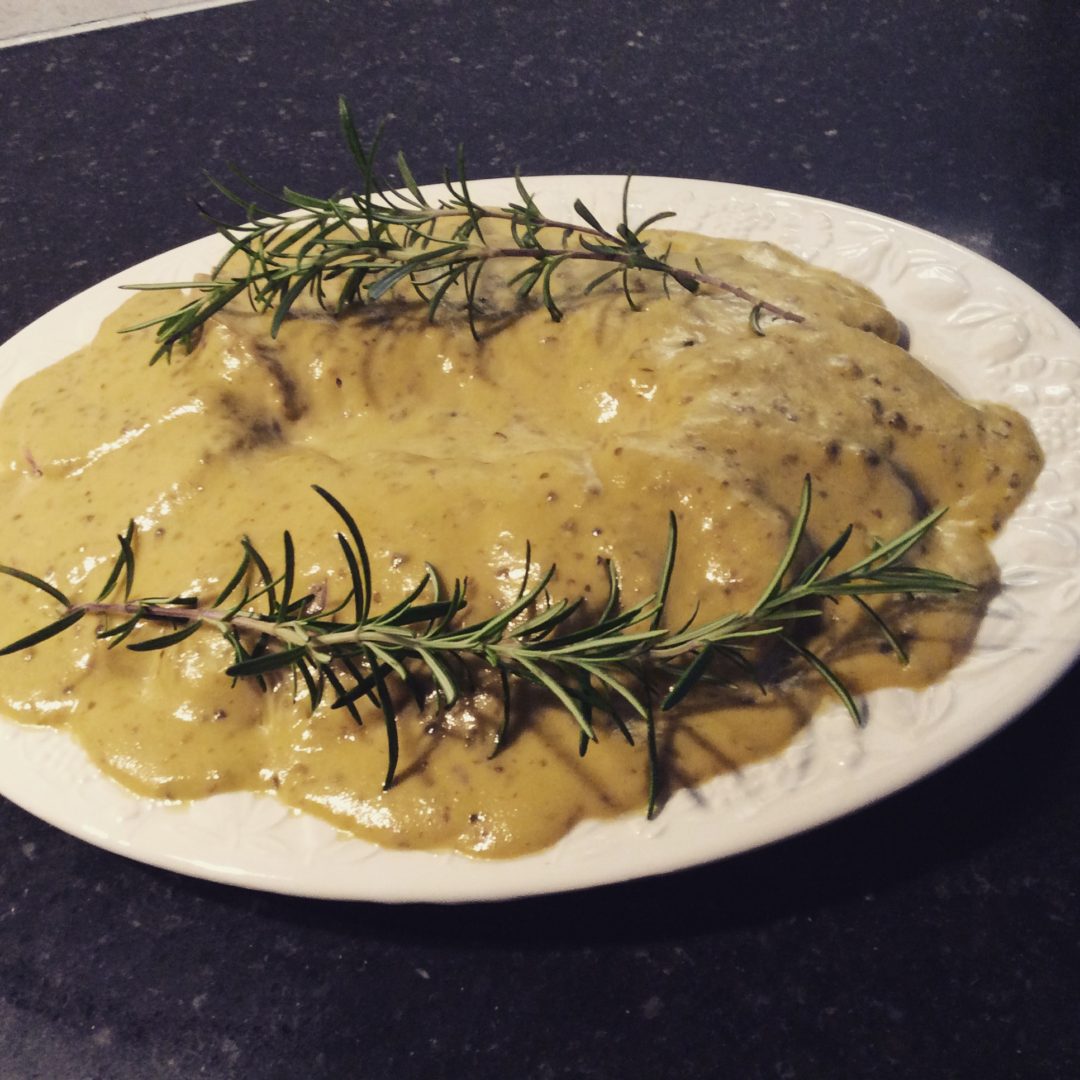
I like to keep the finishing very traditional so usually garnish with boughs of rosemary, lemon slices or parsley leaves, as per the photograph. I have been told by my Piemontese friends that this keeps for up to two weeks in the fridge; never last that long in our house!

Notes

I love this dish and will happily invest the time and money to create it. If I can’t afford either the time or the money, I make something else; it really isn’t worth trying to make a budget version as it will be disappointing and I really can’t stress that enough. If you do make it, I promise you, you will become addicted!

Lunches & Light Suppers/ Spring/ Summer/ Suppers, Dinners & Main Courses

WHAT A SAUCE!

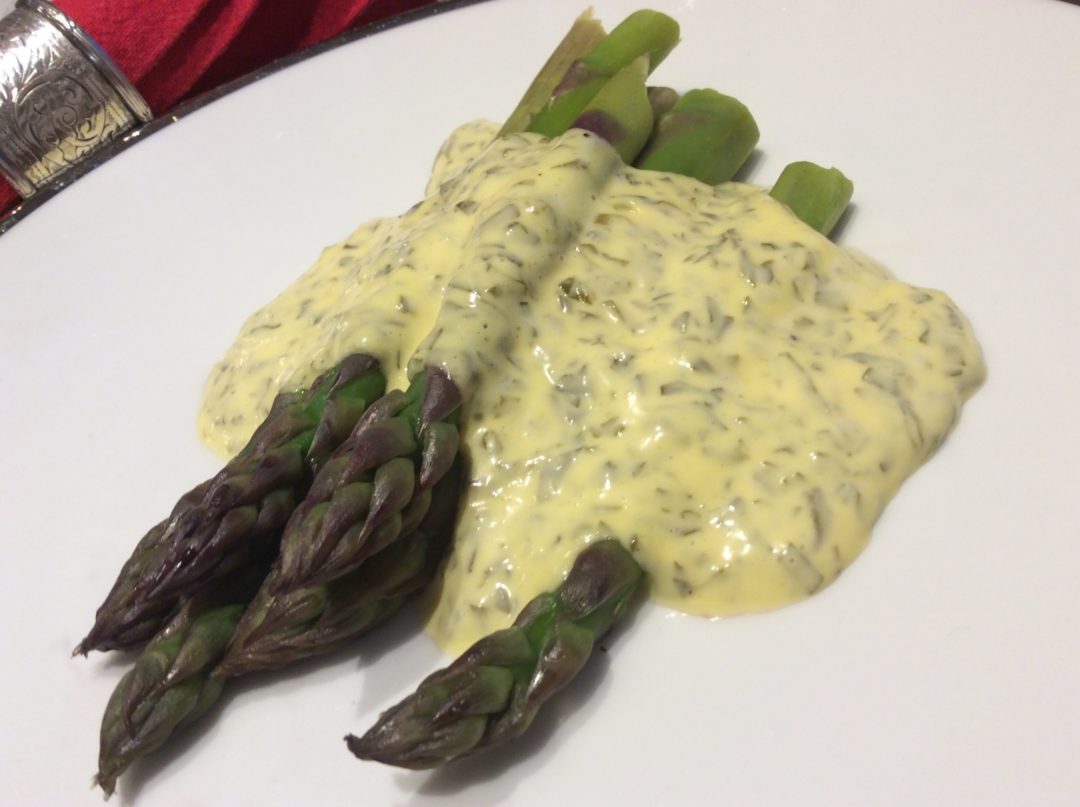
Sorrel hollandaise with asparagus

Why is it that certain recipes induce fear into the most intrepid cook’s heart? I will admit to be being very cautious about anything involving deep fat frying, in the absence of having a dedicated piece of kit. I am not however, afraid of mayonnaise or any of the other so called “Mother Sauces”. In fact, I sometimes think my food would be a much duller if I didn’t use them fairly frequently.

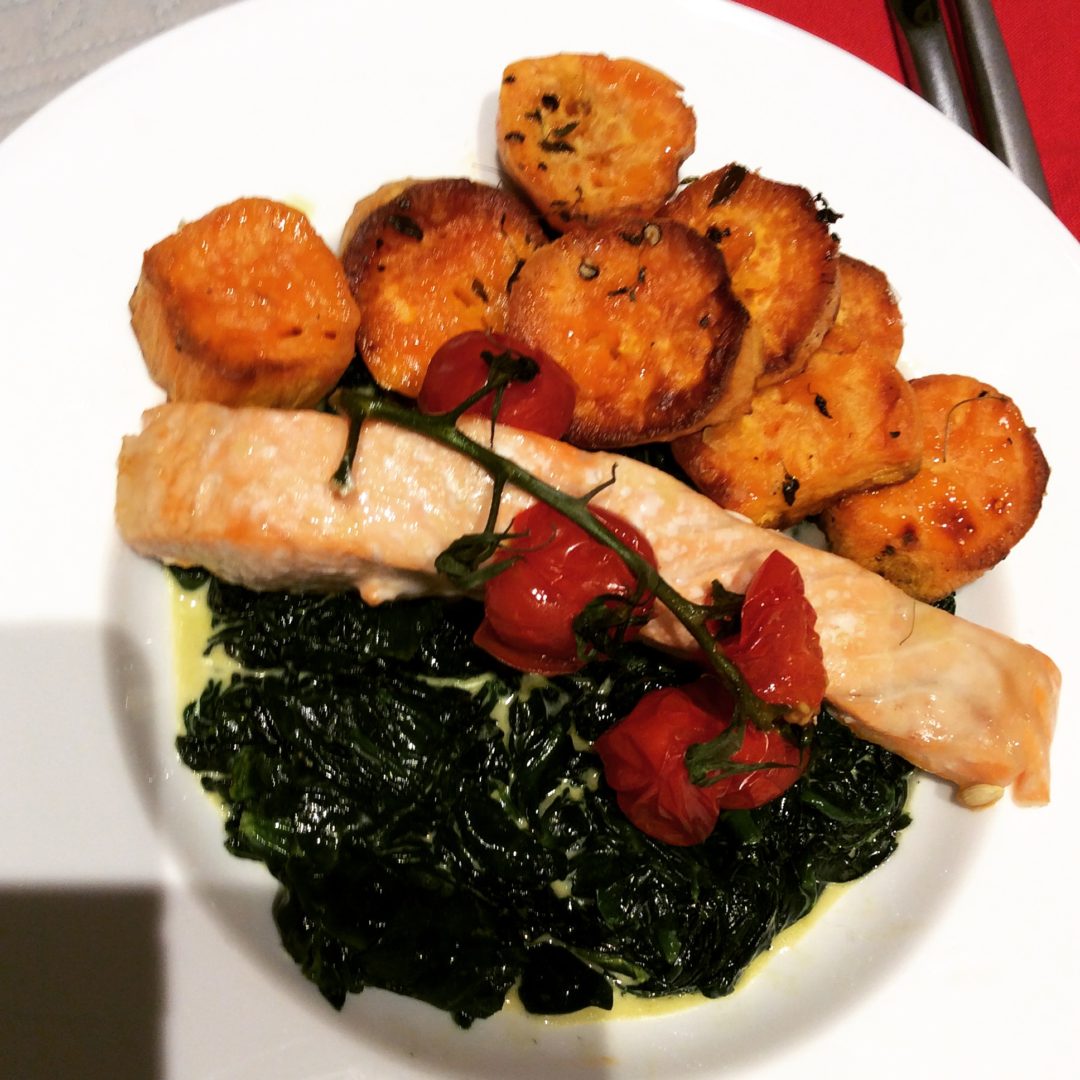
This week was an absolute case in point as I was casting around for something slightly different to do with salmon and asparagus. I had fallen for some sorrel from Farmdrop.com as I love the lemony sharpness that is a good foil for richer, oilier produce. It seemed a good combination to me to make a sorrel Hollandaise with steamed Jersey Royals, roast salmon fillet and steamed asparagus. Simple, flavoursome and absolutely seasonal.

So don’t be afraid of making a Hollandaise which you can then use as a wonderful base for adding a little finesse to simple steamed or roast fish and boiled or steamed vegetables. In a trice you can turn it into Bearnaise, Maltaise, Choron, Moutarde or Mousseline. Yes it can split and you do need the right recipe which lays out the steps carefully. Carême’s recipe is quite intimidating, requiring as it does, the cook to have a quantity of Allemande sauce to hand and 1 tablespoon of chicken stock. You can bet Carême didn’t use a stock cube and just to give you an idea about Allemande, you have to have velouté to hand before you can even start that. Those of us without a brigade behind us need a simpler approach to producing a delicious flavoursome Hollandaise with the minimum of stress and fuss.

Before we start, I have found there to be three golden rules for Hollandaise:

  • use unsalted butter at room temperature; you can clarify it if it makes you happy but after doing it once, I have never bothered since. I do, however, tend to use French or Italian butter which for some reason gives a smoother result
  • use fresh free range, preferably organic eggs; the better the eggs the better the end result and they are the main influence on the colour of the sauce
  • watch the temperature of the emulsion very carefully; I make mine in a Pyrex bowl over a pan of simmering water, although I always remove it at some point and end up clutching it to my bosom to keep the sauce warm but not hot. I have a friend who is somewhat better endowed in the embonpoint department than I, and she makes her sauce in the fashion from the get go. I am completely in awe of The Guardian’s Felicity Cloake who makes her Hollandaise in a pan, direct on the hob. One day I’ll try that…maybe.

My method is based on that which I learned years ago from the Leith’s Cookery Bible, which for me was – and is still – an absolute godsend for acquiring or refreshing techniques. I have tweaked their basic recipe to land on something which I can make with my eyes closed and so far (touch wood) has never gone wrong.

Sorrel Hollandaise

Print Recipe
Serves: 2 - 4 depending on greediness Cooking Time: 20 minutes

Ingredients

  • 3 tbsp wine vinegar (don’t use balsamic - used it once by mistake. Horrid)
  • 6 - 8 peppercorns
  • 1 or 2 bay leaves
  • 1 tbsp water
  • 1 or 2 blades of mace (not 100% essential)
  • 2 egg yolks
  • salt
  • 110 g unsalted butter at room temperature
  • lemon juice
  • 100g sorrel, finely chopped

Instructions

1

Put the vinegar, peppercorns, bay leaves, water and mace if used, into a small saucepan and reduce to 1 tbsp of liquid

2

Strain into a cold bowl and if you want to use immediately, shove it in the freezer for about two minutes to chill it

3

Put the egg yolks, a pinch of salt and a hazelnut size piece of butter into a heatproof bowl and stir together with a wooden spoon

4

Add half a teaspoon of the reduction and place the bowl over a pan of barely simmering water

5

Do not let the water touch the bottom of the bowl

6

Stir over the heat until slightly thickened and then start to add nut sized pieces of butter, stirring each addition well

7

Watch that the water doesn’t boil, so be prepared to moderate the flame under the pan and if necessary, move the bowl off the pan

8

It can be helpful to have a tea towel to hand to either place the bowl on, or wrap the bowl in if you employ what my well endowed friend calls “the bosom technique”

9

Keep adding the butter, stirring well and ensuring that butter is properly absorbed into the emulsion

10

If it begins to look a bit “sweaty” (unpleasant image, I know, but it does describe the condition), add a tiny bit more reduction or a few drops of cold water

11

When all the butter is in, remove from any heat source and beat vigorously for one minute

12

I do all this mixing and beating by hand, with a wooden spoon, simply because that’s how I’ve always done it and it makes me feel (unwarrantedly) virtuous

13

Check the seasoning and add salt and lemon juice to taste

14

Stir in the chopped sorrel and keep warm until needed

15

At this point, I sometimes add a tablespoon of double cream to make it a lighter, more pouring consistency; this doesn’t quite make it into a mousseline, for which you add stiffly whipped double cream at half the volume of the Hollandaise

Notes

I have read all kinds of dire warnings about what happens if you let Hollandaise get cold, but I have found it perfectly even tempered if I keep it at room temperature and don’t refrigerate it. If you find it has thickened a little, just put the bowl over warm water again and let it come to in its own good time, with a little gentle encouragement from a wooden spoon. Without the sorrel, it is a good, basic Hollandaise perfect for this time of year with pretty much anything seasonal


Lunches & Light Suppers/ Spring/ Summer/ Suppers, Dinners & Main Courses

ASPARAGUS AGAIN

Frittata di asparagi

I have friends who remark upon the passing of the years by exclaiming how quickly Christmas comes around. Not me, as apart from the fact that I truly loathe turkey, there are more pleasurable milestones throughout the year. For me, the best is the arrival of English asparagus. There is nothing quite like the real English product and I confine my asparagus eating to the eight or so weeks of the year when it hits the markets. Yes, when I am in Italy, I love Italian asparagus and it has a subtly different flavour so the risotto, or whatever I’m making, are also subtly different, but again, I only use it in season. And no, I never use Peruvian or Mexican asparagus that seems to be available all year round. Why would I do that? Why would anyone do that – it just doesn’t have the same depth of flavour.

I do remember years ago (in the 1970s or early 80s I think), I tried a recipe for a quiche that used canned asparagus and evaporated milk. It was foul, what was I thinking; even the dog wouldn’t eat it and Labradors don’t turn up their noses at much. I recently was given a can of asparagus, prior to the season starting, because this well meaning person knew how much of “an asparagus nut” I was. Well, quite. A nut but not idiotic. And yes, it is still foul stuff, still a travesty of the fresh product but OK for my neighbour’s compost heap.

I’ve written elsewhere on this site about how to make real asparagus quiche, soup and risotto so this short post is about how to put together an authentic Italian frittata using asparagus. If you can make an omelette, forget what you know about omelettes. You do see writers who say that a frittata is an Italian omelette and it makes me livid. OK, they are both eggs but the methods are different, not to mention that an omelette is folded or rolled and a frittata is flat. An omelette is made rapidly, keeping the eggs moving and is over in the blink of an eye. I love Margaret Costa’s description in her Four Seasons Cookery Book of being tutored in the art of omelette making by Monsieur Laplanche, then chef des cuisines at the London Savoy; he had been taught as a commis to cook on the back ring of a gas cooker with the naked flame in front of the pan, under his wrist. Don’t try this at home, but it gives you an idea of how rapidly the eggs should be cooked for a French omelette.

So having said all that, for this recipe, forget it all (although I implore you to find a copy of Mrs Costa’s book – it is captivating) as a frittata is approached differently. It is slow cooked and to finish it, you can either flip it like a pancake or whip it under the grill for a brief moment. Because I use a heavy Le Creuset pan for this, I have proven to myself that my wrists are too feeble to flip a frittata so despite what my Italian friends do, I use the grill method, but you do have to watch it like a hawk. I am a massive fail as well when it comes to the “slide in onto a plate and flip it over” method which if you want to attempt, that is what You Tube is for. If it ends up on the floor, don’t blame me.

FRITTATE DI ASPARAGI

Print Recipe
Serves: 2 Cooking Time: 20 minutes

Ingredients

  • 200g fresh English asparagus (a bit more or less won’t matter too much)
  • 4 large eggs
  • 50g grated Parmesan cheese (no, supermarket “cheddar” won’t do)
  • 30g unsalted butter
  • salt and freshly milled black pepper
  • A heavy based frying pan: I use a Le Creuset with a top diameter of 20 cms

Instructions

1

Heat your grill

2

Trim the asparagus and cut into 1 - 1.5 cm pieces, keeping the tips whole

3

Rinse and blanche in boiling water for 2 minutes

4

Drain thoroughly, patting gently dry with lots of kitchen paper

5

Beat the eggs in a bowl (I use a large Pyrex jug) until whites and yolks are well blended

6

Add the asparagus, cheese, salt and pepper (about 5 twists of the mill)

7

Melt the butter in the frying pan, over a medium heat

8

When the butter foams but is not coloured, add the egg mixture

9

Turn the heat down as low as possible and let the mixture set and thicken

10

This might take up to about ten or twelve minutes but don’t wander off and read the paper; it needs a close eye kept to prevent browning

11

When the top is still runny but the very edges look set, whip it under a hot grill for about 30 seconds, but again watch it like a hawk: it must not brown

12

Loosen the frittata from the pan using a spatula and slide onto a warm plate

13

Cut into wedges and serve warm, not hot, with a green salad

Notes

The frittata in the picture is a bit less puffy than normal as I only had three eggs. Still tasted good, though. We like to sprinkle a bit more Parmesan over the cooked frittata and they also work cold and travel well for picnics or packed lunches. They can also be adapted to use whatever you have around; I like to use up the ends of whole salami or chorizo, finely sliced red pepper, left over griddled courgettes or small cubes of gorgonzola which melt wonderfully into the eggy mixture. Cold and cut into small cubes, frittate are excellent stuzzichini, too


Desserts & Savouries/ Spring

RICOTTA ICE CREAM

Ricotta, rhubarb and blood orange ice cream

I am a big fan of ricotta cheese; it is endlessly versatile but it is very easy to be fobbed off with inferior products. Because it is made from the whey left from cheese making, industrial producers of cheese in this country have cottoned onto the fact that they can make yet another insipid tasteless product from what was previously waste. Blame the industrialisation of the dairy industry in this country which apart from producing tasteless milk, condemns thousands of cattle to unspeakable lives. I can feel a separate post coming on about that.

A good, Italian-style ricotta can be difficult to find in the UK and I’m afraid I have been nagging farmdrop.com to source and supply a really good ricotta. it was therefore with huge pleasure that last week, I was able to order westcombedairy.com Ricotta which was a lovely cheese that I wanted to use for something that I perhaps wouldn’t otherwise have made. Fortuitously, I also had rhubarb and blood oranges, both of which I love. So, rather to my surprise, as I lack the gene for sweet foods (well, not completely but I’d rather have cheese than chocolate), I decided to make ice cream.

Now, before you are up in arms that the following recipe isn’t really ice cream because it’s not made with eggs and cream, yes, I know. But Larousse tells me that ice creams are “cold desserts made by freezing a flavoured mixture”. The use of milk, cream and eggs seems to have started around 1775, although it is said that in about 1650, the cook of Charles I of England had created the egg & cream recipe but the King had paid him to keep the recipe secret. So, I am unrepentant in calling this an ice cream (it does include cream, after all!). I also think that if I start to call it “frozen rhubarb dessert”, it sounds like something full of E numbers that is found at the bottom of a supermarket freezer on double discount because nobody fancies it. And who would, when they can have Rhubarb, Ricotta and Blood Orange Ice Cream!

On a slightly different topic, this recipe has been welcomed by a friend with a daughter who is severely allergic to eggs and who frequently misses out on the pleasure of ice cream.

Can I also mention here that I don’t own an ice cream maker and am not sure I want one (although I think Edoardo thinks he might get ice cream more often if I did). In truth, the end product could probably have been smoother if I had remembered to mash it up more frequently during the freezing process. I did set the alarm on my phone but only managed two mashes. Three might have made it smoother but the flavour is still delightful with just two mashes.

RICOTTA, RHUBARD AND BLOOD ORANGE ICE CREAM

Print Recipe
Serves: 4 - 6 Cooking Time: 30 mins plus freezing time

Ingredients

  • 250g ricotta, strained (sieve it if it pleases you)
  • 400g rhubarb, rinsed and cut into 2cm pieces
  • 100g caster sugar
  • 4 blood oranges, juiced squeezed (I didn’t bother straining it but you could if you wanted to)
  • zest of one of the above oranges
  • 75ml runny honey (I used acacia but use what you have)
  • 240ml double cream (I used Jersey cream for extra lusciousness)

Instructions

1

Put the rhubarb, sugar, orange juice and zest in a pan and simmer until the rhubarb has collapsed into a puree

2

Set aside to cool

3

Beat together the ricotta and honey until very smooth then add the cream

4

Continue beating until all the ingredients are smooth then add the rhubarb mixture

5

Mix well until you have an even distribution of rhubarb then pour into a plastic container and freeze for about two hours

6

After that time, mash up the mixture to reduce the size of the ice crystals and return to the freezer

7

Repeat that process two or three times more for a smooth, silky ice cream

8

At the last “mash” you could add chopped pistachios or walnuts to add a bit of texture

Notes

I served this with Nyakers Pepperkankor Swedish ginger biscuits and in fact, now that blood oranges are over, I might make ricotta, rhubarb and ginger ice cream…


Lunches & Light Suppers/ Spring

BEARS AND EMERALDS

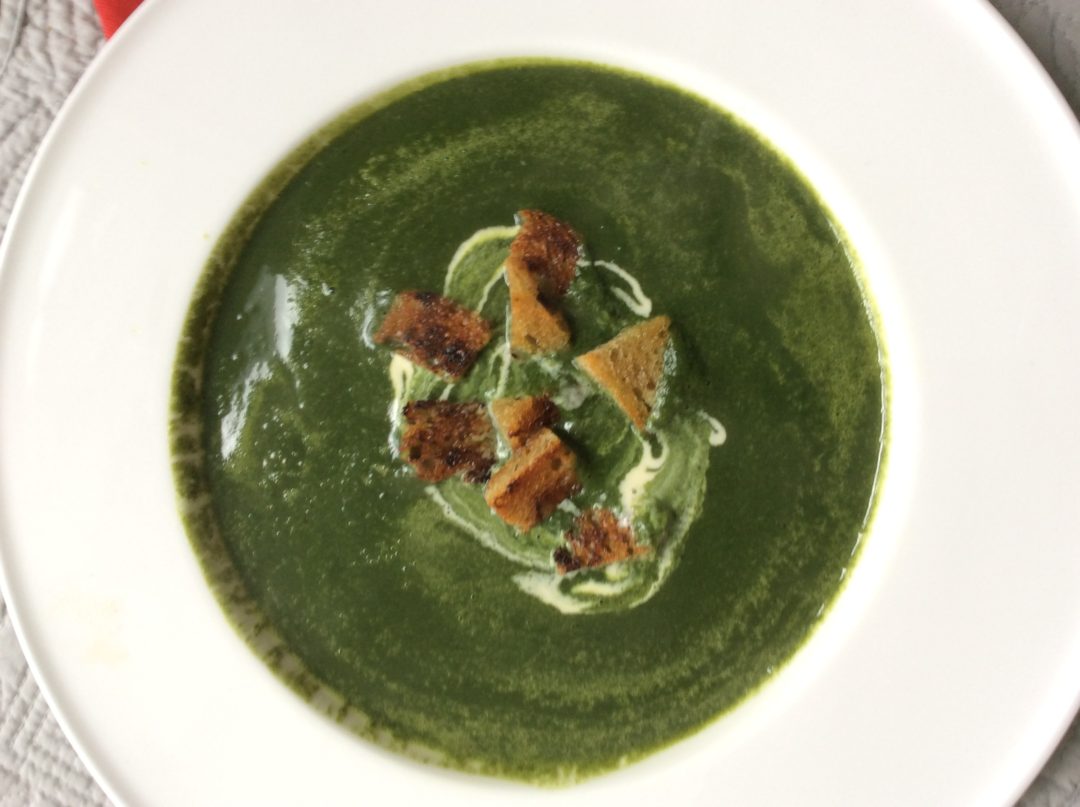
Spinach, watercress & wild garlic soup

If you read many “foodie” blogs, you’ll see that foraging seems to be something you need to do, or you are just Not Keeping Up. Now, I love fresh food but I am not going to start foraging. “Pick your own mushrooms” they say. Really? REALLY? How do you know they aren’t toadstools? How do you know your foraged risotto al funghi won’t kill off your nearest and dearest? There is a huge risk differential between snaffling a few blackberries to add to an apple pie and deciding you are qualified to distinguish between a delicious mushroom and a fungus which at best, will give you a night to remember for all the wrong reasons. I love nettle risotto but my nearest green space is Brompton Cemetery and call me a wimp if you like, but somehow I just don’t fancy eating something picked in a Cemetery (and there is the small matter of it being illegal to take flora from there).

In Italy, they do things differently and many pharmacists are qualified to pronounce on your foraged fungus (no, not the kind on your feet, although they do that too). There are also helpful signs near popular foraging sites warning you of the toxic fungus to be avoided, although how do you know those signs are comprehensive? Just because something doesn’t appear on the sign doesn’t mean it’s safe. Oh, I know, I’m a wuss but blame 35+ years of working in insurance – risk assessment is an ingrained habit.

My aversion to foraging does not, however, mean I need to miss out on recipes containing ingredients traditionally thought of as foraged. The lovely folk at farmdrop.com have recently added a seasonal goodie which I just love: wild garlic. I am pretty well addicted to garlic in most forms and this has given me the seasonal opportunity to experiment with it and look into its history.

It amused me to see that its Latin name is allium ursinum due to it being a favourite of the European Brown Bear who, after emerging from hibernation, would dig it up and feed voraciously, as it grew  early in the spring. Bears, in all their variations, are by far and away my favourite animal so it’s another reason for me to have a soft spot for this plant. In the absence of being able to keep a bear at home, I’ll happily settle for a dog, preferably an Italian Greyhound…but I digress.

This garlic is widespread over Europe but its similarity to Lily of the Valley, which is toxic, has led to a few cases of death through people confusing the two. I’m not sure I understand why as the flower forms are completely different and what about the smell? Crush Lily of the Valley and you get a light, pleasant fragrance that reminds me of Diorella. Crush wild garlic and it’s a whole different fragrance, unused, as far as I know by M. Dior. Just reinforces my aversion to amateur foraging, though.

Wild garlic is seasonal between April and June in the UK, so do make the most of it. I chop it into butter for the ubiquitous garlic butter or to drizzle over roast cod or chicken. The leaves (which have a slightly milder flavour than the bulb) can be used in a salad or added to a leafy green vegetable. The pretty white flowers make a lovely garnish, a change from the nasturtium, but I think my new favourite is this soup. Spring weather can be so unpredictable that I never feel a hot soup is unwelcome around about now and last weekend, when the weather here DID change rapidly and in the wrong direction, this was especially welcome. My slightly fanciful name references the Latin name and also the startlingly intense green of the finished soup which begs finishing with the contrasting colour of cream or creme frâiche – or indeed the flowers.

[sp_recipe

Autumn/ Spring/ Summer/ Suppers, Dinners & Main Courses/ Winter

FEEDING PEOPLE – EASY BAKED SALMON

Colourful, healthy and SO easy.

Let me state right up front, I love to have a table full of people for whom I’m cooking. Don’t much mind if I’m just making a giant risotto for twelve with antipasti first and green salad then fruit and cheese, or a full scale cordon bleu high French cuisine meal for four. Have to say the former scenario is less stressful and much easier on the budget. On reflection, I am not sure anyone really entertains at home in that formal way any more and I can’t stand it when home entertaining becomes a competitive sport.

On that basis, I am going to do a series of occasional posts talking about recipes and tips I have found useful when feeding people at different times of the year and of the day. I will probably include a few failures as well, on the basis that I’m human!

Having said that, having friends round their table is something that sometimes worries people though, so this post is giving you an absolutely foolproof main course that can be put on the table in under 30 minutes, is stress-free and can be done even if you’ve over done it on the aperitivi before you get in the kitchen…not that I have any experience in that regard…

Before we get to the recipe, I would like to emphasise that the quality of ingredients here is crucial: when we cook something this simple, the flavours must be clear and authentic, so do try to find the best you can and in the case of the salmon, preferably organic.

In terms of setting this within the context of say, a three course meal, I usually give people either a simple soup (prepared the day before) or a cold starter (Roquefort, pear and walnut salad is a crowd pleaser and dead easy), followed by a big bought tart, fresh fruit and cheese. Again, very simple so look for the best you can afford.

While I’ve been writing this, I have come to the conclusion that I really don’t like the word “entertaining” in this context. It’s all a bit Abigail’s Party (find it on You Tube – it’s genius) or 1980’s Cuisine Minceur (don’t bother Googling that – dreadful phase in food; everything served on black octagonal plates and so tiny you just wanted to make a pile of buttered toast once home). Having people round a table, eating good home cooked food (ahem, apart from puddings…) accompanied by conversation and laughter is one of great pleasures. Yes, wine helps but some of the best conversation round our table has come from teetotallers or designated drivers. On second thoughts, maybe there is a correlation there…

That’s a long paragraph to describe why I dislike the pretensions that can accompany feeding people at home and I still haven’t found a word to replace entertaining, so I am going to leave it at “feeding people” and hope it doesn’t make me sound too institutional!

Don’t be deterred by the length of these recipe; it is dead easy and when you’ve done it once, it will all slot into place and you’ll do with your eyes closed – or after a few aperitivi

EASY BAKED SALMON

Print Recipe
Serves: as many as you like Cooking Time: 30 minutes

Ingredients

  • 1 fillet of organic salmon per person
  • 1 slice of Parma ham per fillet (optional - see notes)
  • bay leaves
  • olive oil
  • 1 lemon
  • small bunches of cherry tomatoes, left on the vine
  • sweet potatoes, say, 1 chunky one per person but depends on appetites!
  • mature spinach (not those wimpish “baby”leaves that are for salad but have no flavour when cooked); buy more than you think you can possibly eat
  • fresh or dried thyme
  • 1 clove garlic
  • butter
  • double cream or creme frâiche
  • salt
  • black pepper
  • nutmeg

Instructions

1

Pre heat the oven to 200 degrees/180 degrees fan

2

Peel the sweet potatoes and cut into chunks about the size of a golf ball

3

Wash the spinach in two or three changes of water and leave in a colander to drain

4

Put olive oil into a shallow baking tin or oven proof dish, add the chunks of sweet potato ensuring they are all well coated with oil

5

Add black pepper, thyme and a smashed garlic clove (no need to peel it)

6

Put in the oven for 20 minutes

7

Take a second oven proof dish and add a drizzle of olive oil - just enough to lubricate the base

8

Pat dry each salmon filet and wrap each in a slice of Parma ham with the “seams” underneath

9

Slot a bay leaf under the ham, on top, with the tips poking out

10

Add the tomatoes to the dish, with the salmon, making sure they have a drip of olive oil of them but aren’t swimming in it

11

Put in the oven proof dish and wait until the sweet potatoes have had their 20 minutes

12

At that point, turn over the potatoes and return them to the oven

13

Put the salmon in the oven and set your timer for 15 minutes (Note that this time is for a slender fillet - if you have gone for a chunkier size, add a few minutes)

14

About 5 minutes before time is up, take your largest pan and melt a good sized knob of butter

15

When it has foamed, add the spinach and ensure it is all well coated with butter

16

Add a pinch of salt, put the lid on and leave it alone for about four minutes over a medium heat

17

When the time goes off for the oven; switch off the oven and leave everything in there while you finish off the spinach

18

Take the lid off the spinach and you’ll see it has shrunk beyond belief which is why I recommend you buy more than you think you’ll need

19

Drain it through a colander in the sink and then take an old saucer or small plate and press down hard on the spinach to force out as much of the liquid as possible

20

(You can do this to this stage a couple of hours in advance and in some ways that’s better, as it does give the spinach time to properly dry out)

21

Return the resulting green heap to the pan over a low light and move it around a bit more to drive off more liquid Turn up the heat to medium and add a couple of tablespoons of double cream or creme frâiche, heating until it bubbles and sizzles

22

Add black pepper and freshly grated nutmeg

23

Turn off the heat, plate up the fish and tomatoes put the potatoes and spinach in serving dishes - job done

Notes

This is colourful, healthy and not too expensive, especially if you replace the sweet potatoes with lentils or brown rice and leave out the Parma ham In truth, the method for this meal can be adapted for any firm fish such as cod or haddock and the spinach replaced by whatever green veg is in season, so do experiment and find your own speciality that you can produce with your eyes closed - or after a few aperitivi!