Browsing Category

Desserts & Savouries

Autumn/ Courses/ Desserts & Savouries/ Spring/ Summer/ Winter

A QUICK LEMON TART FROM ITALY

Quick Lemon Tart

One of my favourite books in the last few years has been Helena Attlee’s The Land Where Lemons Grow. It is a happy mix of food, history, art and Italy thus covering many of my interests; it is also beautifully written and so withstands many readings without becoming tedious. 

The book traces the development of the growing of citrus fruits throughout the Italian peninsular and specifically the lemons for which Italy is justifiably famous. In the UK, the vast majority of our lemons are imported from Spain and whilst they are reliable workhorses in the kitchen (or in the gin), for me they lack the added dimension of fragrance and flavour that some with Italian lemons, specifically those from the area around Sorrento or from Sicily. 

Unfortunately for we cooks, Spanish lemons tend to be at a more economical price point and I use them for the majority of food where lemon is a supporting act, rather than the star of the show. Where a dish has lemon as the main act, I do try to find and use Sorrentine or Sicilian lemons, especially if I am using the zest. This part of the lemon is where I feel the main advantage lies in Italian lemons; there is something deeply aromatic and almost woody in the zest that out-performs the Spanish cousins. A further advantage is that tend to be somewhat larger so do go further.

I have a vast repertoire of lemon dishes (although I cannot abide lemon meringue pie!) and have been in pursuit of the perfect lemon tart for many years. Mercifully, the wonderful Felicity Cloake has now written up the perfect tarte au citron in her fab book Perfect Two. It is however, not a recipe to be hurried or done in a spare half hour, as the author herself says, so much I love this recipe and commend it wholeheartedly, I have also been searching for a quicker, more “do-able” tart and this is it. It is a variation on a torta al limone as found in the iconic Italian cookery book, The Silver Spoon. Now I love this book, despite it being roughly the size and weight of two house bricks, but it does have shortcomings. It makes no concessions to one’s experience (or lack of) and thus assumes you know how to undertake certain cooking processes and can tell when something is done. The prime example of this assumption is that it never specifies what size cake, tart or flan to to use. In other words, you will have learned all the basics from your mother and/or grandmother and this is just to provide you with ingredients and (approximate) cooking times!

I have to admit that I got this recipe wrong a couple of times but I’d like to think that I’ve ironed out all the wrinkles and have also added additional information that might be helpful. It has a simplicity that showcases Sorrentine or Sicilian lemons to perfection and I like to serve it with creme frâiche or home made (or very high quality bought) vanilla ice cream.

If you don’t feel like making pastry but quite fancy making the tart, do feel free to use an all-butter bought pastry but in this case, I would blind bake it first (see recipe)

A Quick Lemon Tart

Print Recipe
Serves: 6 Cooking Time: 30 minutes cooking

Ingredients

  • Pastry (as per my Rhubarb Almond Tart)
  • 250g plain flour or Italian Tipo 00
  • 125g unsalted butter, very cold from the fridge and cut into small cubes
  • 1 medium free range egg, lightly beaten
  • 100g icing sugar
  • tiny pinch of sea salt
  • Filling
  • 3 medium free range eggs
  • 140g caster sugar
  • finely grated zest of two unwaxed Sorrentine or Sicilian lemons
  • juice of one Italian lemon
  • 150g softened unsalted butter, plus extra for greasing
  • A well buttered 21cm loose bottomed flan tin. I have neither the inclination nor space to collect flan tins in every possible size, so I use a loose bottomed sandwich tin for this; no fluted edge but I can live with that. Happily, both are about 3cms deep.

Instructions

1

Pre-heat the oven to 160C fan

2

To make the pastry, place the flour and butter in a food processor and whizz until fine breadcrumb stage

3

Add the sugar, mix briefly and add the egg and salt

4

Whizz until a soft dough is achieved; tip out of the processor and form into a flattened ball, wrap in clingfilm and put in the fridge for at least 30 minutes

5

When time is up, roll out to fit the flan tin and press the dough gently into the tin

6

Unusually for flans, this recipe doesn’t require baking blind first but somehow (miraculously!) avoids a soggy bottom, at least in a fan oven

7

If you are using bought pastry, increase the oven to 170C, prick the base of the pastry lightly with a fork, line with baking parchment and baking beans; put in the oven for 20 minutes, remove the paper and beans and return to the oven for another 5 minutes

8

After removing the case from the oven, reduce the heat to 160C

9

Beat the eggs with the caster sugar in a large bowl until the mixture becomes creamy with a small amount of foam on top

10

Stir in the lemon zest and juice and then stir in the butter, mixing well

11

Pay attention at this point as if you over mix, the mixture can curdle, which doesn’t affect the flavour but will affect the texture; it’s probably safer to mix by hand at this point rather than use a mechanical mixer

12

Pour the mixture into the pastry case and bake for about 30 minutes until golden and firm to the touch

13

Cool in the tin then dust with icing sugar, remove from the tin and serve with creme frâiche or ice cream

Notes

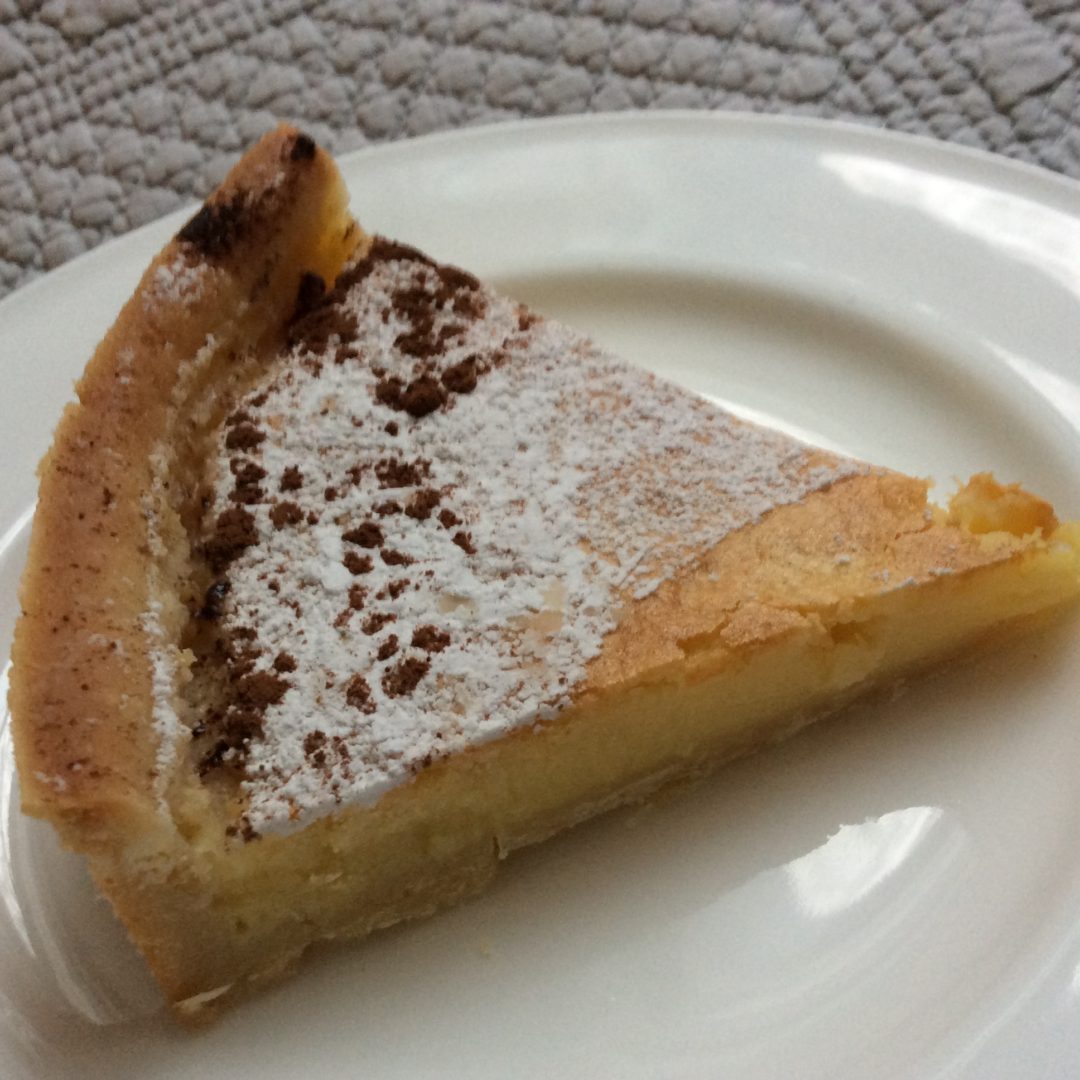
This looks very pretty topped with raspberries or halved strawberries, too. I have also tried this as a blood orange tart with some success (but I do love lemon!) in which case I like to sprinkle with cocoa powder, as indeed I did for the lemon tart in the photo

 

Courses/ Desserts & Savouries/ Spring/ Summer/ Uncategorized

RHUBARB AND ALMOND TART – WITH ADDED GIN!

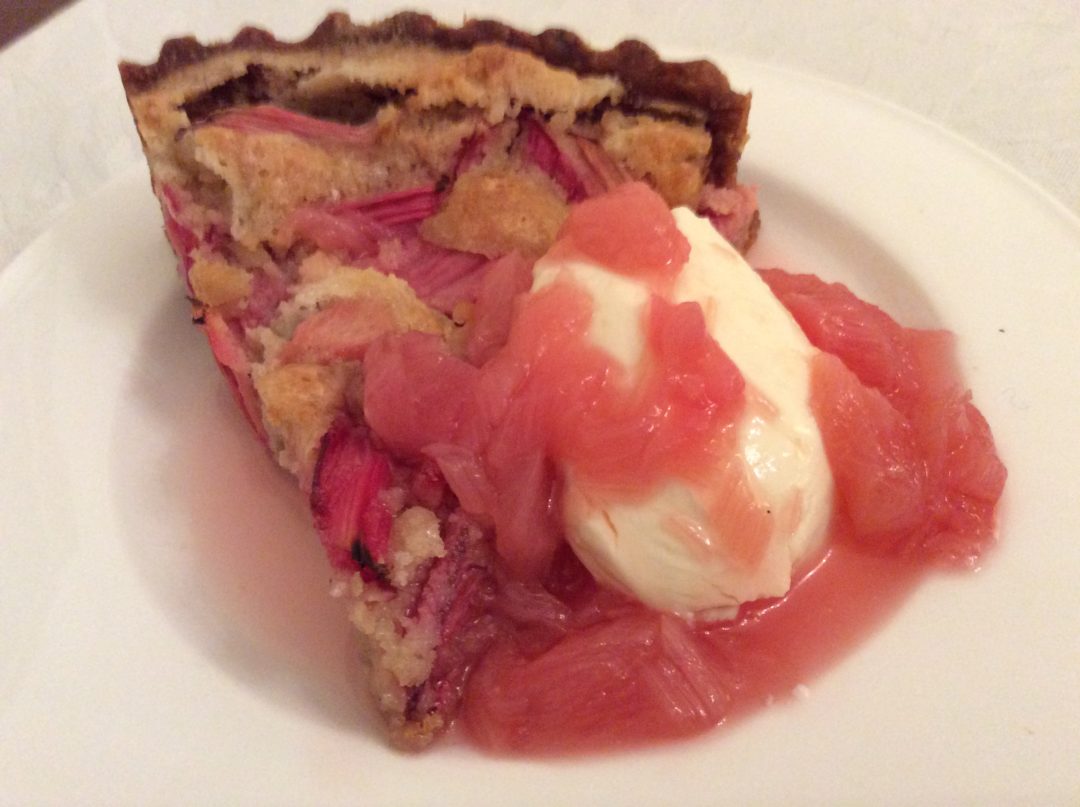
Rhubarb and Almond tart with Rhubarb and Gin Sauce

The end of winter is marked for me by the appearance of two fruits – rhubarb and blood oranges. Recently, winter seems not to have taken the hint and has been hanging around beyond the forced rhubarb season. This tart however, is delicious whatever the weather. And yes, I know that rhubarb is botanically not a fruit, but I would hope you agree that in the kitchen, it tends to be used as if it were. When the first forced rhubarb appears, delicate and elusively fragrant, I like to do as little as possible to it. I poach it gently with the juice of a blood orange and a tablespoon of honey. It is my absolutely favourite breakfast with a good yogurt, the zest of the orange and walnuts. And in a Moka full of Illy coffee and I can face whatever the day decides to lob at me.

Once the forced rhubarb is over and we have the sturdy maincrop stalks, I do like to experiment rather more. Although I have to say that for me, baked mackerel with rhubarb sauce was an experiment too far. More perhaps, I have to say, because I really can’t cope with mackerel and should not have tried (yet again) to get past my dislike. In my defence, at least I do regularly revisit my few dislikes to see if I’ve changed my mind. Still hate sweetcorn, though, in any and all of its manifestations.

A much more successful experiment was when I pottered about with almonds, which I think complement so many fruits, and arrived at this tart. It is an absolute breeze to make and works warm or cold as a dessert and has been consumed here with yogurt for breakfast. No, I am not saying who did that…

Don’t feel you have to make the pastry yourself here; there are excellent ready made, all-butter pastries on the market and resist those people who think using ready made is the eighth sin. I do not, regrettably have my late mother’s gift as a pastry cook and if it weren’t for my Magimix, I would never willingly make pastry. For sweet dishes I now use exclusively the Italian method of Pasta Frotta and so far, it hasn’t let me down; however, feel free to use your favourite sweet pastry recipe here. Should pastry making not be your thing, and if you have access to the French brand “Marie” (available on Ocado) then use that without a second thought.

RHUBARB AND ALMOND TART WITH GIN POACHED RHUBARB SAUCE

Print Recipe
Serves: 6 Cooking Time: 1.5 hours

Ingredients

  • Pastry
  • 250g plain flour or Italian Tipo 00
  • 125g unsalted butter, very cold from the fridge and cut into small cubes
  • 1 medium free range egg, lightly beaten
  • 100g icing sugar
  • finely grated zest of half an unwaxed lemon
  • tiny pinch of sea salt
  • Filling
  • 125g softened unsalted butter, plus extra to grease the tin
  • 125g golden caster sugar plus 2 tbsp
  • 1 medium free range egg
  • 125g ground almonds
  • 1 tsp ground ginger (optional)
  • 250g rhubarb, cut into 3cm chunks
  • Poached Rhubarb
  • 150g rhubarb, cut into 1cm chunks
  • 2 tbsp caster sugar (or more if you prefer)
  • 2 tbsp gin
  • A buttered 23cm loose bottom flan tin
  • Baking parchment
  • Baking beans

Instructions

1

Set the oven to 170C fan

2

To make the pastry, place the flour and butter in a food processor and whizz until fine breadcrumb stage

3

Add the sugar, mix briefly and add the egg, salt and lemon zest

4

Whizz until a soft dough is achieved; tip out of the processor and form into a flattened ball, wrap in clingfilm and put in the fridge for at least 30 minutes

5

When time is up, roll out to fit the flan tin and press the dough gently into the tin

6

Prick the base with a fork, line with baking parchment then tip the baking beans on top

7

Put in the oven for 20 minutes, after which remove the paper and cook for another 5 minutes until the tart shell is crisp and golden

8

It’s really important to get the shell crisp as otherwise the moist almond mixture will result in the dreaded “soggy bottom”

9

While the shell is baking, prepare the almond filling

10

Beat the softened butter and golden caster sugar until light and fluffy, then beat in the egg

11

Fold in the ground almonds and ginger

12

When the shell is ready, spread the almond mixture and press the rhubarb pieces into the mixture in a cartwheel pattern, or whatever pleases you

13

Sprinkle over the 2 tbsp of sugar

14

Put the tart in the oven and bake for 35 - 40 minutes until the tart is golden and puffy

15

Now make the poached rhubarb:

16

Put the second lot of rhubarb in a saucepan with a good heat conducting base, add the sugar and the gin

17

Heat until bubbling and then simmer gently until the rhubarb disintegrates - this doesn’t take long so don’t wander off and start the ironing

18

Bubble more fiercely until reduced by about one third

19

Remove from the heat and allow to cool slightly

20

If you want the final dish to be more refined, you can at this point, press the mixture through a sieve; I was a bit up against the clock when I made the tart pictured so this sauce isn’t sieved

21

Serve slices with either ice cream or creme frâiche and then drizzle over the gin sauce

Notes

You can change this round a bit too, by putting orange zest in the pastry and orange juice in the sauce - or Grand Marnier, perhaps. The tart can be re-heated and also freezes well for up to about a month.


Courses/ Desserts & Savouries/ Food People/ Summer/ Tips & Techniques/ Uncategorized

PUDDING FROM PIEMONTE

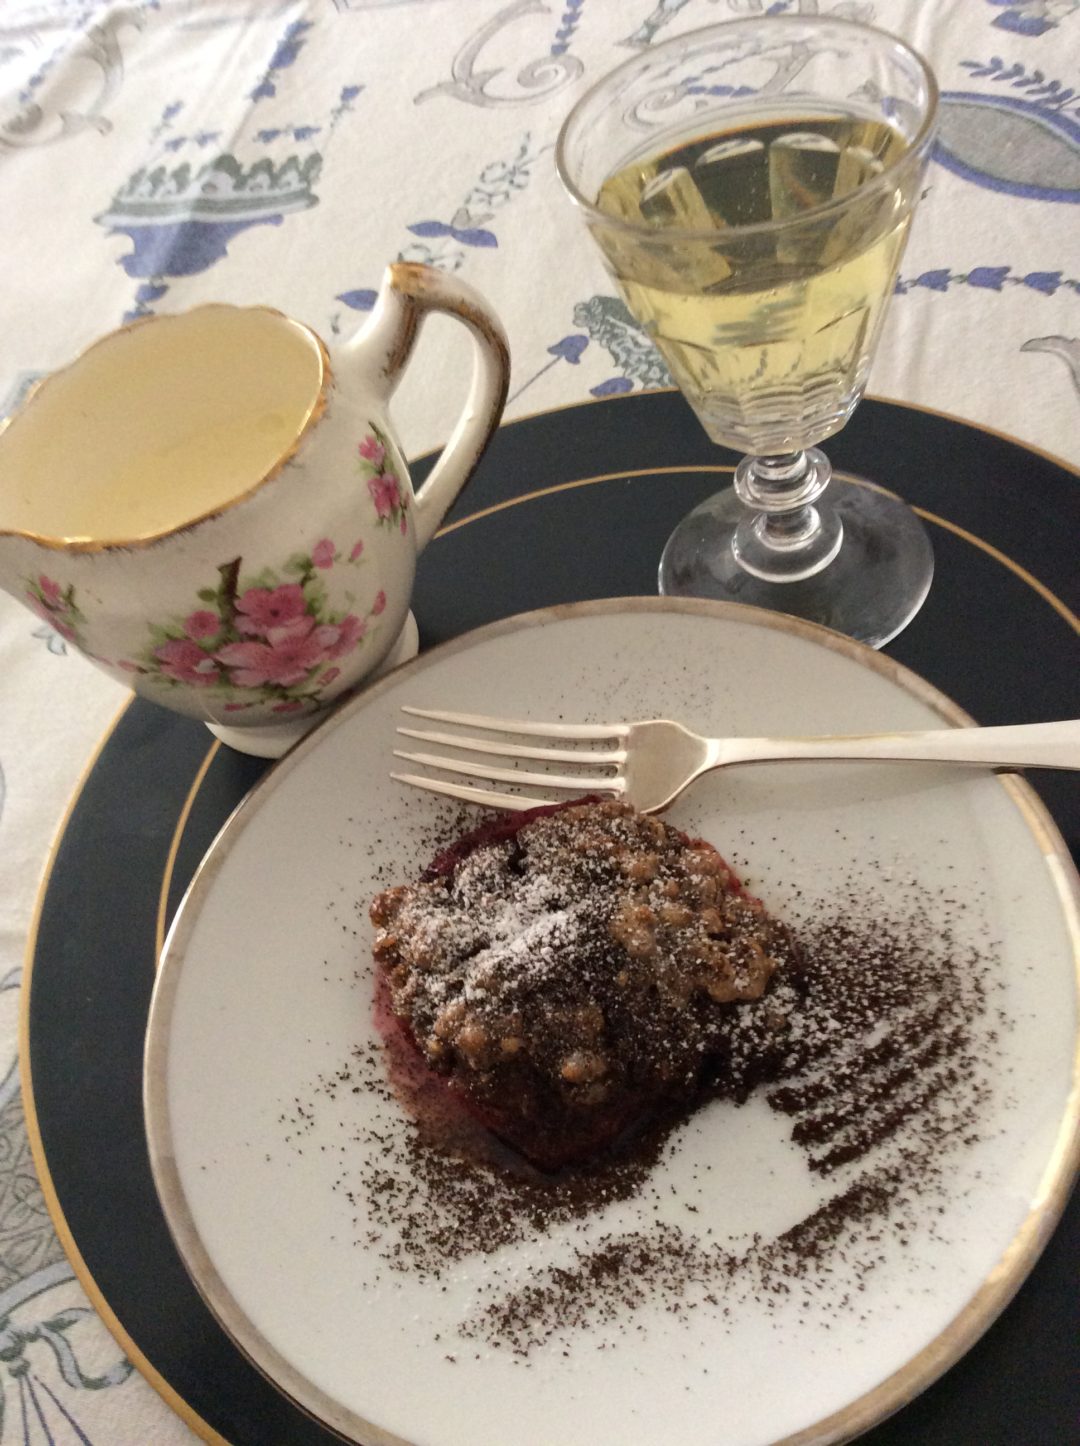
Amaretti Stuffed Peach served with single cream and a glass of Moscato

My recent trip to Turin for the 2017 Turin Epicurean Conference included an amazing evening at www.quibitorino.it which is a space in Turin under the guidance of the lovely Margherita Frari. The vision for this place is as a restaurant, meeting place and exhibition space, all to encourage the integration of the increasingly multicultural city of Turin. It also serves as a food collection point for customers of local producers rather in the way that www.foodassembly.com does.

During our evening there we were fortunate to be under the expert tuition of Margerita and also Marco Giachello, one of Piedmont’s most well known and charismatic chefs. He works to conserve Piedmont dishes, products and methods and actively seeks to promote those things beyond Piedmont, so that we non-Piedmontese can learn how to create their wonderful dishes in our own homes. Sometimes it’s difficult to do that as the Piedmontese have the advantage of fabulous ingredients, produced relatively locally and in some cases, very locally!

I will probably post about everything we created that evening but am starting (perversely) with the pudding, given that peaches are in season right now. Do please try to buy Italian peaches for this as it does make a difference to the flavour, although Spanish ones can be flavoursome too. It will make life much easier for you if you can get freestone peaches; I have to admit that the first time I made this when I came back to the UK, I had made the mistake of unwittingly buying clingstone peaches. It was only with the help of a very sharp, very narrow knife that this didn’t end up as peach purée, so do check.

This is an easy summer dessert that can be served warm or at room temperature but don’t serve it chilled; it will kill the flavours stone dead. Roero, by the way, is an area of Piedmont to the south of Turin and famous for fruit (especially peaches, pears and strawberries) not to mention some wonderful wine.

I’ve given the option of using either cocoa or coffee as I am not that keen on chocolate, but the original recipe uses cocoa. Ditto with the choice of rum or brandy; I dislike rum so tend to use brandy but again, the original, as I was taught, was with rum.

Amaretti Stuffed Peaches

Print Recipe
Serves: 4 - 8 depending on appetite! Cooking Time: 25 minutes

Ingredients

  • 4 fresh freestone peaches (it is helpful if they are still quite firm but not unripe)
  • 200g amaretti biscuits (preferably not the soft ones but they will do if it’s all you have)
  • 1 egg yolk, beaten well
  • 2 tsp caster sugar (optional - I tend not to use it as I find the biscuits sweet enough)
  • 3 tbsp rum or brandy
  • cocoa powder or very finely ground (espresso grind) coffee
  • icing sugar
  • butter
  • extra caster or Demerara sugar

Instructions

1

Set the oven to 180 deg C

2

Line a baking tray with baking parchment (not essential - just helps with the washing up!)

3

Slit the peaches through their “seams” with a sharp knife and twist to separate the two parts

4

(This is where you discover if you really have bought freestone peaches

5

If you haven’t, take a long, thin and very sharp knife - a fish filleting knife is ideal - and gradually work it around behind the pitt until the two parts of the peach come apart

6

This won’t be as elegant a dish as it could be but the flavour will still be wonderful)

7

Slightly enlarge the cavities using a teaspoon; ensure you leave plenty of peach intact ; reserve the extracted flesh

8

Put the peach halves on the baking tray and turn your attention to the filling

9

Bash up the amaretti biscuits until they are crumbs (I put them in a bowl and thump away with the end of my rolling pin)

10

I like a mixture of crumb size but nothing bigger than about 2 ml in diameter

11

Add the peach flesh and mix well

12

Add the caster sugar, if you want to use it and mix well

13

Add 2 - 3 tsp cocoa powder or coffee and again, mix well

14

Add a couple of tablespoons of your chosen spirit, adding a little more if the mixture is too dry

15

Add as much beaten egg as will achieve a firm mixture

16

Taste and add more of whatever you think is lacking but try to avoid the mixture becoming sloppy

17

Fill the peach cavities with the mixture, heaping it up well; I like to cover the entire peach

18

Add a few flecks of butter over the top and sprinkle with Demerara sugar; this will create a slightly crackly top to the finished dish

19

Bake for about 25 minutes until they are bubbling and smelling wonderful

20

Leave to become warm or room temperature (but please don’t serve them from the fridge)

21

I like to then sprinkle them with a mixture of cocoa or coffee and icing sugar

Notes

They are wonderful if served warm with a scoop of good ice cream to match either the cocoa or coffee, or vanilla Good also with creme frâiche but I tend to find double cream a bit too rich


Desserts & Savouries/ Spring

RICOTTA ICE CREAM

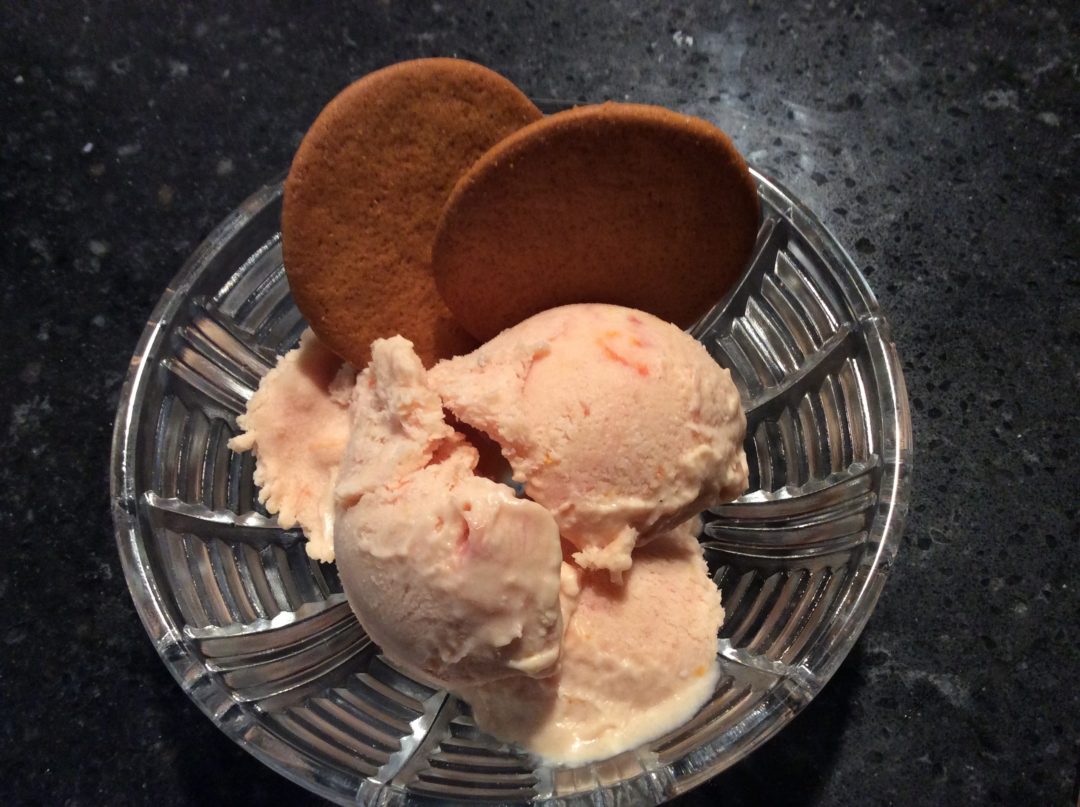
Ricotta, rhubarb and blood orange ice cream

I am a big fan of ricotta cheese; it is endlessly versatile but it is very easy to be fobbed off with inferior products. Because it is made from the whey left from cheese making, industrial producers of cheese in this country have cottoned onto the fact that they can make yet another insipid tasteless product from what was previously waste. Blame the industrialisation of the dairy industry in this country which apart from producing tasteless milk, condemns thousands of cattle to unspeakable lives. I can feel a separate post coming on about that.

A good, Italian-style ricotta can be difficult to find in the UK and I’m afraid I have been nagging farmdrop.com to source and supply a really good ricotta. it was therefore with huge pleasure that last week, I was able to order westcombedairy.com Ricotta which was a lovely cheese that I wanted to use for something that I perhaps wouldn’t otherwise have made. Fortuitously, I also had rhubarb and blood oranges, both of which I love. So, rather to my surprise, as I lack the gene for sweet foods (well, not completely but I’d rather have cheese than chocolate), I decided to make ice cream.

Now, before you are up in arms that the following recipe isn’t really ice cream because it’s not made with eggs and cream, yes, I know. But Larousse tells me that ice creams are “cold desserts made by freezing a flavoured mixture”. The use of milk, cream and eggs seems to have started around 1775, although it is said that in about 1650, the cook of Charles I of England had created the egg & cream recipe but the King had paid him to keep the recipe secret. So, I am unrepentant in calling this an ice cream (it does include cream, after all!). I also think that if I start to call it “frozen rhubarb dessert”, it sounds like something full of E numbers that is found at the bottom of a supermarket freezer on double discount because nobody fancies it. And who would, when they can have Rhubarb, Ricotta and Blood Orange Ice Cream!

On a slightly different topic, this recipe has been welcomed by a friend with a daughter who is severely allergic to eggs and who frequently misses out on the pleasure of ice cream.

Can I also mention here that I don’t own an ice cream maker and am not sure I want one (although I think Edoardo thinks he might get ice cream more often if I did). In truth, the end product could probably have been smoother if I had remembered to mash it up more frequently during the freezing process. I did set the alarm on my phone but only managed two mashes. Three might have made it smoother but the flavour is still delightful with just two mashes.

RICOTTA, RHUBARD AND BLOOD ORANGE ICE CREAM

Print Recipe
Serves: 4 - 6 Cooking Time: 30 mins plus freezing time

Ingredients

  • 250g ricotta, strained (sieve it if it pleases you)
  • 400g rhubarb, rinsed and cut into 2cm pieces
  • 100g caster sugar
  • 4 blood oranges, juiced squeezed (I didn’t bother straining it but you could if you wanted to)
  • zest of one of the above oranges
  • 75ml runny honey (I used acacia but use what you have)
  • 240ml double cream (I used Jersey cream for extra lusciousness)

Instructions

1

Put the rhubarb, sugar, orange juice and zest in a pan and simmer until the rhubarb has collapsed into a puree

2

Set aside to cool

3

Beat together the ricotta and honey until very smooth then add the cream

4

Continue beating until all the ingredients are smooth then add the rhubarb mixture

5

Mix well until you have an even distribution of rhubarb then pour into a plastic container and freeze for about two hours

6

After that time, mash up the mixture to reduce the size of the ice crystals and return to the freezer

7

Repeat that process two or three times more for a smooth, silky ice cream

8

At the last “mash” you could add chopped pistachios or walnuts to add a bit of texture

Notes

I served this with Nyakers Pepperkankor Swedish ginger biscuits and in fact, now that blood oranges are over, I might make ricotta, rhubarb and ginger ice cream…


Autumn/ Breakfasts & Brunches/ Desserts & Savouries/ Spring/ Summer/ Winter

BANANA EMERGENCY

I had a bit of a challenge to my Watchful principles last weekend, as I discovered three elderly bananas that were quite beyond eating “as is”, and for some reason I had neglected to eat most of the Discovery apples that had been delivered by Farmdrop.com. I can’t really explain that latter event, as I adore those apples and they have such a short season. It might have had something to do with my stuffing myself with a friend’s homegrown raspberries and the delivery, direct from Italy, of the most fragrant melon, another gift from a friend – lucky me!

Anyway, these poor apples had become a tad on the wizened side, so I made Spiced Apples (elsewhere on this site), not thinking they’d also come to the rescue in a banana emergency.

I have a fairly large collection of cookery and food books, together with favourite websites and years and years worth of good, old-fashioned clippings from magazines and newspapers. I wish I could tell you that the latter are in apple pie order and that I can lay my hands on exactly what I want in a trice. Nope. Not a hope. This lamentable lack of organisation came back to haunt me when I wanted to save these poor bananas from the bin and had a vague recollection of a good recipe from some years ago. I will cut a long and frustrating story short, by saying it took me nearly an hour to find what I wanted. Yes, there were other recipes more readily available, but stubbornly, I wanted that particular recipe that turned out to be snipped out of an American newspaper eleven years ago. It probably wouldn’t have taken me an hour if I had remained on task, but I kept discovering long forgotten gems, some of which revealed just how rusty my once fairly fluent French has become. Anyway, back to bananas.

The recipe is straightforward enough, in fact it is so simple it barely counts as cooking. Assuming, of course, one has all the ingredients…..now, I am an incurable recipe tweaker, except when it comes to cakes and baking generally. I don’t seem to have to same instinct for baking as I do for other areas of cookery, so tend to tweak only minor ingredients. I am not sure, however, it counts as minor when I discover I only have slightly more than half the required peeled weight of bananas. At this point I had greased the tin, was heating the oven and had weighed out all the other ingredients so opting out wasn’t an option. And Edoardo was expecting cake…….I sympathise, I get a bit like that when I’m expecting cheese…..

Anyway, for once I decided to tweak on a more major scale and made up the weight by using Spiced Apples that were drained of the juice that is inevitable with them. I did wonder if they would make it a bit too damp but decided to keep a close eye on the cake in the oven. For me, it is a minor miracle that it turned out perfectly: moist, light and full of flavour. I might even make this more often (cue for E’s eyes to light up – he complains he is cake-deprived normally).

I have written up what I did, but I suspect you could tinker around with the proportions, so long as it added up to 225g. And it wouldn’t have to be the Spiced Apple recipe; I might try it with raw grated apple and increase the spice content a bit. If you do try that, please let me know how it works out.

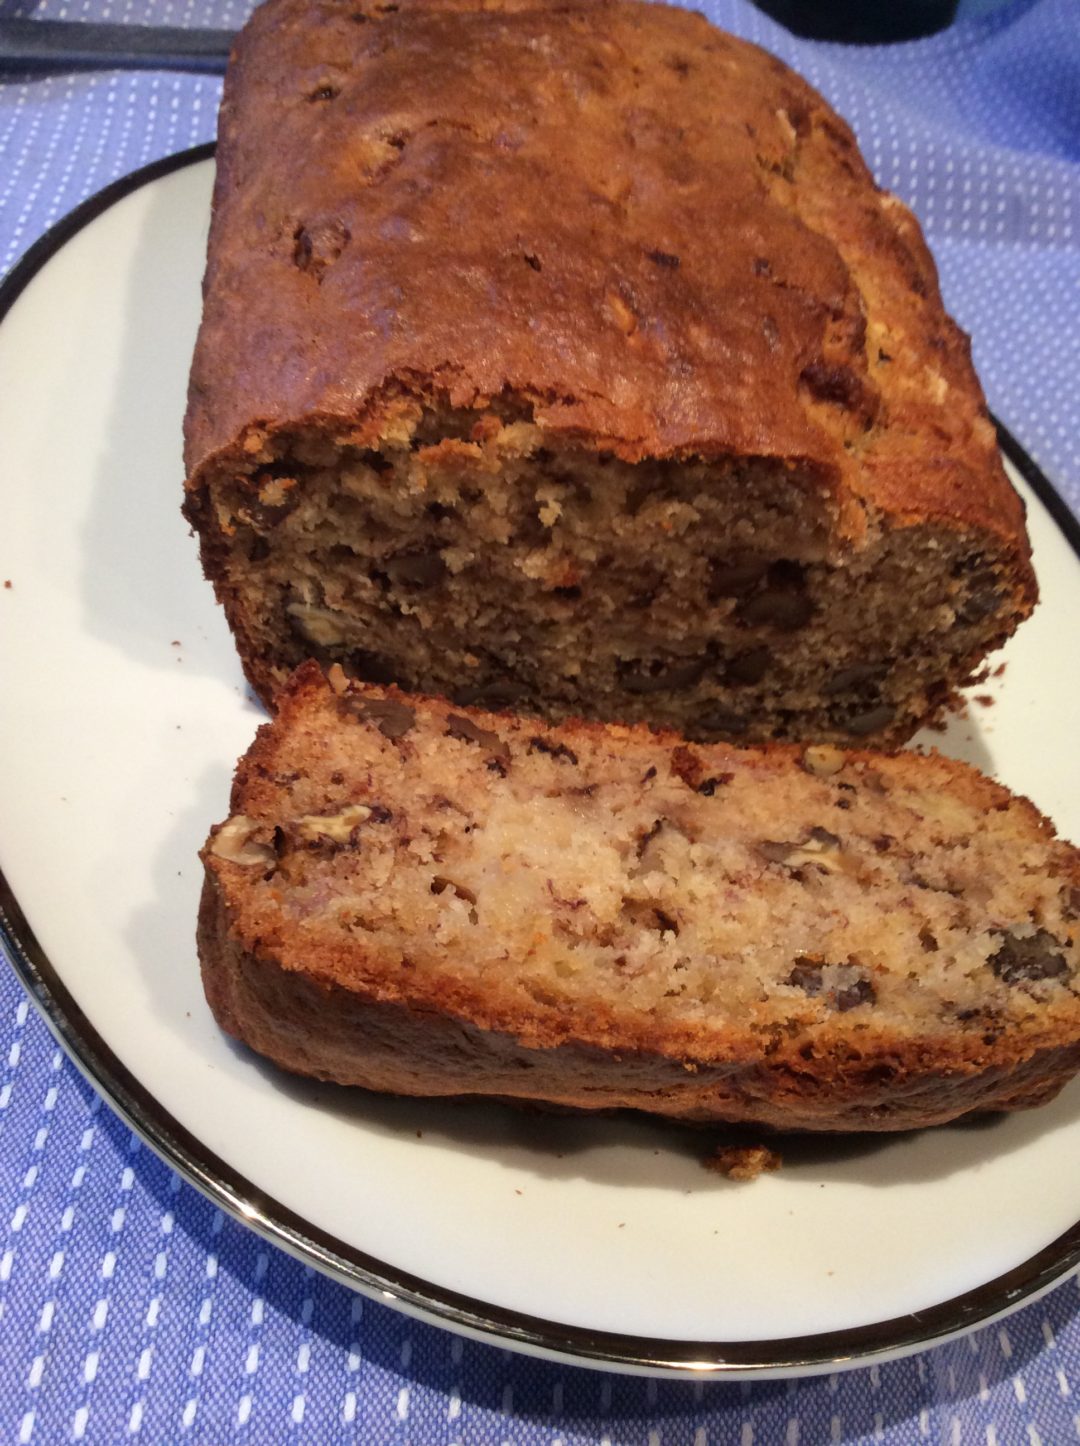
One last note; in the picture I was worried to see what looks like a lump of uncooked cake mixture but was relieved when it turned out to be a piece of apple!

I hope you enjoy this – we now call it “Leftovers Cake” but it’s not a very appetising title!

Spiced Banana and Apple Cake

Print Recipe
Serves: 10 Cooking Time: 45 - 60 minutes

Ingredients

  • butter for greasing the tin
  • 85g unsalted butter
  • 225g plain flour
  • 3 tsp baking powder
  • 0.25 tsp bicarbonate of soda
  • 0.25 tsp salt
  • 0.25 tsp grated nutmeg (or cinnamon, or a mixture of both)
  • 120g peeled weight ripe bananas
  • 105g drained Spiced Apples
  • 110g caster sugar
  • 2 medium eggs, beaten in a cup
  • 100g roughly chopped walnuts
  • 1kg/2lb loaf tin, base and long sides lined and greased with butter

Instructions

1

Pre heat the oven to 190 degrees/170 degrees fan

2

Melt the 85g butter in a small saucepan over a gentle heat (it mustn’t colour) and allow to cool

3

Mash the bananas thoroughly and stir together with the apple

4

Stir in the sugar, eggs and melted butter

5

Sift in the flour, baking powder and bicarb, folding in carefully

6

Fold in the chopped walnuts

7

Turn the mixture into the prepared tin, giving it a smart tap on the work surface to eradicate any air pockets and smooth off the top

8

Bake in the oven for 45 - 60 minutes, testing with a skewer after 45 minutes.

9

This one was done after 50 minutes but I suspect the banana/apple proportion will influence the time

10

Leave to cool in the tin for 10 minutes, then remove form the tin and cool on a wire rack

Autumn/ Breakfasts & Brunches/ Desserts & Savouries/ Spring/ Summer/ Winter

APPLES OF MY EYE

If you were to ask me, I think the first fruit I can remember eating is an apple. I also seem to think of them as always having been around all year, whereas when I was a child, fruit definitely had its season. Strawberries are irretrievably linked to tennis for me and their fragrance reminds me of my mother being glued to the (black and white!) TV during Wimbledon. Tangerines, as they were then, were Christmas, although we seem to see every variation on small citrus now.

Is there, however, more of a workhorse of the fruit bowl than an apple? Admittedly bananas work hard for their living too, but it terms of sheer versatility, the humble apple wins out every time for me.

Sadly, this very versatility led to this unsung hero being bred for volume, size and keeping qualities. We went through a very low period in the seventies and eighties when, unless you grew your own, eating apples were frankly pretty grim. The average supermarkets offered Golden Delicious, Macintosh Red and Granny Smith. Personally I find all of these unpleasant as raw eaters, either because of flavour or texture, but Golden Delicious and Granny Smith do cook well.

Many of the old British, French and Italian species became at risk as producers grubbed up old orchards to plant more profitable types. Mercifully, and largely because of the efforts of Slow Food and in the UK, the Royal Horticultural Society and its members, some enlightened retailers (take a bow, Waitrose) and a general increase in the public’s demand for flavour, many breeds were brought back from the brink.

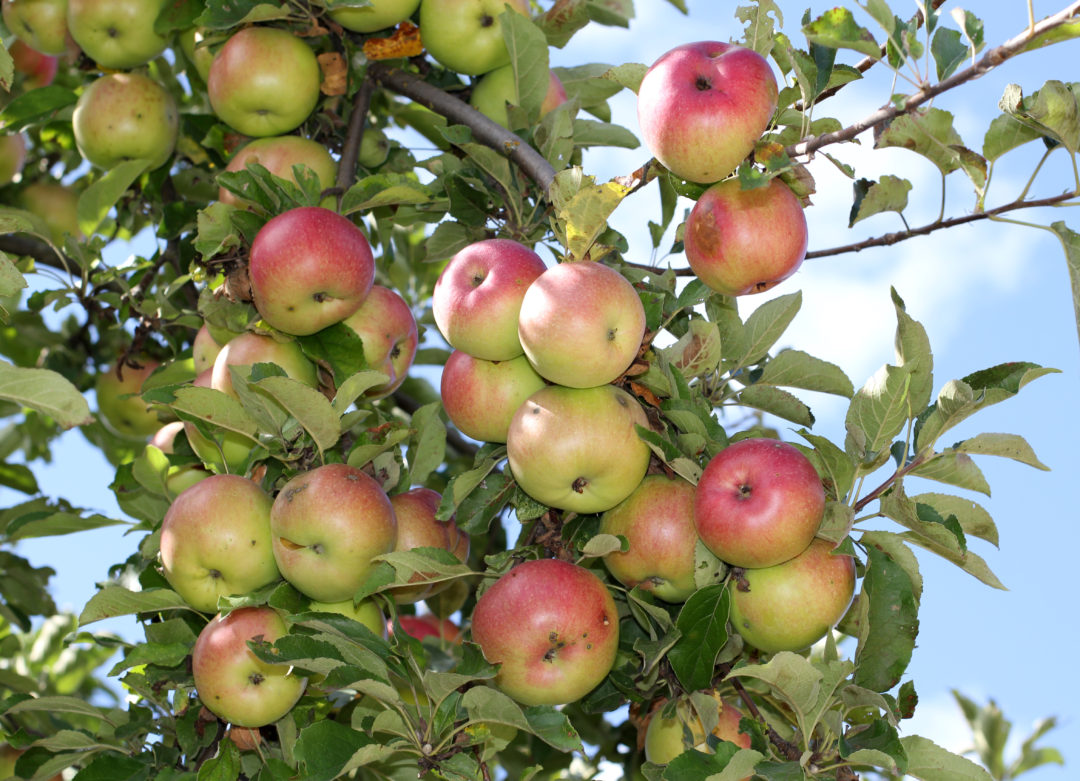
It is now relatively easy to find scrumptious seasonal apples such as Discovery, although until I started to do some research around this lovely apple, I didn’t realise it is in fact a modern fruit. It was found in the late 1940’s in Langham, Essex and is a child of the luscious Worcester Pearmain. I absolutely adore the fragrant crispness and almost strawberry-like flavour of the Discovery, BUT it is a seasonal being and in fact becomes flabby in both texture and flavour if stored for too long. They tend also to be a tad inconsistent in size but frankly this doesn’t bother me and I actually enjoy the process of selecting the individual apples that appeal to me.

Another fragrant apple that I love is Pink Lady; it is also a modern apple, developed in the late 20th Century, in Western Australia, from a liaison between Golden Delicious and Lady Williams. It has the remarkable capacity to be consistent and until recently, I don’t think I have ever had a disappointing Pink Lady. That changed recently when I had some quite unpleasant Argentinian apples – the texture was too mealy for me. Perhaps they had been stored too long. And did you know that Pink Lady is a trademark? I didn’t; her horticultural handle is Cripps Pink and she has an equally lovely cousin called Sundowner (also a trademark), who is horticulturally Cripps Red. She, however, is not so easy to find.

In terms of other modern apples, Jazz is a likeable apple that works well in the Spiced Apple recipe below. Oh and this is another apple that operates under a nom de guerre; it is really Scifresh.

Braeburn is another apple that you will see in quantity in supermarkets and it was an apple in the right place at the right time. It became commercially viable at a point when the public wanted more in terms of flavour than Golden Delicious or Granny Smith could provide. At best, it is a crisp, fragrant and deeply flavoured apple. It does however, to my mind, have a major flaw and that is that it is hugely variable in terms of quality. Personally, I have had too many Braeburn disappointments. Rather than waste them, however, if you are unfortunate enough to have a disappointing batch, use them for the Spiced recipe and just up the spices!

The last eating apple that I want to talk about it is the wonderful Cox’s Orange Pippin. This is an older fruit, developed, it is said in 1825, and with many progeny. I love these apples when they are in prime season, becoming a tad mealy when old. That is though, a wonderful reason to eat seasonally, as it is at its best when from British orchards.
You may wonder why I have not mentioned the noble Bramley Apple in this post. Well, it is indeed a noble apple with an impeccable history of service in the kitchen. I stopped using it quite so ubiquitously when I made a conscious decision to reduce the amount of sugar I use in cooking. As I started to use other apples, I also realised that I actually prefer to eat my cooked apples when they have retained some shape and I can still see the slices. Don’t get me wrong, if I making apple sauce for roast pork, I would still use a Bramley as I do like a cloud of fluffy apple in those circumstances.

Spiced Apples

Print Recipe
Cooking Time: About an hour including prep

Ingredients

  • 6 eating apples, peeled, cored and cut into slices about 2mm thick
  • juice and finely grated zest of 1 orange
  • zest of 1 lemon (I like to peel this with a potato peeler and then cut into julienne strips; you may have a julienne cutter but either way, I like clearly defined strips of lemon peel)
  • 1 tbsp honey
  • 3 pieces of star anise
  • 1 large stick of cinnamon, broken in two
  • half teaspoon of powdered cinnamon

Instructions

1

Put everything into a thick based pan or casserole and simmer gently for about 30 minutes

2

Stir occasionally and watch that it doesn’t catch

3

You may need to add a small quantity of water, depending on how juicy the orange is

4

The final result should be tender but still well shaped slices, with a slightly syrupy juice

5

This is scrumptious hot, warm and cold and I serve it with either ice cream, creme fraiche or yogurt

6

It makes a fabulous filling for a pie or a crumble and can have all kinds of ingredients added (see above)

7

Edoardo is fond of this for breakfast with yogurt and seeds and I have to say I agree with him.

Notes

This recipe rose out of necessity. I had a bag of eating apples (I think they were Braeburns, but can’t actually remember), I had tried one as a raw eater but it wasn’t terribly pleasant. Well, I was at the outset of watching my budget and my conscience, so it was unthinkable to just discard the other five or so apples, even for the benefit of our local birds and foxes. I didn’t want to shop specifically for anything else to make these apples edible so instead I rummaged in the pantry. I think I have said before that pantry is a metaphor - I would dearly love a larder but have to make do with two large drawers and two shelves as my pantry. One day……. Anyway, this recipe is made from ingredients I nearly always have in store, but I have found that I can experiment with this and use sultanas, raisins, seeds, dried apricots, prunes to add flavour to apples. This is also an extremely economical recipe if you make this with blemished apples which are often sold in supermarkets for very low prices, so do experiment. Also, you can make this with however many apples you happen to have, just scale the other ingredients up or down. It also freezes well for about three months. In truth, it so simple I feel a bit of a fraud posting it here, but friends I’ve shared it with have all liked it and mostly said “oh I never thought of doing that…”, so I’m hoping it’s not too much of a fraud!

Desserts & Savouries

HAVING YOUR CAKE……

Cake and I have a troubled relationship. I don’t buy shop cakes (unless as a dessert for entertaining as you will see elsewhere here) because I have done a deal with myself that if I want it badly enough I have to go to the bother of making it. By and large, I don’t have a sweet tooth and if you were to say to me that I have to live the rest of my life with only either cheese or chocolate or cake, it would be cheese all day long. So I am not one of life’s great cake bakers, consequently this site might be a bit light on cake stuff for those of you for whom a cup of tea or coffee is too wet without cake.

You certainly won’t find complicated recipes for whipped cream-laden gateaux, with chocolate curlicues and more fruit than an orchard. I admire the skill and craftsmanship that goes into making them, but speaking as someone who has to watch her weight, I am grateful that I can stroll past a patisserie without feeling any temptation……

Actually, that isn’t quite true: the pasticcerie of Turin and Naples exercise a pull on me, but for elegant, light pastries, not creamy, chocolatey extravaganzas. And when I am there, I will have one with a good espresso and thoroughly enjoy it. Interestingly, they are also significantly more petite than pastries we find in this country not to mention generally speaking, better quality. I have a feeling that the pasticcerie of Italy might be a whole other post, so here I shall pull myself back to the trusty lemon cake.

Given that I am not a great cake fan, this is my absolutely favourite cake, because it is a single clear note of flavour, i.e.  lemon and it has an elegant refinement that appeals to me. It stands up for itself, saying OK, I’m just a simple lemon cake but I am the best lemon cake I can possibly be. Which is where ingredients come in. Please don’t be tempted to make this with any form of margarine or “spread” (yuck) or even salted butter, which will overwhelm the clean fragrance and flavour of the lemon. And do try to use free-range organic eggs, because their yolks will give a better colour to the finished cake. As we are using the zest, I also use unwaxed lemons, but even these I wash before we start. Please don’t scrub them as you risk scrubbing out the precious lemon oil in the zest. Oh and don’t let the simple method and short ingredient list fool you: this is sumptuous in its simplicity.

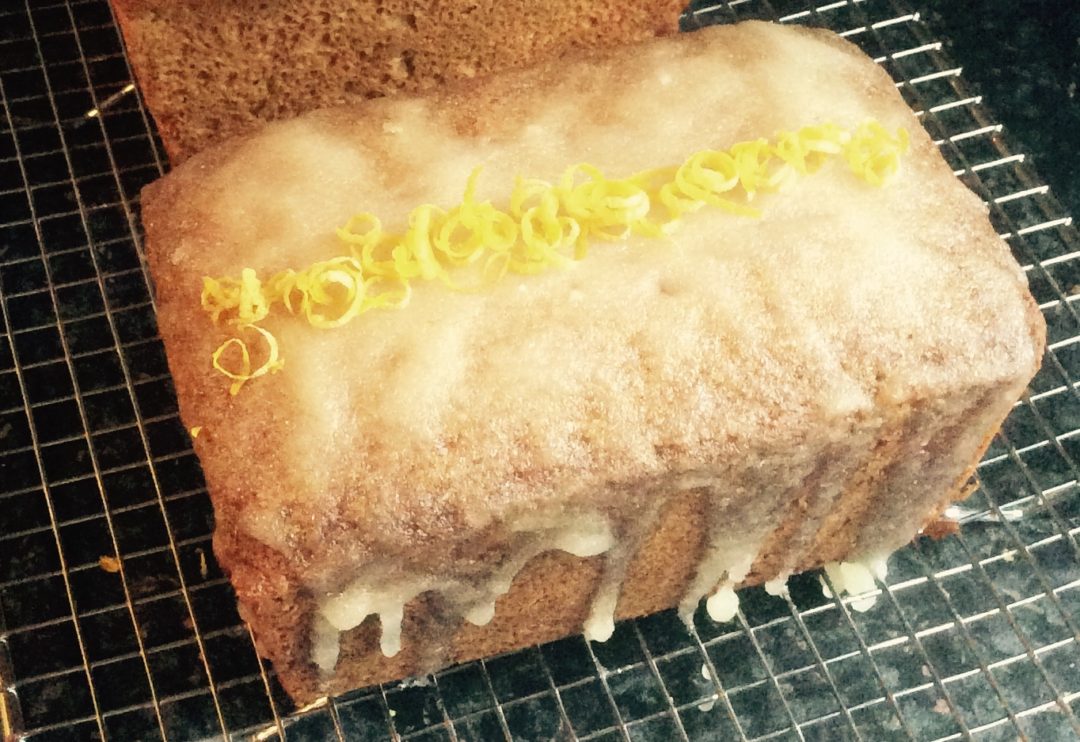
Tipsy Lemon Drizzle Cake

Print Recipe
Serves: 8 Cooking Time: 1 hour

Ingredients

  • 120g unsalted butter at room temperature
  • 170g plain flour
  • 1 tsp baking powder
  • 170g caster sugar
  • 2 tbsp milk
  • 1 tbsp lemon juice
  • 1 tbsp gin
  • zest of two lemons
  • 2 medium free range eggs, beaten up in a cup
  • For finishing the cake:
  • 100g icing sugar
  • juice of half a lemon
  • 2 tbsp gin
  • 1 x 0.5kg/1lb loaf tin, base & long side lined and then greased with butter

Instructions

1

Pre-heat the oven to 180 C/170C fan

2

Cream the butter and sugar until light and fluffy

3

Add the beaten egg, a little at a time, beating well after each addition

4

Sift the flour and baking powder into the mixture and fold in ensuring you preserve the air as you go

5

Add the lemon zest, milk, juice and gin; if you'r not using the gin, replace it with another tablespoon of lemon juice

6

Pour the mixture into the prepared tin, ensuring you haven't created air pockets by giving it a sharp tap on the work top

7

Put in the centre of the oven for about an hour and then test with a metal skewer which should emerge clean, if not repeat at five minute intervals until you have a clean skewer

8

Once cooked, leave it in the tin for five minutes then turn on the a rack to cool

9

While it's still warm I love to feed it with either lemon juice or gin or a mixture of both (you know the drill: holes with a skewer and the liquid dribbled in)

10

As it cools, mix the icing sugar with the juice of half a lemon and 1 tablespoon of gin, or you can use all lemon

11

I have tried all gin but it wasn't popular!

12

You're aiming here for the consistency of thick double cream so adjust appropriately

13

Spoon the icing over the cake - I quite like the icing to drip down the sides - and leave to set

14

Don't under any circumstances refrigerate this as something happens which prevents the icing from setting

Notes

This works as a dessert cake, served with berries, baked apricots or baked rhubarb and creme fruit, so it is a useful cake to have around. I have also tried this with orange and whisky and although I don't care for it that much, it did find a fan base.