This is such a simple recipe, I am wary of actually posting it but a good friend said that she’d never thought of it, so why not?
I think this is something that you can throw together from things you mostly have in the house anyway, plus the fact that you can add all kinds of bits you might find lurking in the fridge. I recently used a few scraps of left over Parma ham; any small pieces of salami are also good but I am reluctant to use anything fishy as i just can’t imagine how it might test. Although it might be good with lovely Morecambe Bay shrimps?
Apologies too, for the dayglo cheese; I was using up a bit of left over Red Leicester and it does come up bright! Tasted good though and that’s what counts.
I had a bit of a challenge to my Watchful principles last weekend, as I discovered three elderly bananas that were quite beyond eating “as is”, and for some reason I had neglected to eat most of the Discovery apples that had been delivered by Farmdrop.com. I can’t really explain that latter event, as I adore those apples and they have such a short season. It might have had something to do with my stuffing myself with a friend’s homegrown raspberries and the delivery, direct from Italy, of the most fragrant melon, another gift from a friend – lucky me!
Anyway, these poor apples had become a tad on the wizened side, so I made Spiced Apples (elsewhere on this site), not thinking they’d also come to the rescue in a banana emergency.
I have a fairly large collection of cookery and food books, together with favourite websites and years and years worth of good, old-fashioned clippings from magazines and newspapers. I wish I could tell you that the latter are in apple pie order and that I can lay my hands on exactly what I want in a trice. Nope. Not a hope. This lamentable lack of organisation came back to haunt me when I wanted to save these poor bananas from the bin and had a vague recollection of a good recipe from some years ago. I will cut a long and frustrating story short, by saying it took me nearly an hour to find what I wanted. Yes, there were other recipes more readily available, but stubbornly, I wanted that particular recipe that turned out to be snipped out of an American newspaper eleven years ago. It probably wouldn’t have taken me an hour if I had remained on task, but I kept discovering long forgotten gems, some of which revealed just how rusty my once fairly fluent French has become. Anyway, back to bananas.
The recipe is straightforward enough, in fact it is so simple it barely counts as cooking. Assuming, of course, one has all the ingredients…..now, I am an incurable recipe tweaker, except when it comes to cakes and baking generally. I don’t seem to have to same instinct for baking as I do for other areas of cookery, so tend to tweak only minor ingredients. I am not sure, however, it counts as minor when I discover I only have slightly more than half the required peeled weight of bananas. At this point I had greased the tin, was heating the oven and had weighed out all the other ingredients so opting out wasn’t an option. And Edoardo was expecting cake…….I sympathise, I get a bit like that when I’m expecting cheese…..
Anyway, for once I decided to tweak on a more major scale and made up the weight by using Spiced Apples that were drained of the juice that is inevitable with them. I did wonder if they would make it a bit too damp but decided to keep a close eye on the cake in the oven. For me, it is a minor miracle that it turned out perfectly: moist, light and full of flavour. I might even make this more often (cue for E’s eyes to light up – he complains he is cake-deprived normally).
I have written up what I did, but I suspect you could tinker around with the proportions, so long as it added up to 225g. And it wouldn’t have to be the Spiced Apple recipe; I might try it with raw grated apple and increase the spice content a bit. If you do try that, please let me know how it works out.
One last note; in the picture I was worried to see what looks like a lump of uncooked cake mixture but was relieved when it turned out to be a piece of apple!
I hope you enjoy this – we now call it “Leftovers Cake” but it’s not a very appetising title!
If you were to ask me, I think the first fruit I can remember eating is an apple. I also seem to think of them as always having been around all year, whereas when I was a child, fruit definitely had its season. Strawberries are irretrievably linked to tennis for me and their fragrance reminds me of my mother being glued to the (black and white!) TV during Wimbledon. Tangerines, as they were then, were Christmas, although we seem to see every variation on small citrus now.
Is there, however, more of a workhorse of the fruit bowl than an apple? Admittedly bananas work hard for their living too, but it terms of sheer versatility, the humble apple wins out every time for me.
Sadly, this very versatility led to this unsung hero being bred for volume, size and keeping qualities. We went through a very low period in the seventies and eighties when, unless you grew your own, eating apples were frankly pretty grim. The average supermarkets offered Golden Delicious, Macintosh Red and Granny Smith. Personally I find all of these unpleasant as raw eaters, either because of flavour or texture, but Golden Delicious and Granny Smith do cook well.
Many of the old British, French and Italian species became at risk as producers grubbed up old orchards to plant more profitable types. Mercifully, and largely because of the efforts of Slow Food and in the UK, the Royal Horticultural Society and its members, some enlightened retailers (take a bow, Waitrose) and a general increase in the public’s demand for flavour, many breeds were brought back from the brink.
It is now relatively easy to find scrumptious seasonal apples such as Discovery, although until I started to do some research around this lovely apple, I didn’t realise it is in fact a modern fruit. It was found in the late 1940’s in Langham, Essex and is a child of the luscious Worcester Pearmain. I absolutely adore the fragrant crispness and almost strawberry-like flavour of the Discovery, BUT it is a seasonal being and in fact becomes flabby in both texture and flavour if stored for too long. They tend also to be a tad inconsistent in size but frankly this doesn’t bother me and I actually enjoy the process of selecting the individual apples that appeal to me.
Another fragrant apple that I love is Pink Lady; it is also a modern apple, developed in the late 20th Century, in Western Australia, from a liaison between Golden Delicious and Lady Williams. It has the remarkable capacity to be consistent and until recently, I don’t think I have ever had a disappointing Pink Lady. That changed recently when I had some quite unpleasant Argentinian apples – the texture was too mealy for me. Perhaps they had been stored too long. And did you know that Pink Lady is a trademark? I didn’t; her horticultural handle is Cripps Pink and she has an equally lovely cousin called Sundowner (also a trademark), who is horticulturally Cripps Red. She, however, is not so easy to find.
In terms of other modern apples, Jazz is a likeable apple that works well in the Spiced Apple recipe below. Oh and this is another apple that operates under a nom de guerre; it is really Scifresh.
Braeburn is another apple that you will see in quantity in supermarkets and it was an apple in the right place at the right time. It became commercially viable at a point when the public wanted more in terms of flavour than Golden Delicious or Granny Smith could provide. At best, it is a crisp, fragrant and deeply flavoured apple. It does however, to my mind, have a major flaw and that is that it is hugely variable in terms of quality. Personally, I have had too many Braeburn disappointments. Rather than waste them, however, if you are unfortunate enough to have a disappointing batch, use them for the Spiced recipe and just up the spices!
The last eating apple that I want to talk about it is the wonderful Cox’s Orange Pippin. This is an older fruit, developed, it is said in 1825, and with many progeny. I love these apples when they are in prime season, becoming a tad mealy when old. That is though, a wonderful reason to eat seasonally, as it is at its best when from British orchards.
You may wonder why I have not mentioned the noble Bramley Apple in this post. Well, it is indeed a noble apple with an impeccable history of service in the kitchen. I stopped using it quite so ubiquitously when I made a conscious decision to reduce the amount of sugar I use in cooking. As I started to use other apples, I also realised that I actually prefer to eat my cooked apples when they have retained some shape and I can still see the slices. Don’t get me wrong, if I making apple sauce for roast pork, I would still use a Bramley as I do like a cloud of fluffy apple in those circumstances.
6 eating apples, peeled, cored and cut into slices about 2mm thick
juice and finely grated zest of 1 orange
zest of 1 lemon (I like to peel this with a potato peeler and then cut into julienne strips; you may have a julienne cutter but either way, I like clearly defined strips of lemon peel)
1 tbsp honey
3 pieces of star anise
1 large stick of cinnamon, broken in two
half teaspoon of powdered cinnamon
Instructions
1
Put everything into a thick based pan or casserole and simmer gently for about 30 minutes
2
Stir occasionally and watch that it doesn’t catch
3
You may need to add a small quantity of water, depending on how juicy the orange is
4
The final result should be tender but still well shaped slices, with a slightly syrupy juice
5
This is scrumptious hot, warm and cold and I serve it with either ice cream, creme fraiche or yogurt
6
It makes a fabulous filling for a pie or a crumble and can have all kinds of ingredients added (see above)
7
Edoardo is fond of this for breakfast with yogurt and seeds and I have to say I agree with him.
Notes
This recipe rose out of necessity. I had a bag of eating apples (I think they were Braeburns, but can’t actually remember), I had tried one as a raw eater but it wasn’t terribly pleasant. Well, I was at the outset of watching my budget and my conscience, so it was unthinkable to just discard the other five or so apples, even for the benefit of our local birds and foxes. I didn’t want to shop specifically for anything else to make these apples edible so instead I rummaged in the pantry. I think I have said before that pantry is a metaphor - I would dearly love a larder but have to make do with two large drawers and two shelves as my pantry. One day…….
Anyway, this recipe is made from ingredients I nearly always have in store, but I have found that I can experiment with this and use sultanas, raisins, seeds, dried apricots, prunes to add flavour to apples. This is also an extremely economical recipe if you make this with blemished apples which are often sold in supermarkets for very low prices, so do experiment. Also, you can make this with however many apples you happen to have, just scale the other ingredients up or down. It also freezes well for about three months. In truth, it so simple I feel a bit of a fraud posting it here, but friends I’ve shared it with have all liked it and mostly said “oh I never thought of doing that…”, so I’m hoping it’s not too much of a fraud!
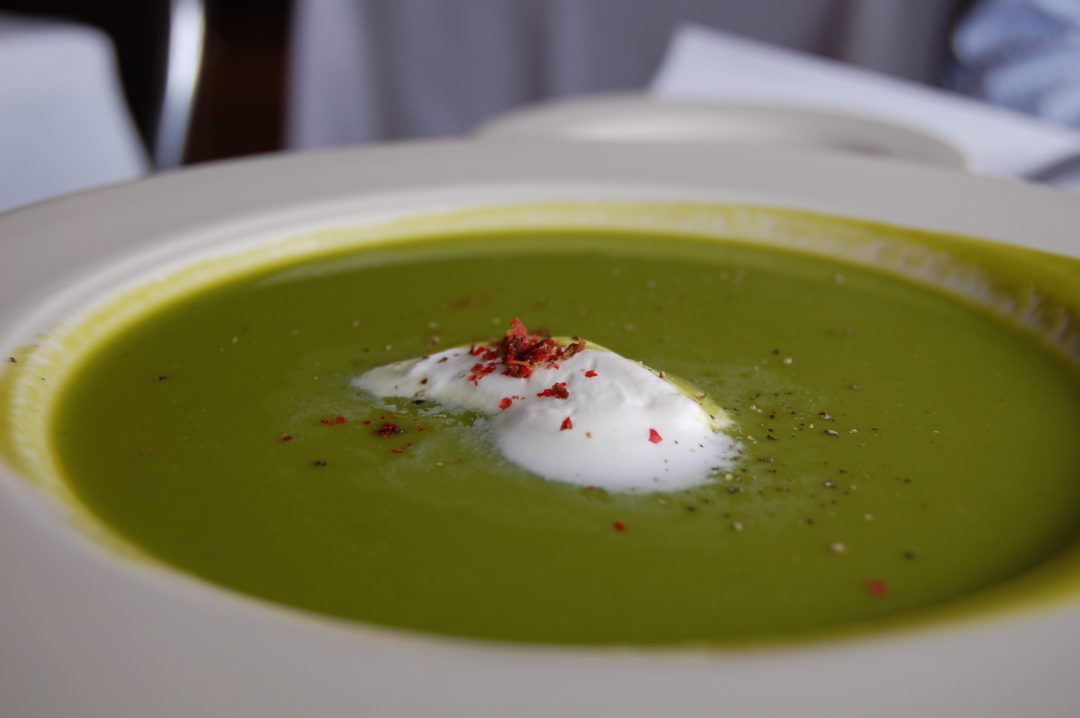
Well that was another miserable Spring Bank Holiday weekend; cloudy, cold and uninviting generally. Something had gone wrong with my quartermastering and I opened the fridge yesterday to unused fresh peas and fresh broccoli. Perhaps I should call this blog the aspiring watchful cook, as there are times when I get things wrong, but I guess now the difference is that I do something edible with the excess, rather than just throwing it away. Anyway, peas and broccoli: we’d already had risotto over the weekend, so my default soup making inclination kicked in. It was also another miserable day, not just grey and cold but absolutely chucking it down; I was drenched when I went out, so the comforting process of soup making seemed just right for the day – honestly if it wasn’t for leaves on the trees, you’d have thought it was November.
In terms of ingredients here, use what you have; I had the ordinary broccoli, but you could use sprouting and you can use frozen peas, too, but add them just before you add the stock, rather than sweating them in the butter and oil. I used both chives and flat leaf parsley as I had fragments that needed using up; I did think about mint and if this had just been a fresh pea soup, I think that would have been good, but I was wary about the combination of mint and broccoli. It also occurred to me afterwards that if I had had left over pancetta or prosciutto, that could have been crisped up and added as a topping, but I didn’t so I didn’t, if you see what I mean!
Serves: 4 as a starter or 2 for a light lunch Cooking Time: An hour or so
Ingredients
1 medium onion, finely chopped
1 small clove of garlic, finely chopped
olive oil
unsalted butter
200g fresh peas, rinsed and podded if necessary (mine came podded already)
1 head of broccoli, broken into small florets
0.75 ml vegetable stock (as usual, Marigold or Kallo is fine and if you have pods, let them steep in the hot stock for a while to boost the flavour)
salt and freshly milled pepper
cream, yogurt or creme fraiche
chives or flat leaf parsley, very finely chopped
Instructions
1
In a thick based pan or casserole, heat about 1tbsp each of olive oil and butter, add finely chopped onion and garlic
2
Sweat over a low to medium heat without colouring until they are soft and fragrant
3
Add the broccoli and mix around until well coated with the oil and butter mixture, add the peas and cook gently for two or three minutes
4
Add the hot stock, partially cover and simmer for about 30 minutes
5
When the soup has reduced by about 20% and the broccoli and peas are soft, allow to cool slightly, blend to a consistency that pleases you and adjust the seasoning
6
Serve in warm bowls, stir in your dairy of choice and top with herbs.
Notes
Scrumptious with the simple wholemeal bread posted elsewhere on this site.
We love wild red rice but gosh, it’s expensive! If you find cheap wild rice, I’d look very carefully at the contents as you may find that there is a small percentage of the contents mingled in with cheaper rice. My favourite is Organico Wild Red Rice, grown by the Picco family in the northern Po valley. The first time I encountered the rice fields of northern Italy, I felt as if I had been whizzed off to Asia, as I found it a strange experience to encounter this landscape in Europe, but of course this crop has been grown in Italy for centuries. The Rice Exchange in Vercelli is testament to the business – don’t be deceived by the modernity of the building; there has been an Exchange in Vercelli for centuries.
Flying over the rice fields of Northern Italy exposes the lattice of man made irrigation canals that date back, for the most part, to the mid 1800s but I have written elsewhere, at some length (too long – Edoardo) about the fascinating history of rice cultivation in northern Italy, so I shall shut up here. If you are interested in reading about the hows and whys of rice in Italy, nip over to the pages called Riso con Riso.
Anyway, back to the food. Saturday dinner was roast cod, peperonata, spinach and wild red rice. We have left-overs of rice and of peperonata, so what to do? The peperonata was easy as it makes a scrumptious if unconventional sauce for pasta. It works better if the peppers are sliced smaller – easily done in the pan with a wooden spoon if the peppers have been cooked for long enough – and I add more chopped basil. A suggestion of chilli (dried is perfectly fine) can also change the character of the dish so that it doesn’t feel quite so like left-overs.
The rice sat in its dish, staring balefully at me. I suppose there might have been a couple of heaped tablespoons so not a huge amount but no way was it going in the bin. Or even out for the birds…it’s May, they’re not starving. So, after a rummage in the fridge, a sort of Greek salad emerged.
Left-over red rice - about two or three heaped tablespoons
1 large salad onion or shallot, finely chopped
3cm piece of cucumber, peeled and chopped into 5mm dice (I also take out the wet seedy bit in the middle but up to you)
Half a red pepper, again chopped into 5mm dice
Half a dozen green olives, sliced into rings (they were already pitted)
About twenty chives, scissored into 2mm pieces
Chopped flat leaf parsley - about two tablespoons
Finely grated zest of half a lemon
100 g (ish) feta ( I happened to have some Waitrose barrel aged left but use what you have)
Half a large clove of fresh garlic, crushed with sea salt under the blade of a knife
Black pepper
Juice of half a lemon
Olive oil - about four or five tablespoons
Instructions
1
Mix the ingredients together using a fork rather than a spoon (means you won’t break the grains), to ensure even distribution and then mix up the dressing, tasting as you go.
Notes
We like small pieces in a salad like this, and I prefer the vegetables to be proportion to the size of the rice grains, but frankly that’s just my preference. If you like bigger chunks, use them! Also, use what you have in the fridge and in truth, on another day, this may have looked very different. I can imagine using left over broccoli, asparagus, grated carrot, walnuts, toasted pine nuts, orange in place of lemon (in which case, I think black olives would be lovely) and replacing the feta with shredded cold chicken, duck (oh yes - lovely with black olives and orange) or beef. It could be spiced with a scrape of cinnamon and sultanas for cold lamb…..I could go on and fear I might, so I shall stop and go and eat it. I am thinking that a glass of cold white wine (a personal favourite is Gavi) might go quite well……..
It is my observation that in Italy people do cook more from scratch, in all income brackets and across all the age groups. And EVERYONE can make a risotto (or at least everyone I know)! I know that some people regard it as a bit of a monster, but honestly, it isn’t. It is a really useful basic technique to have and I was very lucky to have been taught by a Milanese lady, in Milan, in the 90’s. So to my mind, I have been taught in the best possible way and have been given an understanding of and feeling for the ingredients that I’m not entirely sure you can get from books – or blogs! Making risotto is not something that is the same every time you do it and you need to develop (literally) a feeling for the way the rice is behaving in the pan: how heavy it feels, how it smells, tastes and even sounds. Unless you have a gifted donna Milanese to hand, the only way is practice, practice, practice.
Rice production is big business in northern Italy, the cultivation dating back as far as I can tell from my research, to about 1475 when Galeazzo Maria Sforza, Duke of Milan claimed that one sack of rice, properly cultivated, could yield another twelve sacks. He certainly promoted the cultivation of rice (and indeed the commercialisation of silk and wool weaving, although in most other respects, he seems to have been a bad hat), going so far as to sponsor the construction of canals for irrigation. There is evidence that the Romans knew of it as a costly import from India, the grain being reserved to make a dish served to those suffering digestive ills or to the very rich. By all accounts it sounds rather like our present day British rice pudding.
The industrialisation of rice production was hugely aided by the construction between 1863 and 1866 of the Cavour Canal. This takes water from Italy’s longest river, the magnificent Po, starting at Chivasso, north east of Turin and ending at Galliate, north west of Milan and all within the region of Piedmont. These days, rice harvesting is mechanised using what look to my untutored eye like combine harvesters and doesn’t look in the slightest like the scenes from “Bitter Rice”. In the past – in fact up until the 60’s – rice was harvested by hand by teams of women who would invade the rural rice growing areas to spend their days barefoot in water, bent double harvesting the grains by hand. They would be accommodated in fairly spartan barn-type buildings, which these days are being gentrified into designer homes. I do know of one remaining “dormitory” which having been abandoned, is now occupied only by wildlife. Edoardo and I are going to re-visit it shortly, as like a fool, I didn’t take any photographs when I was last there. I will post when I’ve revisited – just hope it is still there and hasn’t been swathed in scaffolding for rebuilding – not yet anyway.
So, to the recipe itself and I’ll talk a little about ingredients first.
You start with selecting the correct rice. Most important and I have been party to some spirited debates in Italy about which rice is used for which risotto! There are three grades of rice: semifino, the smallest grain; fino and superfino, which has the largest grain. Within each of those, there three varieties:
Arborio which makes a dense, sticky risotto, perhaps a tad stodgy but also tends to be the cheapest of the three and honestly, it makes a perfectly acceptable risotto for most occasions
Vialone nano has a round, thick grain (a bit like our pudding rice) and can take quite a lot of rough and tumble before it breaks (broken rice in a risotto can be a sign of poor technique) and is very absorbent. I use it with big, hearty ingredients
Carnaroli is my personal favourite with long, slender grains that can absorb enough liquid to be creamy but never go stodgy. If you are making a risotto with premium ingredients such as asparagus, saffron or seafood, I’d always recommend this rice as it is a little more elegant than say, arborio.
My favoured brands are Acquarello and Curtiriso, the latter partly because not only is it is good rice but also because their production process is carbon neutral. I usually bring both brands back from Italy but Curtiriso can also be found in the UK on-line at www.nifeislife.com If you can’t get either of these, use what you can get but please make sure it is rice actually grown in Italy – don’t be deceived by an Italian looking label!
You will also need onion or shallot. I prefer shallot, especially if I am making a seafood, saffron or asparagus risotto, as it has a more subtle presence. If you only have onion, don’t fret, just ensure you chop it finely so it renders down quite easily. You don’t want to see pieces of shallot or onion in the finished dish. Sometimes I use a stick of celery as well, but optional.
Stock is a subject that seems to send otherwise sane, pleasant people to borders of insanity. Yes, life would be wonderful if one had a permanent supply of freshly made vegetable/chicken/veal stock on hand and sometimes I do have it. I do know of someone who declaims that “no Italian would make risotto from a cube so I don’t”. Huh, this from someone who has never been inside an Italian’s kitchen, speaks no Italian and – here’s the paradox – buys ready grated Parmesan. Don’t let absence of fresh stock deter you from making a risotto, but do choose your cube or powder with care. I can recommend Kollo, Marigold and an Italian brand called Star. The latter do a porcini flavoured cube which is excellent for an autumnal risotto al funghi and if you’re in Italy, they are in every supermarket and take up no room at all to bring home.
Cheese – ah, now this is probably where I become borderline insane. Ready grated Parmesan is not worth spending money on. There, I’ve said it, but honestly, I can find nothing good to say about it. Please, please if you only do one thing to upgrade your risotto, buy your Parmesan or Grana Padano in a biggish piece, preferably 18 – 30 months old. You don’t need fancy-smancy graters, either. I just use a normal three sided grater (of venerable age, I might add) and I use different sized grating faces, depending on whether the cheese is going in or on the risotto. I am writing extensively elsewhere about the virtues of Parmesan and its history so will leave it there for now.
Alcohol. It is nice to slosh some white wine into a risotto but in fact, I use Martini Extra Dry more often as we don’t drink that much white wine. And talking of which, what has Martini done with those fabulous fin de siècle bottle labels? This new minimalist label looks a bit “supermarket own brand” to me. Anyway, again, if you don’t have anything, don’t let this deter you from a risotto.
Butter. Possibly another of my rants coming on here, but I’ll try to contain myself. The final step in making a risotto is the mantecatura. This is resting the risotto and adding cold butter and grated cheese (not the latter for seafood or fish) and stirring in an enthusiastic manner until everything is creamy and emulsified. Please, please do not use salted butter, it will radically unbalance the seasoning and it you who controls the amount of salt in this dish. Salted butter has its place (hot, buttered toast!), just not in a risotto.
OK let’s start. Oh, sorry. One last thing. Risotto making will be easier if you have a pot or pan with a thick, heavy base and fairly shallow curved sides. Curved sides make it easier to scrape up and include every grain of rice and stuff doesn’t get stuck in corners, because there aren’t any! For stirring, I use a wooden spoon as it much gentler on the rice than metal and I can’t stand the sound of metal on enamel. Again though, don’t let absence of the perfect utensil put you off at first. If you become a devoted risotto maker, then you might want to save up and invest in perhaps a Le Creuset Buffet Casserole, which for me, is the perfect pan for this dish. Having said that my teacher in Milan had a battered old double handled shallow aluminium pan that belonged to her grandmother and which was the workhorse of her kitchen.
Serves: four as a first course, two as a main Cooking Time: About an hour including prep
Ingredients
1 small onion or shallot, finely chopped
1 clove of garlic, crushed with a scrap of salt under the blade of a knife
50g unsalted butter
400g Carnaroli rice
2.5 litres of hot stock
100ml or so of dry white wine or Martini Extra Dry
salt and freshly ground black pepper
To finish
75g cold unsalted butter, in small cubes (dice sized)
100g or so of finely grated Parmesan or Gran Padano
Instructions
1
In a separate pan, keep the stock simmering and melt the butter over a low heat, adding the shallot and garlic
2
(In the spirit of sharing and pragmatism, I will say here that if I am making risotto with stock powder or cube, I make it with boiling water in a good old Pyrex jug and it stays plenty hot enough during the making; if it cools too much, I just heat it up a bit in the microwave)
3
Allow shallot to soften and become translucent but there must be no colour at all, which would adversely affect the flavour
4
Turn up the heat a bit to medium and add the rice and stir enthusiastically
5
Ensure the grains are well coated with the butter and are cooking well; you will notice that the dish is making slightly different noises once you have added the rice
6
Do not allow the rice to take on any colour. Confusingly this phase is called tostatura in Italian but toasted looking is not what we want here!
7
It is however, important that the dish is hot before we add the alcohol
8
Add the wine or Martini, keep stirring and allow the wine to almost evaporate
9
The mixture might look quite dry at this point
10
Add a ladle-full of stock and stir, scraping down the sides and across the base of the pan
11
We need the rice to cook evenly so it all needs to move around and evenly absorb the stock
12
Don’t let it catch on the bottom or sides of the pan - any taint of scorching will ruin the dish
13
At this point, I sometimes turn the heat down a tad; you want the risotto to bubble steadily but not at a rampant boil
14
Again, you will notice that the dish has changed its soundtrack
15
After the first ladle has mostly been absorbed, but the risotto is still runny and mobile, add another ladle-full
16
Keep going until you have achieved a moist and mobile consistency but not dry
17
If it is too liquid, looking more like soup than risotto, let the rice absorb the excess stock and also the stock to evaporate
18
It’s easier to slacken off a too-stiff risotto than serve a dismal, soupy dish with excess stock puddling on the plate
19
Take the pan off the heat and allow everything to rest for a moment.
20
This includes the cook who should have been working vigorously up to this point. A fine moment for a reviving slurp of something, I find. For me, I mean, not the risotto.
21
Now for the mantecatura:
22
Quickly beat in the cold butter, working as you would to stir polenta
23
Add the cheese and taste for seasoning - if the stock and cheese are salty you may not need salt at all
24
Test that you have the correct consistency by tipping the pan sideways; if you have got it right, it should ripple like a wave, hence “all’onda”
25
Serve in warm shallow bowls with extra cheese or put the whole lot in a warm dish on the middle of the table and let everyone help themselves
26
if you are making a risotto with additional ingredients, for example mushrooms, nettles (yes really - delicious), asparagus, I usually add the prepped ingredients after the rice and before the wine. There are other schools of thought and all are correct - this is where you do what works for you and I have written about specific risotto in other posts. This is the point where I will say that personally, I dislike cheese with a fish or seafood risotto and you will not find it in a proper risotto in Italy, but again, if it floats your boat….
Notes
If you would like very detailed guides to risotto making, I would unhesitatingly recommend the following:
Made in Italy, Food and Stories by Giorgio Locatelli, published by Fourth Estate - a wonderful book, from which I have learned so much
The Classic Italian Cookbook by Marcella Hazan, my copy is published by Papermac; I think this might be out of print in this format but second hand copies are available
My copies of both of these books are stained, splashed and have broken spines where they have been forced flat in my kitchen. That may offend some book lovers but to me, they are honourable battle scars and demonstrate the genius of the author in creating something so manifestly fit for purpose.
My final words are to implore you not to get stressed about risotto, which can, in the UK, have a reputation for being tricky achieve and do remember that in the Italian language, “riso” not only means rice but also laughter!
I love making soup and it is a default when I open the fridge and am faced with left over broccoli or pretty much anything. This soup is so delicious, however, that I encourage you to buy asparagus just for this. You can sometimes find sprue, which is thin, weedy stuff that would get sand kicked in its face on the beach, but is fab for soup making and is cheaper than the muscly stuff you need for cooking naked (the asparagus, not you….but I’m not here to judge). Markets are better hunting grounds for this than supermarkets and keep your eyes peeled, especially towards the end of the season. The quantity is fairly arbitrary, as you can just adjust everything else dependent on how much “grass” you have. I usually make soup in an ancient and much loved Le Creuset 20cm casserole, but as long as whatever you use has a thick base, use what you have. In terms of finishing the soup, my preference is Ivy House Farm (ivyhousefarm.com) Jersey single cream (available from farmdrop.com) and a miniscule amount of finely chopped chive, but this is good with yogurt or creme fraiche and parsley. I have tried this with mint, thinking it was a summer herb and might complement the asparagus well. Horrid: what was I thinking. Only thing I would caution against is swamping the wonderful asparagus flavour by using too much of any of your preferred finishes. Oh and I don’t think this works as a chilled soup either, but try it – you might think differently!
750 ml hot vegetable stock (Marigold or Kallo is fine)
chives or flat leaf parsley
cream, yogurt or creme fraiche
salt and freshly ground pepper
Instructions
1
Add 1tbsp of oil and 1 tbsp butter to pan and add shallot and garlic, keep heat low to prevent colouring and soften, added a modicum of salt at this point
2
While this is happening, chop the stems into pieces about 1cm long, after snapping off and discarding any woody ends
3
Add to the pan and stir around cooking gently without colouring; add some freshly ground pepper at this point and then add the stock
4
Partially cover and simmer for about 25 minutes; the asparagus needs to be soft and the liquid to have reduced by about 20% in order to concentrate the flavour
5
Turn off the heat and allow to cool slightly
6
Blend to the point that pleases you: sometimes I like a very smooth soup, other times, I like to see a few green chunky bits bobbing around. If I want it to be very refined (not often!), I will sieve it but for me, adding refinement also risks removing some precious asparagus flavour
7
Serve into warmed dishes, stir in your choice of dairy and sprinkle lightly with finely chopped herbs
Notes
Serves four as a starter or two for a substantial lunch with Ballymaloe Bread. This also freezes well if frozen prior to adding the cream and I quite like having some squirrelled away for those cold summer days that we inevitably get in the UK.
I suppose this is based on a quiche but having experimented, I have decided that for me, a shallow tart with a crisp, short pastry gives the elegant proportions for asparagus. With other ingredients, I might use a higher proportion of filling to pastry (ie a deeper tart) but somehow, this works well as a light, summery savoury tart. Oh, and I unapologetically use my Magimix for making pastry, as I don’t have a light hand with pastry, but do what works for you! In terms of the cheeses, I have made this with Cheddar, Cheshire, Emmentaland Gruyere in the egg mixture and it’s worked well. Parmesan in the mixture was less successful, as was Roquefort, both of which overpowered the asparagus (although I have other recipes using both of those in the mixture that are yummy). Dusting the top with Parmesan isn’t essential either and you can equally use Padano. We love this served warm, not hot, with a crisp green salad and a chilled white wine. I prefer not to use lemon juice in the salad dressing where I’ve used asparagus; somehow, for me, the flavours of asparagus and lemon fight unpleasantly so I avoid putting them together on the same plate.
When the first English asparagus hits the shops in late April, early May, it scarcely seems possible that one can have too much of a good thing. I know that one can now have asparagus all year round, but to me it is one of the last true seasonal foods left. I don’t buy anything but English and make the greedy most of the short season.
It is just so easy to prepare and no, it isn’t necessary to have a special pan for cooking it, although admittedly the stems take longer to cook than the tips. To get round this, I tend to steam rather than simmer, as I can prop up the tips on the side of the steamer and then poke them back down for the last two minutes.
If I roast them, there isn’t really any way round having crunchier tips than stems but as they still retain intense asparagus flavour, I tend to just accept that’s how things are. For such a wonderful food, small compromises are worth it, I find.
Asparagus has an interesting history and appears as an offering to the gods on friezes from circa 3000BC. The Romans loved it so much that their followers of the Greek Epicurus developed ways to dry it and in the high Alps, freeze it for the Feast of Epicurus which I think is our January. In the Attic calendar it was in Gamelion which is difficult to equate to our modern calendar as it was Lunar, not Solar. Anyway, if you can help me out on understanding that, please feel free!
Its first appearance in a cookery book is in the oldest surviving book, Apicius’ “De re coquinaria” from the third century AD. Galen mentions it as beneficial to health in the second century AD and then it disappears from writings until about 1410, when it appears in al-Nefzaoui’s famous “The Perfumed Garden”, although the earliest translation into English that I can find is 1886, by the famous explorer Richard Francis Burton. I found some interesting uses for Cinnamon in that, but we’ll stick with asparagus here! It is perhaps from al-Nefzaoui that asparagus gains its (clinically unproven!) reputation as an aphrodisiac and it is documented as having been a favourite of Madame de Pompadour……..
It also, of course, has another reputation which I will ask Marcel Proust to describe: “all night long, after a dinner at which I had partaken of [asparagus] they played at ……..transforming my chamber pot into a vase of aromatic perfume”. Always overdoes it, does Marcel Look what a madeleine did to him. Nice enough with a cup of tea, but I ask you….
There is also a perception that asparagus is difficult to pair with wine. My own view is that it difficult with a tannic or oakey wine, which according to my in-house Sommelier is because of the asparagusic acid (the culprit in making Proust go over the top), which is an organosulphur carboxylic compound. This is the point at which my eyes glaze over until Roberto returns to the wine itself, preferably opening one. Anyway, his advice is to go with Sancerre, Pouilly Fume or Riesling. My favourites are Italian Verdicchio or Orvieto, but take the time to search out decent ones. Italian whites seem to be marketed in supermarkets at the “I’ll drink anything as long as it’s cheap” consumer, so it may be better to find a reliable vintner who takes Italian wine seriously.
I think I will leave the last words on asparagus to Samuel Pepys. I am quite fond of Sam although he had some less than admirable attitudes and habits; you have to have some affection for a man who, when the Great Fire of London threatened his home, thought more of saving his Parmesan cheese than his silver: “So home, and having brought home with me from Fenchurch Street, a hundred of sparrowgrass, cost 18d. We had them and a little bit of salmon, which my wife had a mind to, cost 3s” April 20 1667.
Much as I adore our wonderful English sparrowgrass, after about four weeks, however, the joy of having simply cooked fresh asparagus with either melted unsalted butter or hollandaise begins to, well, not pall exactly but I begin to cast around for Other Things To Do. Much depends on how much effort I feel like putting in, so it might be as simple as roasting it, wrapped in Parma ham and finished with flakes of Parmesan. I also have three recipes which have become firm favourites, none of which is complicated and in fact, the base recipes can be re-used with other ingredients.
75 g Carnaroli rice (Arborio can be used but I prefer Carnaroli as it produces a creamier risotto)
1 shallot, chopped finely (you can use onion; shallot gives a more subtle flavour)
1 clove fresh garlic, chopped finely (juicy fresh garlic is seasonal at the same time as asparagus but you can use dried)
1 litre hot vegetable stock (can use chicken but I prefer to keep the “purity” of a vegetable based dish)
Unsalted butter
Olive oil
Finely grated Parmesan cheese - about 40g
White wine or dry martini (optional!)
Saffron, either the powdered or pistils (the crocus “threads”); if the latter, soak a couple in a couple of tablespoons of warm water
Instructions
1
Start by preparing the asparagus: snap off the bottom of the stem where it naturally wants to bend
2
Steam for about 5 minutes, drain and chop into short pieces about 1cm long; separate the stem bits from the tips as you will add them at different points
3
The snapped off end bits can be steeped in the stock to rev up the flavour, then discarded; I find this worth doing but don’t worry if you forget
4
Using a wide thick based pan (I use a Le Creuset casserole that is wide and shallow), add about 1tbsp of olive oil and a good knob of butter over a low to medium heat
5
Add the onion and garlic and soften but don’t let anything burn, keep stirring around
6
Add the rice and allow it to gain some transparency
7
Add the alcohol element - about a glassful of either a dry white wine or slightly less of dry martini
8
Turn up the heat slightly and keep stirring until the alcohol has evaporated and been absorbed
9
Add the stem pieces of the asparagus with the first ladleful of stock, stirring all the while and add the stock by the ladle, keeping an eye on the heat as you don’t want the risotto to burn
10
Adjust the heat as necessary to avoid boiling or burning
11
Add the saffron around this time but go easy with it, the risotto doesn’t need to glow in the dark!
12
After about four ladles of stock, start to check the rice - eventually you want slightly softer than al dente and don’t worry if you don’t use all the stock, or indeed if you need to top it up with hot water
13
When you get to the last couple of ladles of stock, add the asparagus tips and when the stock is absorbed, turn the heat off
14
This is the only tricky part of risotto, as you don’t want to end up with a stodgy mess, nor do you want a soup; the Italian phrase is that is should be “all’ onda” - like a wave, so you’re looking for the rice to have some movement but not sloshing around like a soup
15
At this point, stir in a couple of good sized knobs of unsalted butter and two or three tablespoons of finely grated parmesan (in truth, add to taste but try not to swamp the flavour of the asparagus)
16
Now taste for seasoning, adding salt and freshly ground black pepper to your taste
17
Serve more Parmesan at table
Notes
If you have the technique of risotto under your belt, you will open a huge reservoir of recipes that you can vary to suit what you have and indeed, what you like. Quantities can vary every time you make the same risotto, as small things such as changing the brand of rice you use can make a noticeable difference to the quantity of stock you need. I can advise you only to practice, tasting as you go and experiment with ingredients. Small things do make a big difference to flavour, such as using unsalted butter, buying good quality parmesan in a piece and grating your own and if you don’t have fresh stock, use a good powder like Marigold or a Kallo cube.
When our British weather sends us something miserable, is there anything more comforting than a bowl of homemade soup? Is there anything else that tells us that life isn’t that bad and it will get better? (OK, so wine or chocolate work here too) After all, think of the theme of so many of the advertisements for bought soups; they usually focus on the homely theme or on the fresh and natural aspect. So far, so good – until you read the ingredients or check the cost. Not so good.
I read recently that tinned soups are one of the biggest offenders for salt and as for ingredients, I am speechless (not a frequent occurrence….). What on earth are Wheat Flour, Citric Acid, Modified Cornflour (modified how?), Polyphosphate and Sodium Phosphate doing in soup? Fresh soups are by far and away less offensive on the ingredient front but that is unfortunately reflected in the price.
It is possible to easily avoid these dilemmas by making your own. It is so easy to make soup, it almost criminally simple and once you have the Foundation Recipe under your belt, you can use whatever ingredients are seasonal, well priced, or just what you fancy!
Before I dive into the Foundation Recipe, I want to just make a few comments on the ingredients I have listed:
I soften my onion, carrot and celery mixture in olive oil, unsalted butter or a mixture of both. It depends on the flavour I want to achieve; you’re free to use what you like, including sunflower oil. Personally I avoid rapeseed oil as I can always detect it in a soup (or indeed in most dishes) and I dislike it.
Note too that the ingredients I just listed are not mandatory. I pretty much always use an onion (or shallot if I want a more subtle flavour) and frankly, carrot and celery isn’t always needed. I find it helpful to just take a moment before I decide, to imagine the end flavours I want to achieve; if it doesn’t include carrot or celery, I don’t use them.
Stock is a fraught subject that can bring normally calm, restrained cooks to scarlet-faced fury. Yes, it is lovely if you can always have homemade chicken stock to hand and if you have had a roast chicken and you have the time, yes, make some. But, please, don’t stress about it, or even shy away from making soup simply because your freezer isn’t stocked with homemade stock! It is perfectly acceptable to use bought stock (Waitrose and Truefoods both produce excellent stock without salt) and I always have Marigold Organic Reduced Salt Bouillon Powder and Kallo Organic Very Low Salt Vegetable Stock Cubes in the cupboard. That Swiss brand or the three letter brand – don’t even go there. Have you read the ingredients?
Garlic – love it, so it finds its way into most of my soup. If you don’t like it, don’t use it but might I plead with you to give it a gentle try in at least tomato soup?
OK, sermon over, let’s get started. I have tried to give very clear instructions here and if I have over done it and trespassed into the “teaching my grandmother to suck eggs” territory, sorry, but some of you might never have done this before and I am a tad evangelical about the numerous benefits of homemade soup!
In terms of cost, this comes at about £1.29 and can serve four as a first course or two for lunch as a single course. This compares well, I believe, with about £1.89 for 600m of fresh tomato soup in the supermarket. Yes, tinned tomato soup is cheaper, at about 99p for a well-known brand. But does it really taste of tomato?
Now, moving on to other flavours. You can make soup from pretty much any vegetable, pulse or bean. Let’s say you want lentil soup: soften the soffrito as above then instead of tomatoes, add a couple of handfuls of red lentils and perhaps cumin and a scrap of dried chilli flakes. You might need more of the stock at this stage and also, lentils are devils for catching on the bottom, so keep the flame low and stir frequently, while the soup simmers lazily, with the occasional plop. You might want spinach and broccoli soup, so add washed broccoli florets, let them cook for about 10 minutes and then add washed, torn spinach, cooking for another ten minutes or so. This is splendid with a scrape of nutmeg and a generous amount of cream and in my mind, does need blending before adding the cream.
You can experiment, vary and play with this foundation recipe to your heart’s content. The only thing I would say is try to keep it seasonal and use left over vegetables, too. They just need less simmering. I did try to make something once with left over roast potatoes. Don’t. Just don’t. Horrid. Oh and taste, taste, taste as you go, and if you do succeed with roast potatoes, let me know!
1 medium onion, peeled and chopped into 0.5mm dice
1 medium carrot, peeled and chopped into 0.5mm dice
1 stick celery, chopped into 0.5mm dice and if it’s a bit stringy, swipe a potato peeler down it to whisk away the strings
This combination is called a soffrito in Italian cookery. I know it exists in French cookery too, but a) I can’t remember the French word for it and b) my heart is in Northern Italy and particularly in her kitchens!
1 tbsp olive oil
1 tbsp unsalted butter
1 (or more) cloves of garlic, finely chopped, or crushed under the blade of a knife (see over in My Kitchen under Techniques for how to do this)
I tin Italian tomatoes, chopped or whole - no matter - but they MUST be Italian
a few sprigs of fresh thyme
1 tbsp Italian tomato puree
1 litre chicken or vegetable stock - see above
salt and freshly ground pepper
Instructions
1
Take a pan or flameproof casserole with a thick, heavy base. I use an ancient and much loved 20cm Le Creuset which has been with me for more than 30 years
2
Put it on a low heat, add the oil and butter then the soffrito, stir and allow to soften until everything becomes soft and fragrant
3
Under no circumstances allow this to burn, so you might need to be a bit hawk-like at first, until you understand how your pan and flame perform together
4
You can add a modicum of salt at this point, but go easy
5
Add the garlic and soften that too, but again no burning, as burnt garlic is just horrid
6
I like to add the thyme at this point and to be honest, don’t always bother to strip the leaves off the stems; they will fall off in the process of cooking and just remember to fish out the stems before you blend
7
Add the tin of tomatoes all in one go; if they are whole, mash them up a bit with a wooden spoon
8
Add the tomato puree and then the stock, using at this stage probably about 750 ml, and stir everything round
9
Add a few grinds of pepper, partly cover the pan having brought the contents to a gentle simmer
10
Leave it for about 20 - 25 minutes, stirring occasionally to ensure nothing catches on the bottom
11
The soup should reduce a little during this process, which helps to concentrate the flavour
12
Turn off the heat and let the soup cool a little
13
This is the point at which I like to blend a soup, usually using a trusty Kenwood Stick Blender which is just so easy to wash up (just remember to fish out the thyme stems!)
14
You can of course, use a conventional blender or food processor, and indeed you can leave it chunky and rustic
15
After blending, it may appear quite thick so just thin it out with the remaining stock
16
To finish, swirl in some cream, yogurt or creme fraiche and top with a sprinkle of finely chopped chives or parsley