This is such a simple recipe, I am wary of actually posting it but a good friend said that she’d never thought of it, so why not?
I think this is something that you can throw together from things you mostly have in the house anyway, plus the fact that you can add all kinds of bits you might find lurking in the fridge. I recently used a few scraps of left over Parma ham; any small pieces of salami are also good but I am reluctant to use anything fishy as i just can’t imagine how it might test. Although it might be good with lovely Morecambe Bay shrimps?
Apologies too, for the dayglo cheese; I was using up a bit of left over Red Leicester and it does come up bright! Tasted good though and that’s what counts.
The idea for this blog came when I realised, after leaving my corporate life, how much food I was throwing away, if I had over-provisioned (that happened SO often). It was therefore a stark reminder of my old life when towards the end of last week I was faced with leeks, feta cheese, an astonishingly pretty striped aubergine, a couple of San Marzano tomatoes and the dregs of the carton of creme frâiche. A rummage in the dry goods drawer also revealed a sad, almost empty bag of pearl barley. This post therefore, is not quite episode 3 of Supermarket Siesta which follows later this week, but I felt did talk to the origin of this blog.
The weather had begun to feel more like autumn, although not yet cold enough to trigger my soup-making (although enough to make me feel like Kanga counting Roo’s vests). So what to make? When in doubt, consult Elizabeth David is my motto and after half an hour in her company, and an espresso, I had inspiration, although I have to say I made most of this up as I went along.
So here are two simple recipes that are quick, reasonably priced and can be dressed up and down to suit either a solo lunch or supper at home, or serve as starters or main courses. I have a number of vegetarian friends and these work well for them, although I’m still working with a limited repertoire for vegans. I don’t seem to be able to get past using eggs, cheese and butter; my fault I know and I probably need to find the time to do a whole lot more research.
I think the stuffed aubergines will be a regular through the autumn and winter and I’m looking forward to playing around with the flavours.
2 sprigs thyme, leaves stripped and chopped (I don’t always bother to chop as I don’t mind seeing the little leaves in the finished recipe)
0.25 tsp ground cumin
finely grated zest of half a lemon
1 dsp capers, rinsed and chopped
40 - 50 g feta cheese
2 tbsp dried breadcrumbs
Salt and freshly milled black pepper
A greased oven tray
Instructions
1
Pre heat the oven to 200 degrees C/180 degrees fan
2
Set the pearl barley to cook over a moderate flame until al dente then drain
3
Cut out the flesh of the aubergine, chopping it into 1cm dice. Leave a slim shell of aubergine skin and set aside.
4
I find an old grapefruit knife remarkably useful for this operation. Try your best not to pierce the shell as it will leak horribly.
5
Heat the oil in a thick based pan and soften the shallot and garlic, without letting them colour
6
Add the aubergine flesh and cumin and cook until the aubergine begins to soften
7
Add the tomato, thyme and barley and mix well
8
Allow to simmer until the mixture is quite dry - the tomato juices must evaporate to stop the mixture being sloppy and also to intensify the flavours
9
Add the grated lemon zest and capers and check the seasoning
10
Fill the two aubergine shells, packing the mixture quite firmly
11
Crumble over the feta cheese and finish with the breadcrumbs
12
Cook for 25 - 30 minutes until the stuffing is hot, cheese melting and the aubergine shells a bit wrinkly
Notes
I prefer to eat this warm rather than hot and like it with either a simple green salad or buttered savoy cabbage.
Feel free to experiment with the spices here; I can imagine cinnamon being good and to shake things in a different flavour direction, ground cardamom and/or fennel seeds. Just thought - dried porcini mushrooms, soaked and finely chopped could be good too.
I had a bit of a challenge to my Watchful principles last weekend, as I discovered three elderly bananas that were quite beyond eating “as is”, and for some reason I had neglected to eat most of the Discovery apples that had been delivered by Farmdrop.com. I can’t really explain that latter event, as I adore those apples and they have such a short season. It might have had something to do with my stuffing myself with a friend’s homegrown raspberries and the delivery, direct from Italy, of the most fragrant melon, another gift from a friend – lucky me!
Anyway, these poor apples had become a tad on the wizened side, so I made Spiced Apples (elsewhere on this site), not thinking they’d also come to the rescue in a banana emergency.
I have a fairly large collection of cookery and food books, together with favourite websites and years and years worth of good, old-fashioned clippings from magazines and newspapers. I wish I could tell you that the latter are in apple pie order and that I can lay my hands on exactly what I want in a trice. Nope. Not a hope. This lamentable lack of organisation came back to haunt me when I wanted to save these poor bananas from the bin and had a vague recollection of a good recipe from some years ago. I will cut a long and frustrating story short, by saying it took me nearly an hour to find what I wanted. Yes, there were other recipes more readily available, but stubbornly, I wanted that particular recipe that turned out to be snipped out of an American newspaper eleven years ago. It probably wouldn’t have taken me an hour if I had remained on task, but I kept discovering long forgotten gems, some of which revealed just how rusty my once fairly fluent French has become. Anyway, back to bananas.
The recipe is straightforward enough, in fact it is so simple it barely counts as cooking. Assuming, of course, one has all the ingredients…..now, I am an incurable recipe tweaker, except when it comes to cakes and baking generally. I don’t seem to have to same instinct for baking as I do for other areas of cookery, so tend to tweak only minor ingredients. I am not sure, however, it counts as minor when I discover I only have slightly more than half the required peeled weight of bananas. At this point I had greased the tin, was heating the oven and had weighed out all the other ingredients so opting out wasn’t an option. And Edoardo was expecting cake…….I sympathise, I get a bit like that when I’m expecting cheese…..
Anyway, for once I decided to tweak on a more major scale and made up the weight by using Spiced Apples that were drained of the juice that is inevitable with them. I did wonder if they would make it a bit too damp but decided to keep a close eye on the cake in the oven. For me, it is a minor miracle that it turned out perfectly: moist, light and full of flavour. I might even make this more often (cue for E’s eyes to light up – he complains he is cake-deprived normally).
I have written up what I did, but I suspect you could tinker around with the proportions, so long as it added up to 225g. And it wouldn’t have to be the Spiced Apple recipe; I might try it with raw grated apple and increase the spice content a bit. If you do try that, please let me know how it works out.
One last note; in the picture I was worried to see what looks like a lump of uncooked cake mixture but was relieved when it turned out to be a piece of apple!
I hope you enjoy this – we now call it “Leftovers Cake” but it’s not a very appetising title!
Last week I started my response to the Supermarket Siesta challenge and I have to say, everything about it talks to my desire to move away from (my) mindless on line ordering or wandering in a supermarket. As I said also last week, I am not going to declare supermarkets instruments of the devil (although I can think of a couple of brands that do approach that status), but I am finding using farmdrop.com and Borough Market (to name but two), does make me plan meals better and think more clearly about the seasonality, balance, flavours and economy of what we’re eating.
Yes, it takes a bit of time a couple of times a week to do that planning but in truth, it’s time I look forward to, as it allows me to think about what’s seasonal and then rummage around, either in my food library (I’m going to write about that soon) or in my head, to find solutions. Sometimes I am beguiled by something so appealing when I’m shopping that I do click or buy and then think afterwards about what I’m going to make! On reflection though, that is exactly what I do when we’re in Italy, so interestingly, I am moving my UK habits closer to those I have in Italy.
Our menu for Sunday looked like this:
Breakfast
Jersey milk yogurt with blueberries
Sourdough toast with blackberry and gin jam
Lunch we had out, so doesn’t count here
Supper
Piedmont peppers (will write this up soon)
Salmon fillet wrapped in Parma ham with bay leaves (ditto!)
Chargrilled golden zucchini with lemon, fennel seed and basil dressing
Spiced apples (recipe elsewhere on this site) with creme fâiche
My bill for this lot from non-supermarket suppliers was £27.20 and the same on-line service that I used last week for comparison came to £34.91. I have not included store cupboard ingredients such as anchovies, fresh basil or garlic as I have those to hand all the time. If it’s not basil season, it will be thyme or rosemary, both of which obligingly supply the kitchen all year round.
The most remarkable price differentials came with the Sourdough bread (£3.20 versus £5.33 weight for weight), two organic red peppers (£2.00 versus £6.00) and the San Marzano tomatoes (£2.70 versus £3.99 by weight). I used lovely farmdrop.com for some items and others came from traders within Borough Market.
Also, I had made enough Piedmont Peppers and Chargrilled Zucchini for us to have them for lunch on Monday with bread and a bit of goat’s cheese.
Chargrilled Golden Zucchini with Lemon, Fennel Seed and Basil Dressing
500g golden zucchini, or indeed any fresh looking ones you can get
olive oil for brushing
1 clove garlic
100ml extra virgin olive oil
freshly squeezed juice of half a large lemon
quarter teaspoon of fennel seeds
fresh basil leaves
Instructions
1
If the zucchini are quite large, the skins can be a bit tough so just scrape a vegetable peeler down it to give a striped effect
2
Dispose of the stalk and slice into 2 - 3ml thick slices
3
You can either produce “coins” (hence the word “zucchini” in the first place), or on the diagonal, or even lengthways; do what pleases you
4
Brush them with olive oil but don’t soak them
5
Heat a griddle pan until hot but not smoking - you’re dealing with delicate zucchini here, not a chest-beating steak
6
Add a few slices at a time but don’t over-crowd the pan or you’ll start to get too much steam kicking up
7
Once each slice has nice clear stripes, turn them over; for me, they are then done when they have gone floppy and have good chargrilling marks on them
8
Remove to a platter and spoon over the dressing, building up the platter in layers as the zucchini become readyFor the dressing:
9
Crush the garlic with sea salt under the blade of a knife and put into a small bowl
10
Gently crush the fennel seeds, just enough to allow the fragrance to release more easily and add to the bowl
11
Pour in the extra virgin olive oil and whisk briskly
12
Add lemon juice to your taste; I quite like a lemony sharpness to counteract the smoothness of the grilled vegetable and we were having it with salmon which is a rich fish
13
Add freshly milled black pepper to taste
14
Once you have layered and dressed all your zucchini, finish with torn basil and a final flourish of oil
Notes
You can also include aubergines in with this and I do still salt and drain them first. Habit, I suppose, as we are told that modern varieties aren't bitter. Slice them a little thicker, say 3 - 4 ml, and they need a little longer on the griddle, too. Later in the autumn, I add a little ground cumin to the dressing, if I am using aubergine for a warm flavour. Finely chopped chilli also works well here in the dressing.
No, I wasn’t quite sure what it meant either. But I was invited to an event in the far north of London (OK, it was near Moorgate Station but I live in Wimbledon so anything north of the Marylebone Road induces a nosebleed) that invited me to discover what it was all about.
It was worth the trek as happily, it was a convention of some of my favourite suppliers who were launching a mission to “challenge the UK public to shake up part of their weekly shop – switching from supermarkets to specialists” (taken from their marketing material) for the month of September.
Now, I am already a huge devotee of farmdrop.com who supply the most wonderful fruit & veg, fish, meat, bread & cakes and fresh pasta from small local suppliers, so it was a delight to meet the lovely Lucy and gifted Beth (a semi finalist in Masterchef who now masters the Farmdrop social media content and cooks, too). More about them later, but I was also introduced to pongcheese.co.uk I am afraid to say that Edoardo and I were a little less than restrained with the sampling of their fabulous cheese; we will be ordering from them so I’ll write about that later this month.
Edoardo is already a devotee of HotelChocolat.com so was happy to sample their luxurious chocolate and by luxurious, I don’t necessarily mean expensive – it is the flavours and inspired combinations that denote luxury here. Chocolate is not my weakness so I went back to the cheese zone, via FishforThought.co.uk where I sampled fresh crab – one of my favourites, and nakedwines.com Regrettably I might have sampled there just a tad over-enthusiastically so I needed more cheese to mop it up…..that’s my excuse anyway.
I am also not going to sit here and criticise all supermarkets, but increasingly they are NOT a good place to buy your fresh food. In my view, they place far too much emphasis on visual appeal and how easy it is to pack food. I guess for them, life is easier if all tomatoes or apples or whatever are of a uniform size, making packaging and general logistics more predictable and thus cost-controllable. As shoppers though, we perhaps have to take some of the blame for this obsession with the perfect tomato; a tomato’s perfection should be assessed by its flavour, not the fact that it looks shiny and perfect. The British by and large don’t shop with their noses – how may times have you observed someone in a supermarket sniff a melon to see if it’s ripe? Unless you’ve seen me, I’d say quite rarely. And how can we sniff a tomato if the poor wretched things are imprisoned in a plastic box and wrapped in cellophane? Never mind, they look good so that’s all right then!
I do have some sympathy with supermarkets when the media coverage tends to focus solely on their price competitiveness, so they find themselves in a race to the bottom. And back also to my lament that wanting to have good food, fairly priced is somehow seen as elitist or the province of the chatterati in the UK. No, it isn’t, the less you have to spend on food, the less you can afford to be taken in by supermarkets; the less you have to spend on food, the more you need to be able to cook a few basics like soup, casseroles, anything eggy and bread. And I don’t buy the time objection either, but you do need to be organised and prepared to learn. Rant over…..
Anyway, to go back to the challenge issued by these great producers, Edoardo and I decided to see if we could eat for a whole day using fresh ingredients only from these guys. I planned the menus for Sunday which also prompted me to try an Italian dish I ate once years ago and have wanted to attempt myself ever since. Here’s what we ate last Sunday:
Breakfast
Jersey milk yogurt & blueberries
Cafone sourdough toast with unsalted butter
Lunch
Chargrilled courgettes and aubergine with crumbled feta cheese
Rosemary focaccia
Dinner
Beetroot tortelloni with sage butter and poppy seeds
Loin of pork in milk (recipe later – don’t be deterred by the title, it’s scrumptious)
Boiled potatoes
Chard
Apple tart with creme fraiche (Edoardo had room for this – I didn’t!)
All these came from farmdrop.com and my bill was £37.00 and did several meals: the chargrilled veg, left over pork and potatoes were all upcycled into delicious meals today and the bread will last for several days. The sourdough comes in a huge 800g loaf that goes in the freezer on day three and is perfect for a week or so. The focaccia is so good that I’m afraid that despite the fact it arrives in a monster 400g slab, it doesn’t last more than two days so never sees the freezer!
I have virtually shopped this same list with from a supermarket’s on line shop (no, not saying which one!) and the bill came to £41.77; several ingredients were not available as organic and I couldn’t get Jersey milk yogurt. I also know that the supply chain is far shorter with Farmdrop and the producer gets a fairer cut of the money, which matters hugely to me. I shop mainly organic because I have concerns about animal welfare and again, I know with Farmdrop, I can be easier in my mind about that.
We both also said that the quality of the food was considerably better, so we are going to continue using Farmdrop.com and before anyone asks, no, I receive no remuneration or other consideration from them – I just want good food, honestly priced and sourced and they hit the spot.
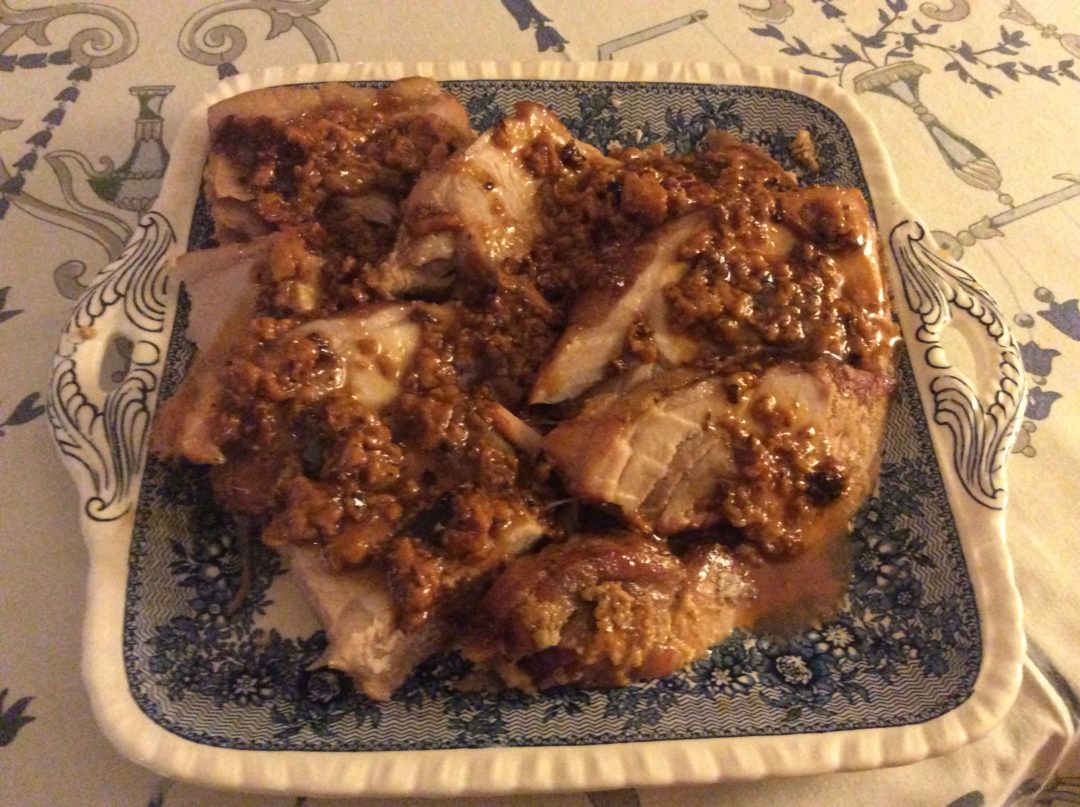
So, on to the recipe with this blog. Loin of pork in milk sounds hideous but please trust me when I say it is absolutely scrumptious. If you like a deeply savoury, umami flavour then this is the dish for you. The milk renders down into a dark, double cream that is glossy and chestnut coloured; the meat becomes tender and can be cut with a spoon. It is simple but does need an eye kept on it, so best to cook it when you can be near the kitchen every 20 – 30 minutes. It is also very rich, so I recommend keeping the accompaniments very simple; plain rice or potato and a leafy green vegetable go well. Please, buy the best quality pork you can find; something sitting on a blue polystyrene tray in a chiller cabinet won’t cut it. It is easier to carve if you buy a boned, rolled loin but I do prefer the extra flavour that is there when the bone is present. It’s not that much harder to carve if you loosen the meat away from the bone first and of course, use a surgically sharp knife! This recipe also calls for the joint to be skinless and this is also easy to do with the properly sharp knife. Just cut the string, slice off the rind as close to the skin as possible and roll and tie it up again. I keep the rind in the freezer to add to beef casseroles later in the winter for extra depth of flavour.
550ml whole organic milk (please don’t try this with semi- or skimmed milk, it won’t work)
bay leaf
sprig of thyme or rosemary
salt and freshly milled black pepper
Instructions
1
Use a thick based casserole or stout pan, just large enough to hold the meat
2
Heat the butter and oil until the foaming point is subsiding and then add the meat, initially fat side down
3
Brown all sides of the meat and turn down the heat if the butter becomes dark brown or if it smells too nutty
4
Season and gently add the milk - I usually take the pan off the heat momentarily to do this and avoid sudden eruptions - followed by the bay leaf and your choice of herb
5
Allow the milk to slowly come to the boil and then turn the heat own to a gentle simmer
6
Put on the lid, slightly askew and simmer for about 2 hours
7
Every 30 minutes or so, turn the meat and in the meantime, keep an eye or ear out for overboiling
8
You might need to add a little more milk
9
After about the first hour, the milk will start to change colour and also create little clusters that will gradually also go a golden brown - don’t worry, it’s not curdling
10
Once you can easily pierce the meat with a fork, remove it to a carving board or dish and cover with foil to keep warm
11
While this is happening, draw off the surface fat from the milk mixture but do be careful not to rob yourself of any delicious nutty clusters
12
Stir quite vigorously and if you prefer to thin it a little, add a couple of tablespoons of warm water; ensure you loosen all the scrummy bits adhering to the base of the pan
13
Discard the bay leaf and herbs
14
Cut the string on the meat and slice into medium thick slices, arrange on a platter and pour over the sauce
Notes
As I’ve said, you might want to keep accompaniments simple and any first course could be vegetable based, for example Piedmont peppers or chargrilled courgettes with basil. Having said that, last Sunday we preceded it with a small portion of pasta, so anything non meat based can work.
When I married in 1978 (stupidly young and it didn’t last….), I knew kitchens existed but wasn’t entirely sure what went on in them. I knew food emerged but had no idea how it happened. Didn’t do “Domestic Science” at school as I was in the stream that did Latin and French, both of which I have to say, have been remarkably useful. It now enrages me to think that learning to cook was (and might still be in some schools) regarded as less demanding than learning languages. Better I don’t get started on that one; it is probably a whole other post.
Shortly after becoming engaged my wise mother, fearing that my husband would have to live on toast, bought me the Delia Smith Complete Cookery Course, which in those days came in three paperback volumes. In truth, I wasn’t terribly impressed with that as an engagement present (what an ungrateful creature I was) but when I finally opened the first volume, something in me blossomed and food became an enduring passion. I am also terribly attached to some of the books and equipment that I bought or was given in those early days. I still have (see picture) the very first wooden spoon I was given and the casserole in the same picture is now over 35 years old and.
In some quarters, it is now fashionable to decry Delia and whilst I no longer cook from her books, she did teach me the basics, allowed me to start cooking edible meals (and then good meals) and for me, best of all, that edition included a Bibliography! One of my other passions is books and reading (to the point that when I met Edoardo, we realised that consolidating our homes would mean accommodating over 5,000 books), so pointing me to other writers and cooks was just bliss.
Now, for me, this is where a deep, enduring love of food, cooking and its social and political history started. The first person I investigated from Delia’s bibliography was Elizabeth David and for me, this was when I really began to understand flavours, textures and the simple joy of good food eaten seasonally with minimal interference. I think I was a little in awe of her in the way I never was with Delia, but I as grew older and matured myself, Mrs David’s (never, just never Elizabeth) approach to much in life resonated with me.
The second aspect of Mrs David’s writing that spoke to me was the sheer poetry of it. Should you doubt this, may I refer you to the first two paragraphs of her chapter on Fish in “Italian Food”. The description of the Rialto fish market takes me straight back there every time I read it. She makes me not just see it but smell and hear it, too.
It has probably also taken me some years to understand how brave Mrs David was to publish her first book in 1950 post war Britain, when food was still rationed and olive oil was something requested in the chemist’s to sort out wax in one’s ears. Can you imagine the reaction of people being asked to cook with something they regarded as medicinal? I also have huge sympathy for the early brave devotees of Mrs David – I cannot begin to think what it must be like to cook without olive oil, lemons, garlic, spices and fresh herbs; for those intrepid cooks, the frustration must have been enormous.
That first book, “A Book of Mediterranean Food” is still amongst my most referred to and certainly takes the prize for the most bespattered pages (none of my foods books is pristine – if I come across one it usually means it was rubbish and, no, am NOT naming names!). It is a continual source of inspiration, not dogmatically but as a jumping off point for interpreting her recipes.
There are points upon which I depart from her advice; for example, adding oil to water for cooking pasta is nonsense. It will just float there on top while the water boils away, doing its job and ignoring the oil. You are therefore wasting precious oil and thus money. I know there are people who swear by this, but I have never come across an Italian who does it and when I enquired, was met with a sigh of resignation indicating that the craziness of the British in the kitchen should never be underestimated. She also says pasta can take up to 20 minutes to cook. Nope, not unless you like wallpaper paste.
When she speaks of meat and fish, however, she remains for me definitive and whilst I have adjusted her recipes to suit my taste, her basic advice and method remain unaltered. As we approach the cooler months of the year, I’d like to share with you my version of her Daube de boeuf provencale. It is easy, if not cheap, but does serve 6, or fewer with left overs and smells utterly divine while cooking. It is a recipe that denotes for me the arrival of autumn, as I always seem to make it in September after the lighter foods of summer.
1 kg top rump of beef, cut into squares about 7/8cm and 8mm thick (I always buy the beef in the piece and cut it myself to get the right sized pieces)
175g unsmoked streaky bacon or pancetta, sliced into strips
2 carrots, peeled and sliced into rounds
2 medium onions sliced into half moon slices
2 tomatoes, skinned and sliced (you can use tinned and then use the rest to make soup as a first course)
2 tbsp olive oil
2 cloves of garlic, peeled and squashed under the blade of your knife
bouquet garni (I use a piece of celery with a bay leaf, a generous amount of thyme and parsley and if possible, a large slice of orange peel, sans pith, tied up with kitchen string and anchored to the handle of the casserole)
a (very) generous glass of red wine, French if possible, but use what you have
salt and freshly milled ground pepper
Instructions
1
Pre-heat the oven to 140 degrees C/130 fan
2
In the bottom of a thick based, heat retaining pot (I use an ancient and much loved le Creuset casserole) pour in the olive oil, the bacon or pancetta, then the vegetables and then layer the meat slices, overlapping them slightly. Bury the garlic and bouquet garni in the centre.
3
Season and with an uncovered pan, start cooking over a moderate flame for about ten minutes
4
In a separate pan, heat the wine until at a lively boil and set it alight
5
Once the flames have died down, pour the bubbling wine over the meat mixture
6
Cover VERY tightly (I add a layer of tightly clamped tin foil before the casserole lid) and out in the oven for about 2.5 hours
7
I like to add pitted, black olives about half an hour before the end of the cooking time
8
It might not seem that you start with much liquid here, which is true, but long, slow cooking will produce a fragrant, delicious dish for so very little effort.
9
Although I am usually all for saving on the washing up, I do like to serve this in the traditional way on a wide shallow platter, having extracted the bouquet garni, poured the sauce around the meat and garnished with persillade of finely chopped garlic and parsley, or a few capers and a couple of chopped anchovies
10
This goes well with wild red rice or plain boiled potatoes
Notes
As there is no pre-browning of the meat, this is wonderful for a slow cooker, but do try to find time to flame the wine. I have to confess that I have on occasions made do with just heating the wine, as I am not always at my brightest before my first cup of coffee in the early morning. Flames in my kitchen prior to coffee is a tad alarming for me. Anyway, the upshot is that it is subtly different without the flaming trick, but not worse. Just different.
If you were to ask me, I think the first fruit I can remember eating is an apple. I also seem to think of them as always having been around all year, whereas when I was a child, fruit definitely had its season. Strawberries are irretrievably linked to tennis for me and their fragrance reminds me of my mother being glued to the (black and white!) TV during Wimbledon. Tangerines, as they were then, were Christmas, although we seem to see every variation on small citrus now.
Is there, however, more of a workhorse of the fruit bowl than an apple? Admittedly bananas work hard for their living too, but it terms of sheer versatility, the humble apple wins out every time for me.
Sadly, this very versatility led to this unsung hero being bred for volume, size and keeping qualities. We went through a very low period in the seventies and eighties when, unless you grew your own, eating apples were frankly pretty grim. The average supermarkets offered Golden Delicious, Macintosh Red and Granny Smith. Personally I find all of these unpleasant as raw eaters, either because of flavour or texture, but Golden Delicious and Granny Smith do cook well.
Many of the old British, French and Italian species became at risk as producers grubbed up old orchards to plant more profitable types. Mercifully, and largely because of the efforts of Slow Food and in the UK, the Royal Horticultural Society and its members, some enlightened retailers (take a bow, Waitrose) and a general increase in the public’s demand for flavour, many breeds were brought back from the brink.
It is now relatively easy to find scrumptious seasonal apples such as Discovery, although until I started to do some research around this lovely apple, I didn’t realise it is in fact a modern fruit. It was found in the late 1940’s in Langham, Essex and is a child of the luscious Worcester Pearmain. I absolutely adore the fragrant crispness and almost strawberry-like flavour of the Discovery, BUT it is a seasonal being and in fact becomes flabby in both texture and flavour if stored for too long. They tend also to be a tad inconsistent in size but frankly this doesn’t bother me and I actually enjoy the process of selecting the individual apples that appeal to me.
Another fragrant apple that I love is Pink Lady; it is also a modern apple, developed in the late 20th Century, in Western Australia, from a liaison between Golden Delicious and Lady Williams. It has the remarkable capacity to be consistent and until recently, I don’t think I have ever had a disappointing Pink Lady. That changed recently when I had some quite unpleasant Argentinian apples – the texture was too mealy for me. Perhaps they had been stored too long. And did you know that Pink Lady is a trademark? I didn’t; her horticultural handle is Cripps Pink and she has an equally lovely cousin called Sundowner (also a trademark), who is horticulturally Cripps Red. She, however, is not so easy to find.
In terms of other modern apples, Jazz is a likeable apple that works well in the Spiced Apple recipe below. Oh and this is another apple that operates under a nom de guerre; it is really Scifresh.
Braeburn is another apple that you will see in quantity in supermarkets and it was an apple in the right place at the right time. It became commercially viable at a point when the public wanted more in terms of flavour than Golden Delicious or Granny Smith could provide. At best, it is a crisp, fragrant and deeply flavoured apple. It does however, to my mind, have a major flaw and that is that it is hugely variable in terms of quality. Personally, I have had too many Braeburn disappointments. Rather than waste them, however, if you are unfortunate enough to have a disappointing batch, use them for the Spiced recipe and just up the spices!
The last eating apple that I want to talk about it is the wonderful Cox’s Orange Pippin. This is an older fruit, developed, it is said in 1825, and with many progeny. I love these apples when they are in prime season, becoming a tad mealy when old. That is though, a wonderful reason to eat seasonally, as it is at its best when from British orchards.
You may wonder why I have not mentioned the noble Bramley Apple in this post. Well, it is indeed a noble apple with an impeccable history of service in the kitchen. I stopped using it quite so ubiquitously when I made a conscious decision to reduce the amount of sugar I use in cooking. As I started to use other apples, I also realised that I actually prefer to eat my cooked apples when they have retained some shape and I can still see the slices. Don’t get me wrong, if I making apple sauce for roast pork, I would still use a Bramley as I do like a cloud of fluffy apple in those circumstances.
6 eating apples, peeled, cored and cut into slices about 2mm thick
juice and finely grated zest of 1 orange
zest of 1 lemon (I like to peel this with a potato peeler and then cut into julienne strips; you may have a julienne cutter but either way, I like clearly defined strips of lemon peel)
1 tbsp honey
3 pieces of star anise
1 large stick of cinnamon, broken in two
half teaspoon of powdered cinnamon
Instructions
1
Put everything into a thick based pan or casserole and simmer gently for about 30 minutes
2
Stir occasionally and watch that it doesn’t catch
3
You may need to add a small quantity of water, depending on how juicy the orange is
4
The final result should be tender but still well shaped slices, with a slightly syrupy juice
5
This is scrumptious hot, warm and cold and I serve it with either ice cream, creme fraiche or yogurt
6
It makes a fabulous filling for a pie or a crumble and can have all kinds of ingredients added (see above)
7
Edoardo is fond of this for breakfast with yogurt and seeds and I have to say I agree with him.
Notes
This recipe rose out of necessity. I had a bag of eating apples (I think they were Braeburns, but can’t actually remember), I had tried one as a raw eater but it wasn’t terribly pleasant. Well, I was at the outset of watching my budget and my conscience, so it was unthinkable to just discard the other five or so apples, even for the benefit of our local birds and foxes. I didn’t want to shop specifically for anything else to make these apples edible so instead I rummaged in the pantry. I think I have said before that pantry is a metaphor - I would dearly love a larder but have to make do with two large drawers and two shelves as my pantry. One day…….
Anyway, this recipe is made from ingredients I nearly always have in store, but I have found that I can experiment with this and use sultanas, raisins, seeds, dried apricots, prunes to add flavour to apples. This is also an extremely economical recipe if you make this with blemished apples which are often sold in supermarkets for very low prices, so do experiment. Also, you can make this with however many apples you happen to have, just scale the other ingredients up or down. It also freezes well for about three months. In truth, it so simple I feel a bit of a fraud posting it here, but friends I’ve shared it with have all liked it and mostly said “oh I never thought of doing that…”, so I’m hoping it’s not too much of a fraud!
Well that was another miserable Spring Bank Holiday weekend; cloudy, cold and uninviting generally. Something had gone wrong with my quartermastering and I opened the fridge yesterday to unused fresh peas and fresh broccoli. Perhaps I should call this blog the aspiring watchful cook, as there are times when I get things wrong, but I guess now the difference is that I do something edible with the excess, rather than just throwing it away. Anyway, peas and broccoli: we’d already had risotto over the weekend, so my default soup making inclination kicked in. It was also another miserable day, not just grey and cold but absolutely chucking it down; I was drenched when I went out, so the comforting process of soup making seemed just right for the day – honestly if it wasn’t for leaves on the trees, you’d have thought it was November.
In terms of ingredients here, use what you have; I had the ordinary broccoli, but you could use sprouting and you can use frozen peas, too, but add them just before you add the stock, rather than sweating them in the butter and oil. I used both chives and flat leaf parsley as I had fragments that needed using up; I did think about mint and if this had just been a fresh pea soup, I think that would have been good, but I was wary about the combination of mint and broccoli. It also occurred to me afterwards that if I had had left over pancetta or prosciutto, that could have been crisped up and added as a topping, but I didn’t so I didn’t, if you see what I mean!
Serves: 4 as a starter or 2 for a light lunch Cooking Time: An hour or so
Ingredients
1 medium onion, finely chopped
1 small clove of garlic, finely chopped
olive oil
unsalted butter
200g fresh peas, rinsed and podded if necessary (mine came podded already)
1 head of broccoli, broken into small florets
0.75 ml vegetable stock (as usual, Marigold or Kallo is fine and if you have pods, let them steep in the hot stock for a while to boost the flavour)
salt and freshly milled pepper
cream, yogurt or creme fraiche
chives or flat leaf parsley, very finely chopped
Instructions
1
In a thick based pan or casserole, heat about 1tbsp each of olive oil and butter, add finely chopped onion and garlic
2
Sweat over a low to medium heat without colouring until they are soft and fragrant
3
Add the broccoli and mix around until well coated with the oil and butter mixture, add the peas and cook gently for two or three minutes
4
Add the hot stock, partially cover and simmer for about 30 minutes
5
When the soup has reduced by about 20% and the broccoli and peas are soft, allow to cool slightly, blend to a consistency that pleases you and adjust the seasoning
6
Serve in warm bowls, stir in your dairy of choice and top with herbs.
Notes
Scrumptious with the simple wholemeal bread posted elsewhere on this site.
We love wild red rice but gosh, it’s expensive! If you find cheap wild rice, I’d look very carefully at the contents as you may find that there is a small percentage of the contents mingled in with cheaper rice. My favourite is Organico Wild Red Rice, grown by the Picco family in the northern Po valley. The first time I encountered the rice fields of northern Italy, I felt as if I had been whizzed off to Asia, as I found it a strange experience to encounter this landscape in Europe, but of course this crop has been grown in Italy for centuries. The Rice Exchange in Vercelli is testament to the business – don’t be deceived by the modernity of the building; there has been an Exchange in Vercelli for centuries.
Flying over the rice fields of Northern Italy exposes the lattice of man made irrigation canals that date back, for the most part, to the mid 1800s but I have written elsewhere, at some length (too long – Edoardo) about the fascinating history of rice cultivation in northern Italy, so I shall shut up here. If you are interested in reading about the hows and whys of rice in Italy, nip over to the pages called Riso con Riso.
Anyway, back to the food. Saturday dinner was roast cod, peperonata, spinach and wild red rice. We have left-overs of rice and of peperonata, so what to do? The peperonata was easy as it makes a scrumptious if unconventional sauce for pasta. It works better if the peppers are sliced smaller – easily done in the pan with a wooden spoon if the peppers have been cooked for long enough – and I add more chopped basil. A suggestion of chilli (dried is perfectly fine) can also change the character of the dish so that it doesn’t feel quite so like left-overs.
The rice sat in its dish, staring balefully at me. I suppose there might have been a couple of heaped tablespoons so not a huge amount but no way was it going in the bin. Or even out for the birds…it’s May, they’re not starving. So, after a rummage in the fridge, a sort of Greek salad emerged.
Left-over red rice - about two or three heaped tablespoons
1 large salad onion or shallot, finely chopped
3cm piece of cucumber, peeled and chopped into 5mm dice (I also take out the wet seedy bit in the middle but up to you)
Half a red pepper, again chopped into 5mm dice
Half a dozen green olives, sliced into rings (they were already pitted)
About twenty chives, scissored into 2mm pieces
Chopped flat leaf parsley - about two tablespoons
Finely grated zest of half a lemon
100 g (ish) feta ( I happened to have some Waitrose barrel aged left but use what you have)
Half a large clove of fresh garlic, crushed with sea salt under the blade of a knife
Black pepper
Juice of half a lemon
Olive oil - about four or five tablespoons
Instructions
1
Mix the ingredients together using a fork rather than a spoon (means you won’t break the grains), to ensure even distribution and then mix up the dressing, tasting as you go.
Notes
We like small pieces in a salad like this, and I prefer the vegetables to be proportion to the size of the rice grains, but frankly that’s just my preference. If you like bigger chunks, use them! Also, use what you have in the fridge and in truth, on another day, this may have looked very different. I can imagine using left over broccoli, asparagus, grated carrot, walnuts, toasted pine nuts, orange in place of lemon (in which case, I think black olives would be lovely) and replacing the feta with shredded cold chicken, duck (oh yes - lovely with black olives and orange) or beef. It could be spiced with a scrape of cinnamon and sultanas for cold lamb…..I could go on and fear I might, so I shall stop and go and eat it. I am thinking that a glass of cold white wine (a personal favourite is Gavi) might go quite well……..
It is my observation that in Italy people do cook more from scratch, in all income brackets and across all the age groups. And EVERYONE can make a risotto (or at least everyone I know)! I know that some people regard it as a bit of a monster, but honestly, it isn’t. It is a really useful basic technique to have and I was very lucky to have been taught by a Milanese lady, in Milan, in the 90’s. So to my mind, I have been taught in the best possible way and have been given an understanding of and feeling for the ingredients that I’m not entirely sure you can get from books – or blogs! Making risotto is not something that is the same every time you do it and you need to develop (literally) a feeling for the way the rice is behaving in the pan: how heavy it feels, how it smells, tastes and even sounds. Unless you have a gifted donna Milanese to hand, the only way is practice, practice, practice.
Rice production is big business in northern Italy, the cultivation dating back as far as I can tell from my research, to about 1475 when Galeazzo Maria Sforza, Duke of Milan claimed that one sack of rice, properly cultivated, could yield another twelve sacks. He certainly promoted the cultivation of rice (and indeed the commercialisation of silk and wool weaving, although in most other respects, he seems to have been a bad hat), going so far as to sponsor the construction of canals for irrigation. There is evidence that the Romans knew of it as a costly import from India, the grain being reserved to make a dish served to those suffering digestive ills or to the very rich. By all accounts it sounds rather like our present day British rice pudding.
The industrialisation of rice production was hugely aided by the construction between 1863 and 1866 of the Cavour Canal. This takes water from Italy’s longest river, the magnificent Po, starting at Chivasso, north east of Turin and ending at Galliate, north west of Milan and all within the region of Piedmont. These days, rice harvesting is mechanised using what look to my untutored eye like combine harvesters and doesn’t look in the slightest like the scenes from “Bitter Rice”. In the past – in fact up until the 60’s – rice was harvested by hand by teams of women who would invade the rural rice growing areas to spend their days barefoot in water, bent double harvesting the grains by hand. They would be accommodated in fairly spartan barn-type buildings, which these days are being gentrified into designer homes. I do know of one remaining “dormitory” which having been abandoned, is now occupied only by wildlife. Edoardo and I are going to re-visit it shortly, as like a fool, I didn’t take any photographs when I was last there. I will post when I’ve revisited – just hope it is still there and hasn’t been swathed in scaffolding for rebuilding – not yet anyway.
So, to the recipe itself and I’ll talk a little about ingredients first.
You start with selecting the correct rice. Most important and I have been party to some spirited debates in Italy about which rice is used for which risotto! There are three grades of rice: semifino, the smallest grain; fino and superfino, which has the largest grain. Within each of those, there three varieties:
Arborio which makes a dense, sticky risotto, perhaps a tad stodgy but also tends to be the cheapest of the three and honestly, it makes a perfectly acceptable risotto for most occasions
Vialone nano has a round, thick grain (a bit like our pudding rice) and can take quite a lot of rough and tumble before it breaks (broken rice in a risotto can be a sign of poor technique) and is very absorbent. I use it with big, hearty ingredients
Carnaroli is my personal favourite with long, slender grains that can absorb enough liquid to be creamy but never go stodgy. If you are making a risotto with premium ingredients such as asparagus, saffron or seafood, I’d always recommend this rice as it is a little more elegant than say, arborio.
My favoured brands are Acquarello and Curtiriso, the latter partly because not only is it is good rice but also because their production process is carbon neutral. I usually bring both brands back from Italy but Curtiriso can also be found in the UK on-line at www.nifeislife.com If you can’t get either of these, use what you can get but please make sure it is rice actually grown in Italy – don’t be deceived by an Italian looking label!
You will also need onion or shallot. I prefer shallot, especially if I am making a seafood, saffron or asparagus risotto, as it has a more subtle presence. If you only have onion, don’t fret, just ensure you chop it finely so it renders down quite easily. You don’t want to see pieces of shallot or onion in the finished dish. Sometimes I use a stick of celery as well, but optional.
Stock is a subject that seems to send otherwise sane, pleasant people to borders of insanity. Yes, life would be wonderful if one had a permanent supply of freshly made vegetable/chicken/veal stock on hand and sometimes I do have it. I do know of someone who declaims that “no Italian would make risotto from a cube so I don’t”. Huh, this from someone who has never been inside an Italian’s kitchen, speaks no Italian and – here’s the paradox – buys ready grated Parmesan. Don’t let absence of fresh stock deter you from making a risotto, but do choose your cube or powder with care. I can recommend Kollo, Marigold and an Italian brand called Star. The latter do a porcini flavoured cube which is excellent for an autumnal risotto al funghi and if you’re in Italy, they are in every supermarket and take up no room at all to bring home.
Cheese – ah, now this is probably where I become borderline insane. Ready grated Parmesan is not worth spending money on. There, I’ve said it, but honestly, I can find nothing good to say about it. Please, please if you only do one thing to upgrade your risotto, buy your Parmesan or Grana Padano in a biggish piece, preferably 18 – 30 months old. You don’t need fancy-smancy graters, either. I just use a normal three sided grater (of venerable age, I might add) and I use different sized grating faces, depending on whether the cheese is going in or on the risotto. I am writing extensively elsewhere about the virtues of Parmesan and its history so will leave it there for now.
Alcohol. It is nice to slosh some white wine into a risotto but in fact, I use Martini Extra Dry more often as we don’t drink that much white wine. And talking of which, what has Martini done with those fabulous fin de siècle bottle labels? This new minimalist label looks a bit “supermarket own brand” to me. Anyway, again, if you don’t have anything, don’t let this deter you from a risotto.
Butter. Possibly another of my rants coming on here, but I’ll try to contain myself. The final step in making a risotto is the mantecatura. This is resting the risotto and adding cold butter and grated cheese (not the latter for seafood or fish) and stirring in an enthusiastic manner until everything is creamy and emulsified. Please, please do not use salted butter, it will radically unbalance the seasoning and it you who controls the amount of salt in this dish. Salted butter has its place (hot, buttered toast!), just not in a risotto.
OK let’s start. Oh, sorry. One last thing. Risotto making will be easier if you have a pot or pan with a thick, heavy base and fairly shallow curved sides. Curved sides make it easier to scrape up and include every grain of rice and stuff doesn’t get stuck in corners, because there aren’t any! For stirring, I use a wooden spoon as it much gentler on the rice than metal and I can’t stand the sound of metal on enamel. Again though, don’t let absence of the perfect utensil put you off at first. If you become a devoted risotto maker, then you might want to save up and invest in perhaps a Le Creuset Buffet Casserole, which for me, is the perfect pan for this dish. Having said that my teacher in Milan had a battered old double handled shallow aluminium pan that belonged to her grandmother and which was the workhorse of her kitchen.
Serves: four as a first course, two as a main Cooking Time: About an hour including prep
Ingredients
1 small onion or shallot, finely chopped
1 clove of garlic, crushed with a scrap of salt under the blade of a knife
50g unsalted butter
400g Carnaroli rice
2.5 litres of hot stock
100ml or so of dry white wine or Martini Extra Dry
salt and freshly ground black pepper
To finish
75g cold unsalted butter, in small cubes (dice sized)
100g or so of finely grated Parmesan or Gran Padano
Instructions
1
In a separate pan, keep the stock simmering and melt the butter over a low heat, adding the shallot and garlic
2
(In the spirit of sharing and pragmatism, I will say here that if I am making risotto with stock powder or cube, I make it with boiling water in a good old Pyrex jug and it stays plenty hot enough during the making; if it cools too much, I just heat it up a bit in the microwave)
3
Allow shallot to soften and become translucent but there must be no colour at all, which would adversely affect the flavour
4
Turn up the heat a bit to medium and add the rice and stir enthusiastically
5
Ensure the grains are well coated with the butter and are cooking well; you will notice that the dish is making slightly different noises once you have added the rice
6
Do not allow the rice to take on any colour. Confusingly this phase is called tostatura in Italian but toasted looking is not what we want here!
7
It is however, important that the dish is hot before we add the alcohol
8
Add the wine or Martini, keep stirring and allow the wine to almost evaporate
9
The mixture might look quite dry at this point
10
Add a ladle-full of stock and stir, scraping down the sides and across the base of the pan
11
We need the rice to cook evenly so it all needs to move around and evenly absorb the stock
12
Don’t let it catch on the bottom or sides of the pan - any taint of scorching will ruin the dish
13
At this point, I sometimes turn the heat down a tad; you want the risotto to bubble steadily but not at a rampant boil
14
Again, you will notice that the dish has changed its soundtrack
15
After the first ladle has mostly been absorbed, but the risotto is still runny and mobile, add another ladle-full
16
Keep going until you have achieved a moist and mobile consistency but not dry
17
If it is too liquid, looking more like soup than risotto, let the rice absorb the excess stock and also the stock to evaporate
18
It’s easier to slacken off a too-stiff risotto than serve a dismal, soupy dish with excess stock puddling on the plate
19
Take the pan off the heat and allow everything to rest for a moment.
20
This includes the cook who should have been working vigorously up to this point. A fine moment for a reviving slurp of something, I find. For me, I mean, not the risotto.
21
Now for the mantecatura:
22
Quickly beat in the cold butter, working as you would to stir polenta
23
Add the cheese and taste for seasoning - if the stock and cheese are salty you may not need salt at all
24
Test that you have the correct consistency by tipping the pan sideways; if you have got it right, it should ripple like a wave, hence “all’onda”
25
Serve in warm shallow bowls with extra cheese or put the whole lot in a warm dish on the middle of the table and let everyone help themselves
26
if you are making a risotto with additional ingredients, for example mushrooms, nettles (yes really - delicious), asparagus, I usually add the prepped ingredients after the rice and before the wine. There are other schools of thought and all are correct - this is where you do what works for you and I have written about specific risotto in other posts. This is the point where I will say that personally, I dislike cheese with a fish or seafood risotto and you will not find it in a proper risotto in Italy, but again, if it floats your boat….
Notes
If you would like very detailed guides to risotto making, I would unhesitatingly recommend the following:
Made in Italy, Food and Stories by Giorgio Locatelli, published by Fourth Estate - a wonderful book, from which I have learned so much
The Classic Italian Cookbook by Marcella Hazan, my copy is published by Papermac; I think this might be out of print in this format but second hand copies are available
My copies of both of these books are stained, splashed and have broken spines where they have been forced flat in my kitchen. That may offend some book lovers but to me, they are honourable battle scars and demonstrate the genius of the author in creating something so manifestly fit for purpose.
My final words are to implore you not to get stressed about risotto, which can, in the UK, have a reputation for being tricky achieve and do remember that in the Italian language, “riso” not only means rice but also laughter!